
SalesHiker Mobile App
- Installation & Setup
- Account Summary
- General Settings
- GEO(Location tracking) Settings
- InApp Notification Settings
- General Features
- Premium Feature
- Users
- Access to Record
- Record List View
- Record Option
- Customize Record Display Fields
- Quick Record Search
- Search by Custom Filter
- Share Record
- Asset/Card scanner
- Live Tracking
- Electronics Signature
- Site Inspection/Visit
- Route Planner
- Time Tracker
- My List
- Voice Search
- Comment & Mention Users
- Call logging & Recording
- Mail Manager
How to Install and Access SalesHiker Mobile Apps?
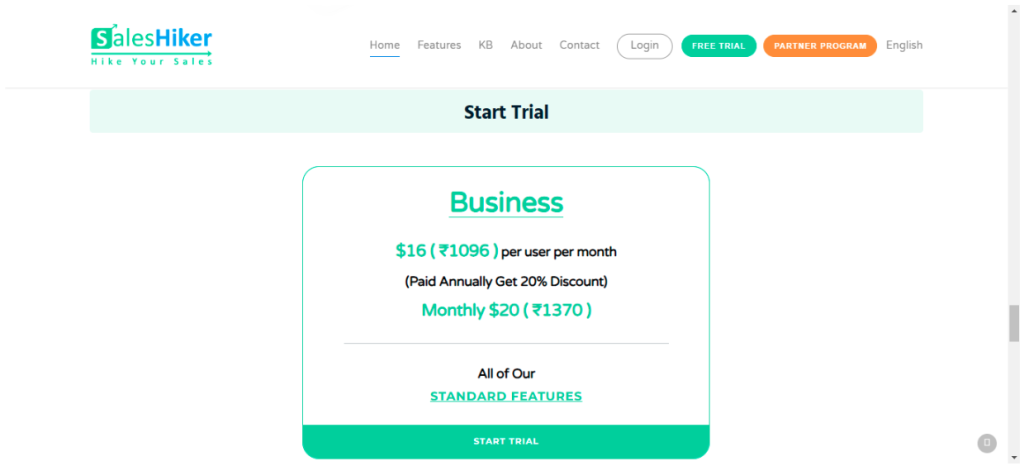
- Open SalesHiker Website URL
- Click on Start Trail in the page below
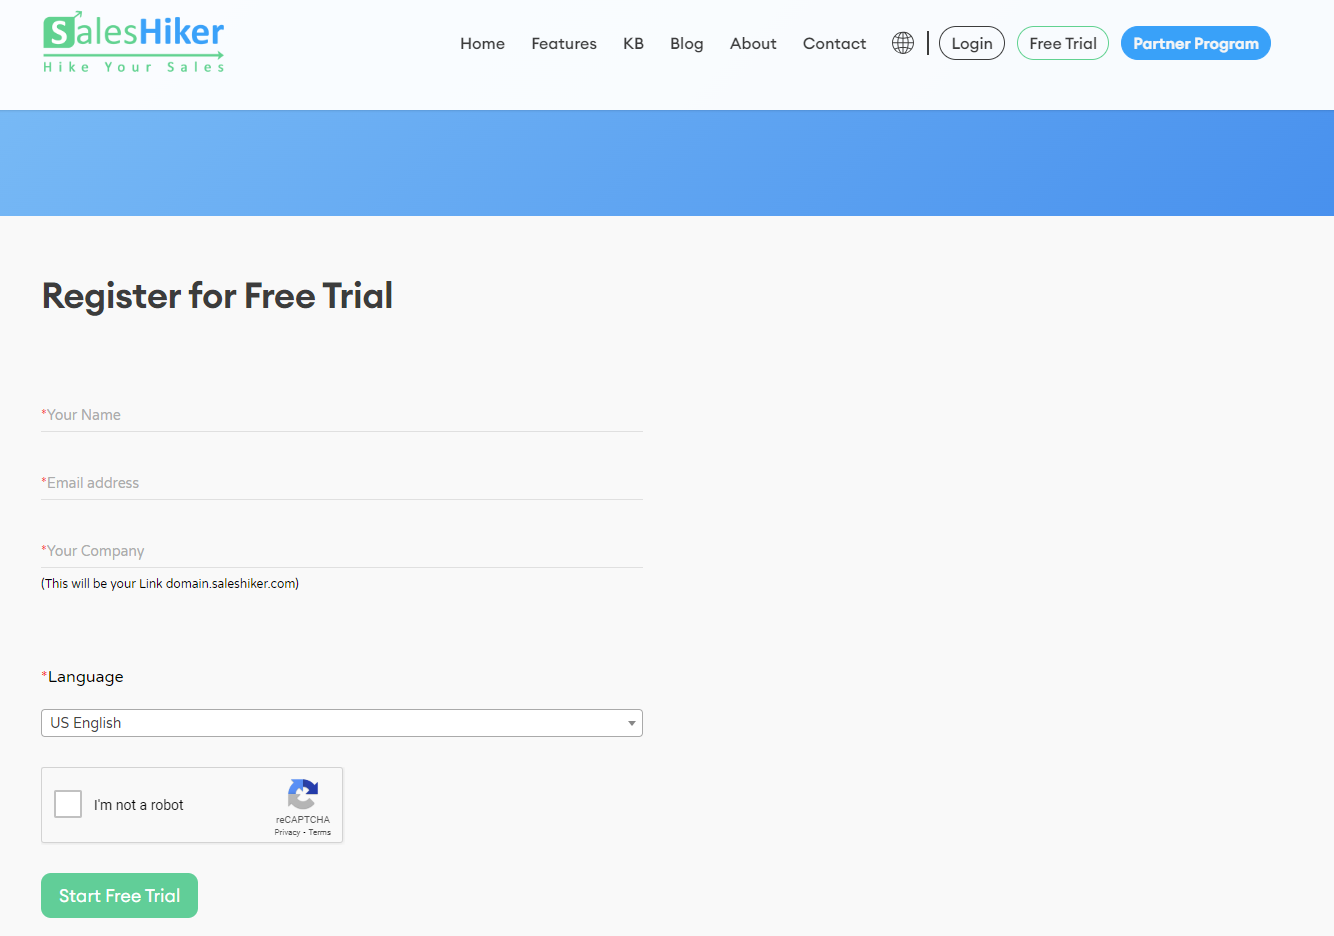
- Register for 21 days Free Trial by entering all the details and click on Start 21 Day Free Trial Button.
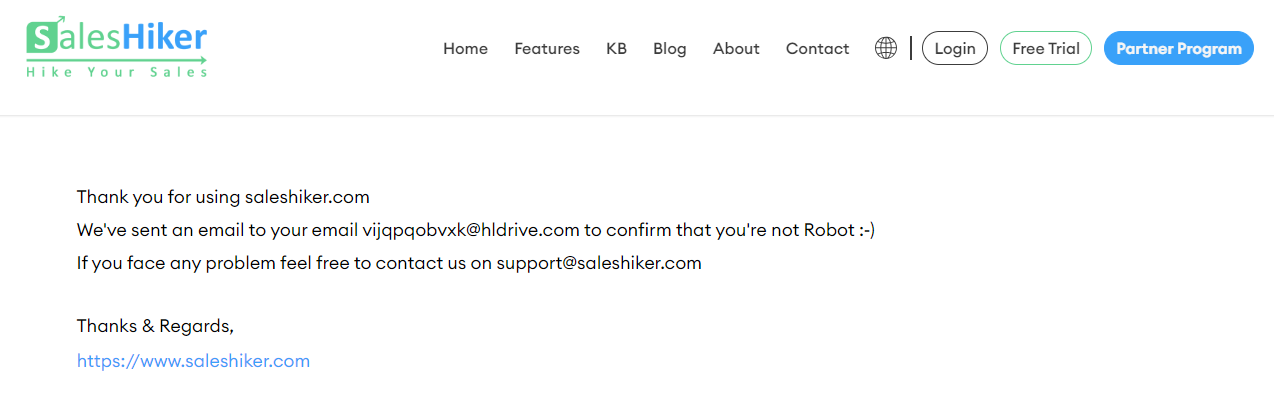
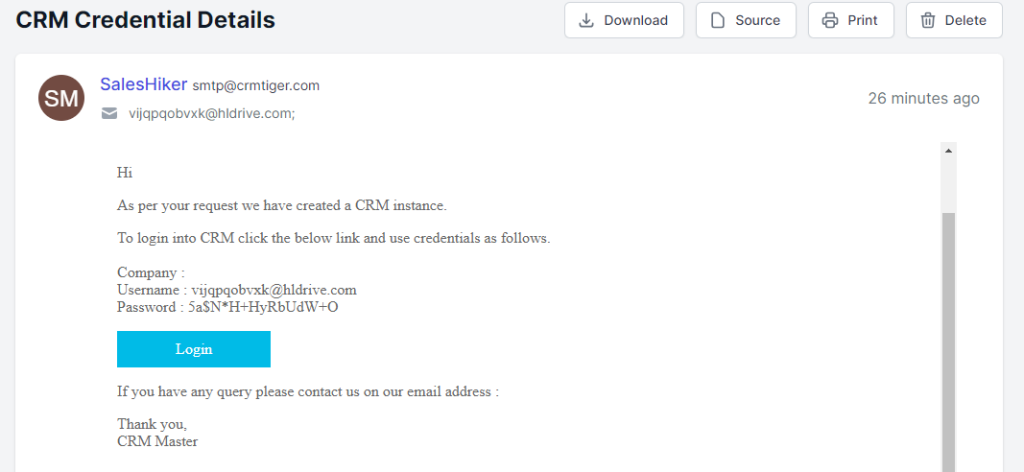
- After making a free trial order, Tenant Set-up link will be sent a registered Email ID.
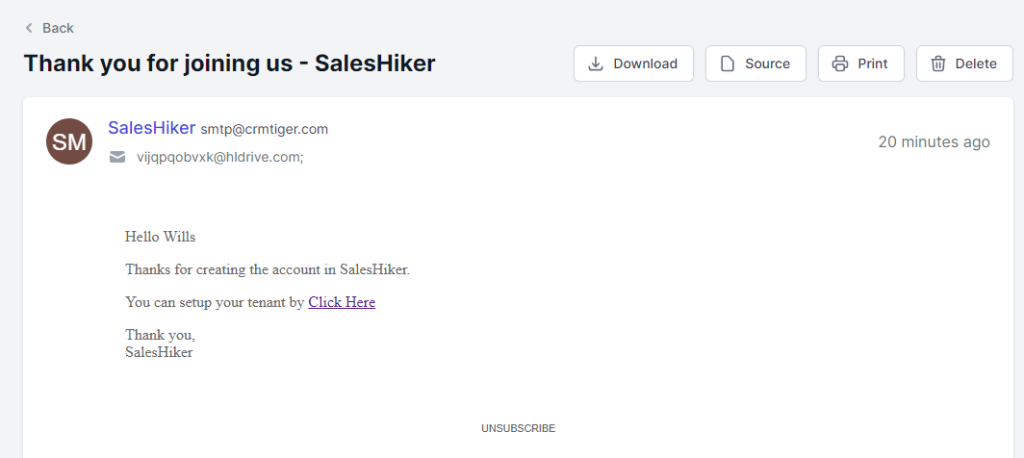
- Click on click here and your tenant will set-up in 2-5 minutes.
- Your SalesHiker CRM will open automatically.
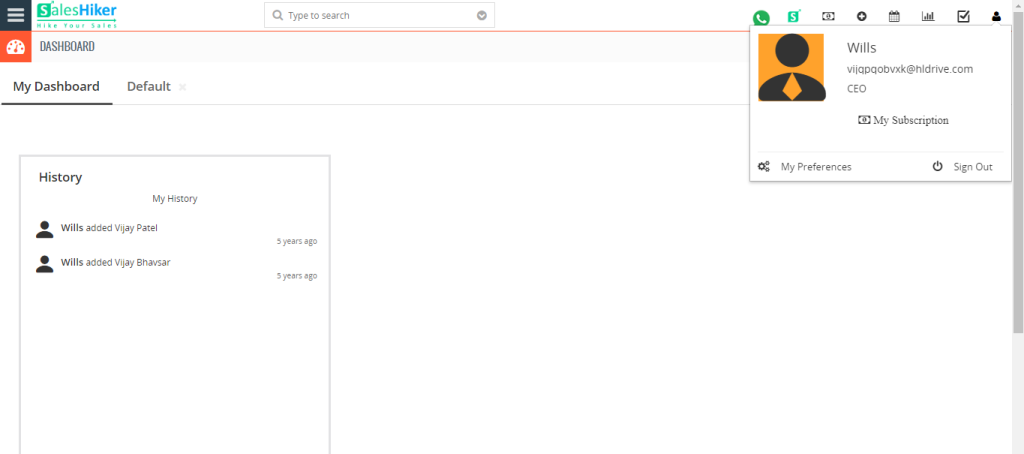
- You will receive Login Credentials on registered Email ID once your tenant is set-up perfectly.
- Now, you can Login into CRM by using valid credentials.
- You can see the SalesHiker App installed successfully.
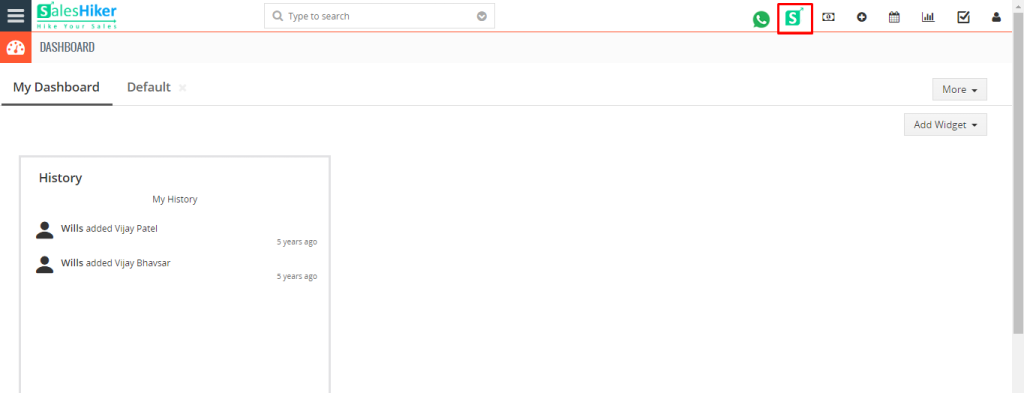
- So, now you can Login into the SalesHiker App by using valid credentials.
- You can install Android App and iOS App for SalesHiker using the given URL link.
My Account Summary
As an administrator your first step towards SalesHiker Mobile Apps will involve a summary of your account. which will be visible to only Admin users.
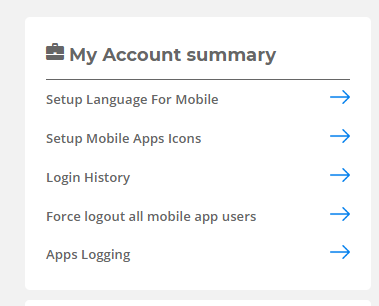
“My Account Summary” will be accessible from the following path.
GoTo Settings > Other Settings > SalesHiker Mobile App Settings
- Setup Language for Mobile
SalesHiker Mobile App offers Localized Mobile Apps solutions to allow all text in Mobile Apps and Web CRM(Specific to SalesHiker Apps) in your Language. How to Set Text for a Specific Language ?
From Setup Language for Mobile page Select Your Local language and Section for which you would need to Change text to your language.
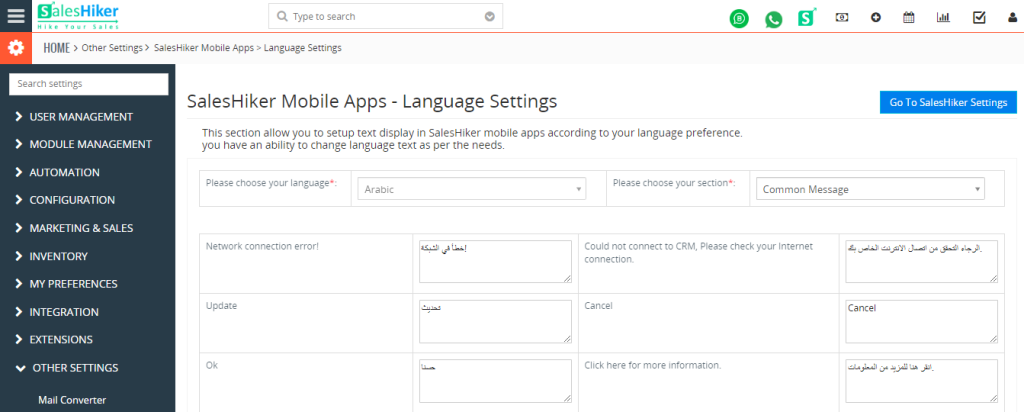
*Once you change Language User needs to Logout and Login to Mobile Apps for Language to Take into effect. - Setup Mobile Apps Icons
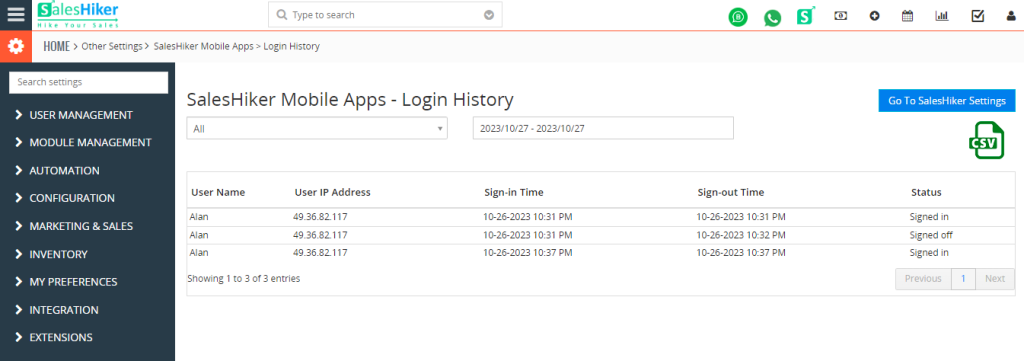
Users can set up module icons for Mobile App. - Login History
Users can view the Login History of the different users date-wise for Mobile App.
- Force logout all mobile app users
Users can Logout all users forcefully from the app by using this option. - Apps Logging
If you have any problem with the Apps and SalesHiker Team asked you to send Log then click on “Download Logs” icon to download file. Please email download file to [email protected] for team to further investigate your issues.
General Settings
SalesHiker Mobile Apps offer some settings in Admin to operate SalesHiker Mobile Apps accordingly.
“General Settings” will be accessible from the following path.
GoTo Settings > Other Settings > SalesHiker Mobile App Settings
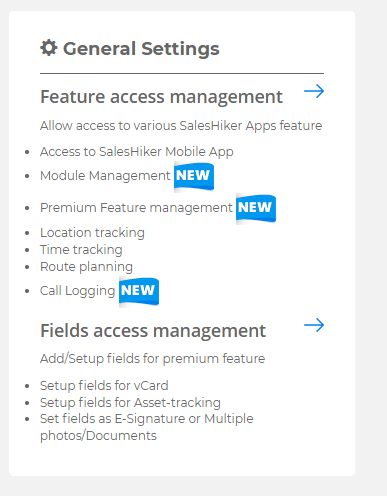
Access to Users
Access to users option allow your CRM users to access various features of SalesHiker Mobile Apps
- Access to SalesHiker Mobile App: This option allows users to access SalesHiker Mobile Apps.
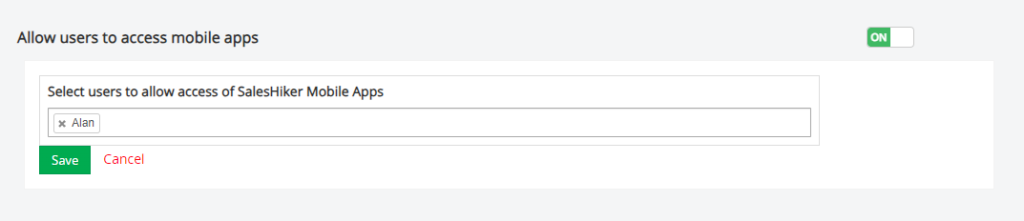
All users : If you’ve set “All users” in access then any users added in future will get access to apps as default.
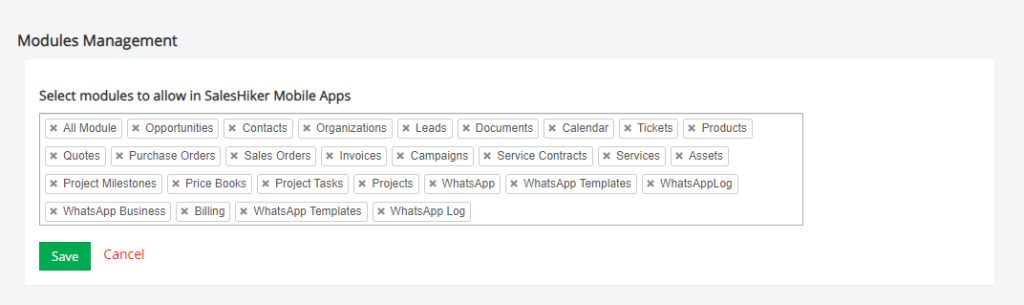
Users/Groups : If you’ve set an individual user or specific group in the list then it will allow specific users/groups to access SalesHiker Mobile Apps. - Module Management : This option allows admin users to add/remove Modules to be available for users in the SalesHiker Mobile Apps.
- Asset / Card Scanner: This option allows admin users to enable/disable QR code scanner, Business card scanner and Asset tracking features for Mobile App.

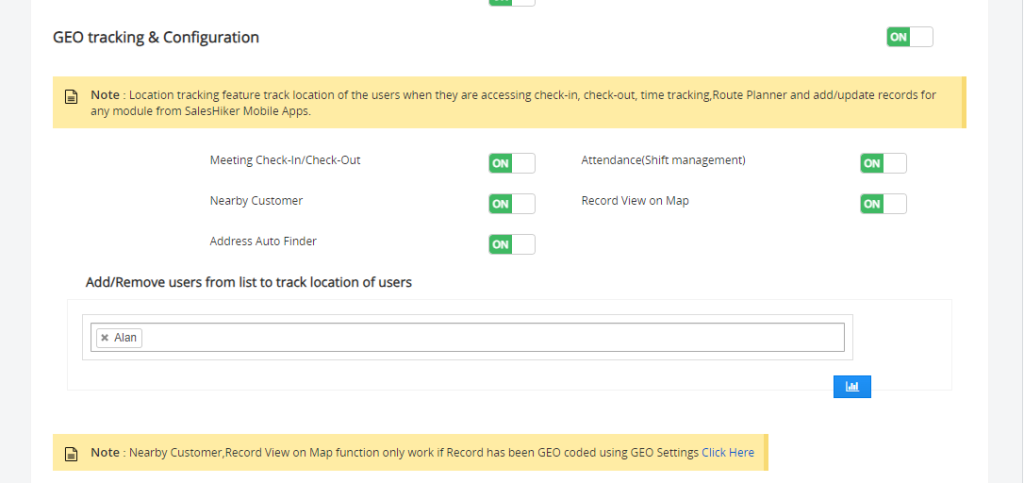
- Track Users Location : This option allows admin users to Add/Remove Location tracking of users who have access to SalesHiker Mobile Apps.
*Admin users can enable/disable access to the location/time tracking features for SalesHiker Mobile Apps Users meeting check-in/check-out, Attendance, Nearby customers, Record view on map, Address Auto Filter.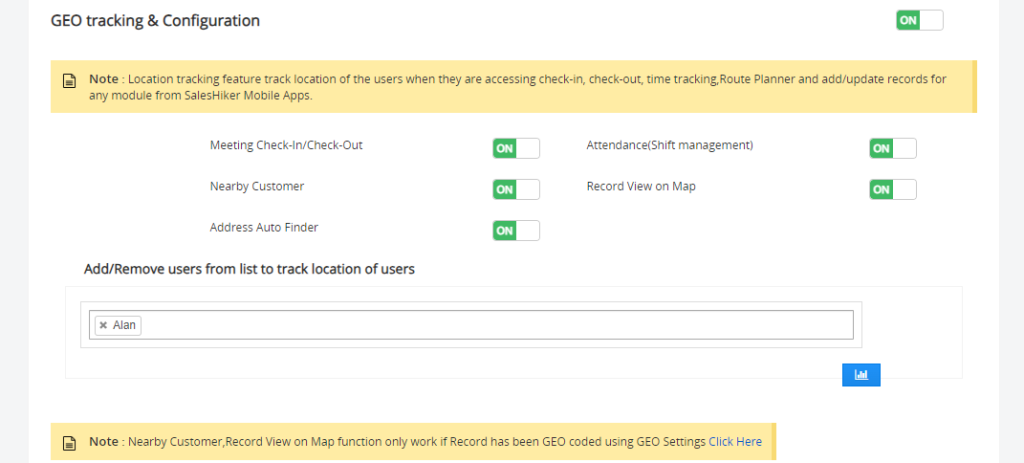 Users/Groups : If you’ve set an individual user in the list then it will track location of specific users of SalesHiker Mobile Apps.
 - Communication : This option allows users to enable/disable different option for communication like Call, Email, SMS and WhatsApp for Mobile App.

- Route Planner : This option allows admin users to Add/Remove users to set up route planner features. Route planner is accessible from Mobile Apps for users to plan their route of Sales or Delivery.
* This feature requires Google API integration for the accurate result on the map.
Users/Groups : If you’ve set an individual user in the list then it will track location of specific users of SalesHiker Mobile Apps.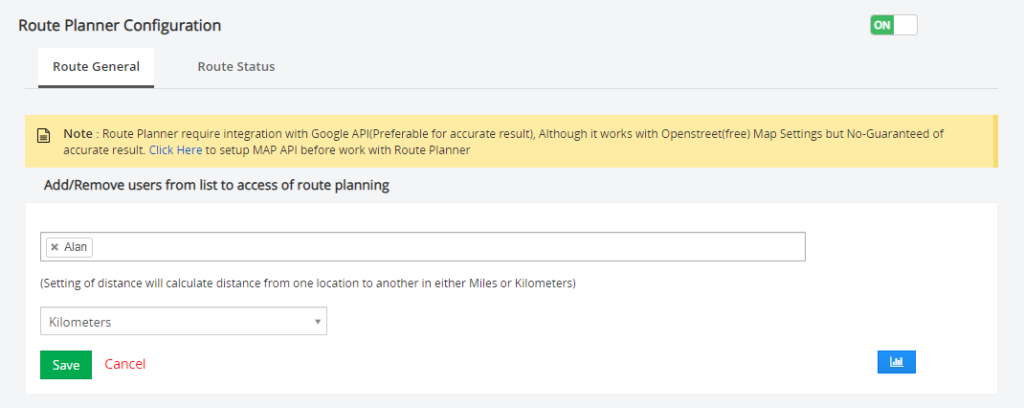 Kilometres/Miles : Set Kilometres or miles according to your destination’s distance settings.
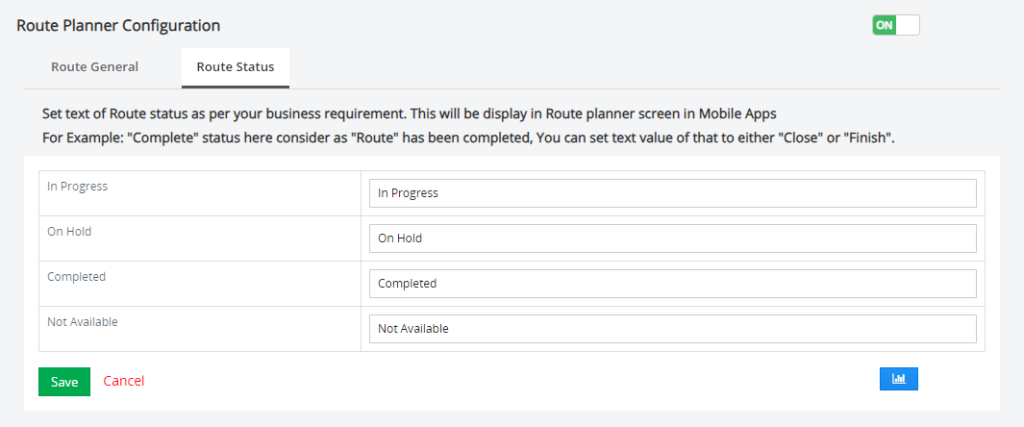
Route Status : Setting of route status text helps you to display status of route as per your personalized text.
- Time tracker configuration : This option allows admin users to Add/Remove modules for users to track time against any records of the module. Remove/Disable module from Time tracker configuration page will not allow user to track time.
* Time tracking function only tracks Location if GEO Location Tracking is enabled for the user from GEO Location tracking section.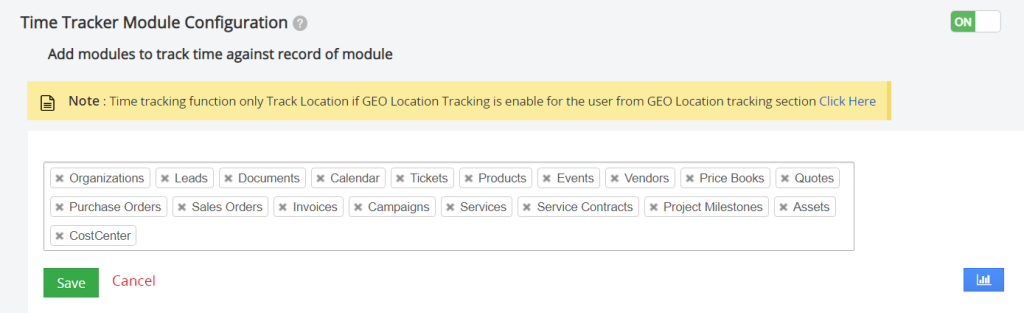
- Call Logging Configuration : *This option allows users to keep a log of their regular call from the user’s phone.
Admin users have the right to add/remove users from accessing the call logging list.
Note : This feature only offers to Limited android phone who allows call Logging and recording
Here is the List of the Phone with version # allow
Only certain devices and carriers support this feature. You can’t record calls in all countries and regions. To record your phone calls:
- Your device must run Android 9 or higher.
- Your device must have the Phone app pre-installed and updated to the latest version.
- You must be in a supported country or region.
Click here for more information about Call Recording

GEO(Location tracking) Settings
GEO(Location) Settings Allow you to GEO-Code(e.g. Set Lat/Long) All records in CRM which contain addresses. This is an important setting to utilize all Maps features in SalesHiker Mobile Apps.
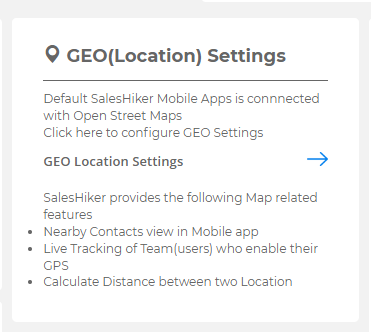
SalesHiker Mobile Apps allow users to set various types of MAP Api to capture Latitude/Longitude from address as well as track location of users and many other map related features.

You can activate any one from the available map type settings from the available list.
Currently SalesHiker Mobile Apps extensions offer OpenStreetMap and Google Map API to get addresses on Map.
OpenStreetMap : This is free map API and you do not have to pay and extra fees to enable it, but accuracy of this MAP API is lower compare to Google MAP API
Google Map : This is a Paid API you’ve to purchase from Google. This API will charge based on the number of requests, Draw a path on maps and other features.
Google Map required you to obtain API key, Click here to get more information on How to Obtain API key from Google

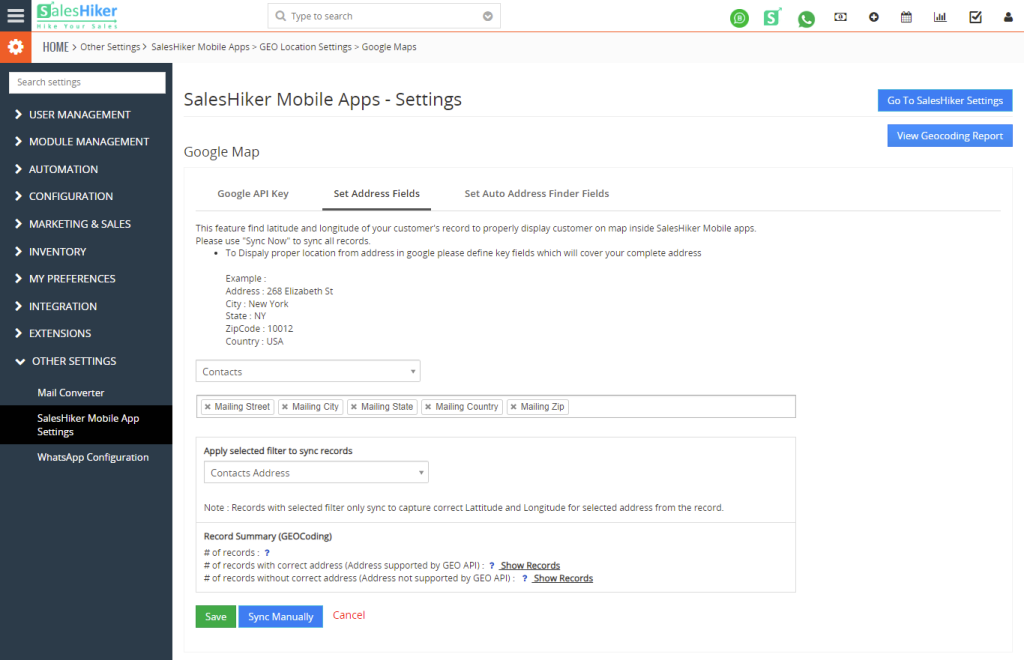
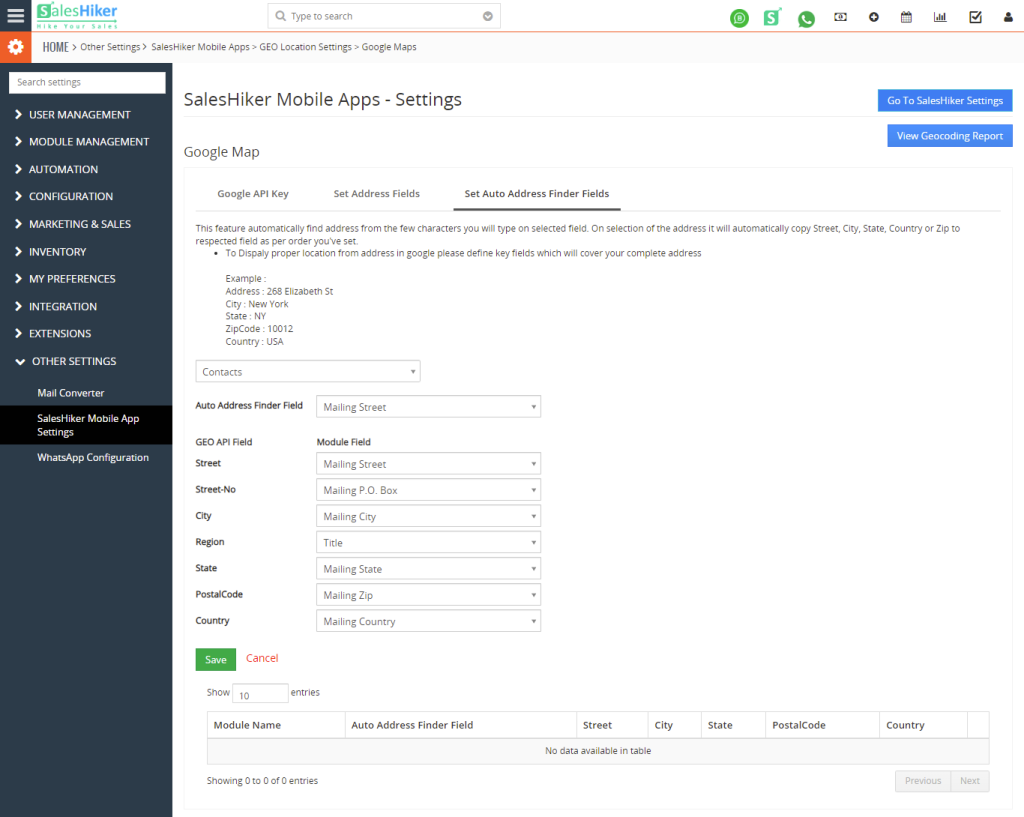
Set Address fields : This option allows you to set fields of allowed modules of your CRM to pass to Map API to capture correct Latitude/Longitude from address.
As per the standard follow fields example mentioned in the picture field.
Set Auto Address Finder :
This feature automatically finds addresses from the few characters you will type on a selected field. On selection of the address it will automatically copy Street, City, State, Country or Zip to a respected field as per order you’ve set.
To display proper location from address in google please define key fields that can fetch complete address details based on GEO-tag.
Example
Address – 268 Elizabeth St
City – New York
State – NY
ZipCode – 10012
Country – USA
Reports & Analytics
Reports and Analytics section of SalesHiker settings offer detailed report of all activities from SalesHiker Mobile Apps.
“Reports and Analytics” will be accessible from the following path.
Go To Settings > Other Settings > SalesHiker Mobile App Settings
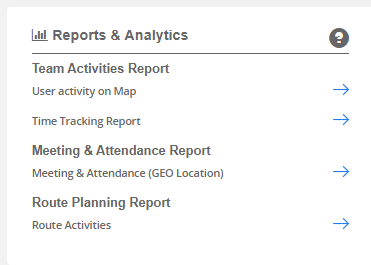
- Team Activities Report
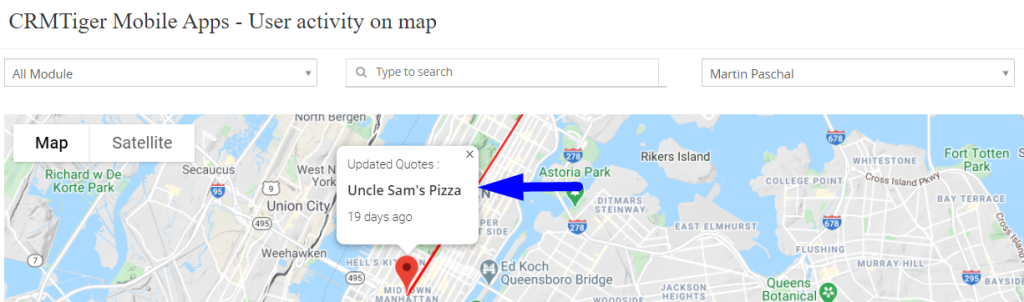
This report option provides more information about track activities of users on map. It means it will give you results of location of the user, actual location of meeting and track time of user spend on specific activities. - User Activity on Map
This report displays activity of the user on a map . It means at what location the user updates which record of the CRM. This is a very helpful feature for companies to track the location of updated records.
*This feature only works for the user If user has been added to “Track Location of user” option from “General settings”
To get accurate results we suggest using Google API to capture the correct location of the updated record.
- Time tracking report
This report displays time spent on each record with the location on which activity happens on the record. This is a very useful feature for on field staff to manage time spent on various activities to offer accurate reporting to the manager/company.
*This feature only works for the user If “Time tracking for the user” has been enabled from “General settings”
- Meeting Activity(GEO Location)
This report displays details of all meetings managed from Mobile Apps using Task/Event features of CRM. It will display Check-In Location and Check-out Location of the meeting.
Check-In : Whenever users click on Check-In when they reach the meeting location or start the meeting it will capture Location when the meeting.
Check-out : Whenever users click on Check-out when they leave the meeting location or finish the meeting it will capture Location when the meeting has been finished.
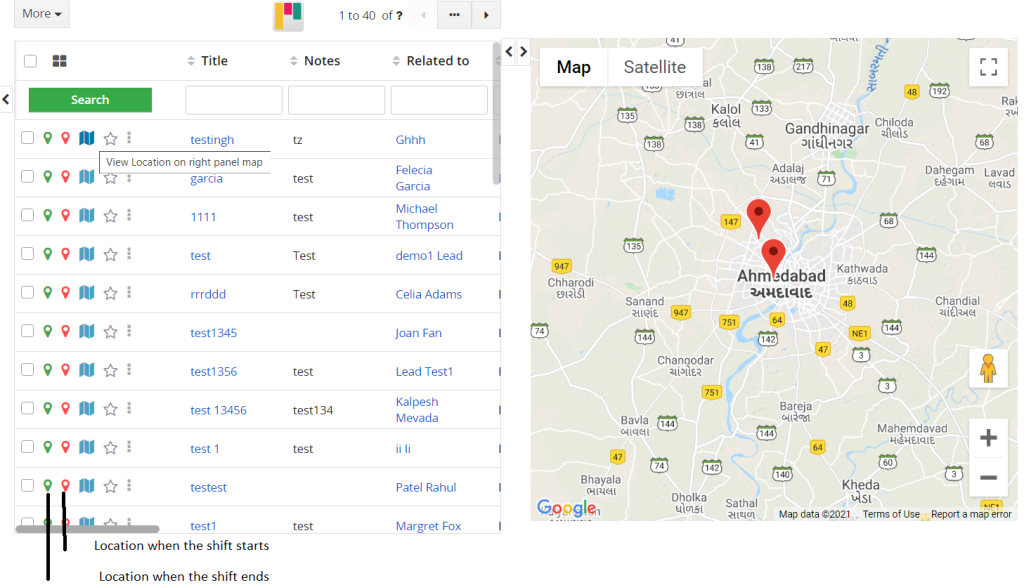
Team Attendance : This report displays details of daily attendance on mobile from the team. managed from Mobile Apps using Start shift/End shift option display in Dashboard of Mobile Apps.
Start-Shift : Whenever users click on Start-shift when they start their work shift. It will capture the time and location of the user.

End-Shift : Whenever users click on End-shift when they end their work shift. It will capture the time and location of the user.

- Team attendance report
Attendance report will display a list of the employees/users to record their shift using Start/End shift option from Mobile Apps.

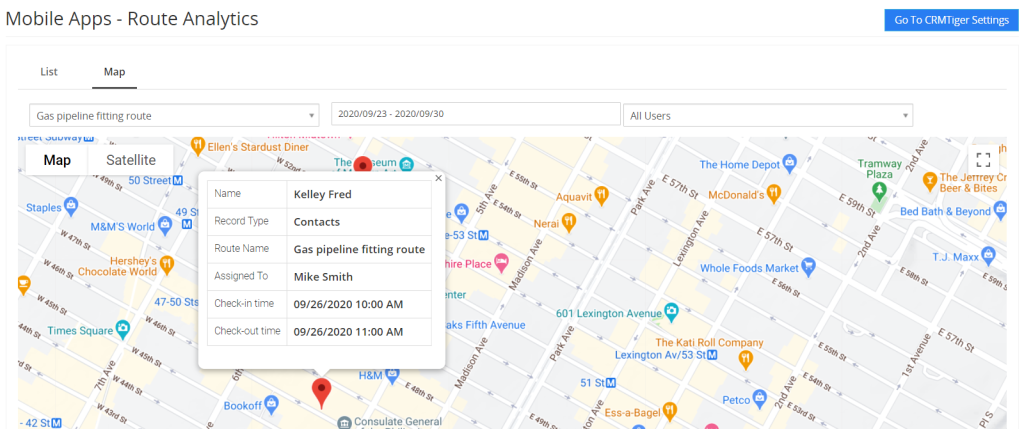
- Route Planner Analytics
This report lists Route on Map which is captured from the “Route Planner” option in Mobile Apps.
Two types of report :
- Tabular report : This report lists records with location of route, distance, status of route with Location information.
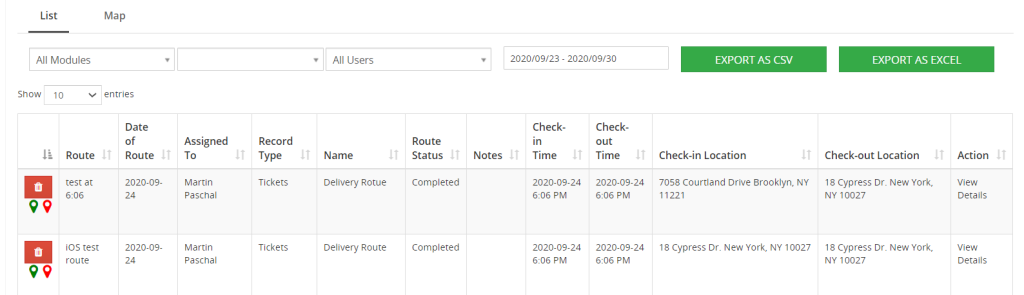
- Map Report : This report lists records with location of route, distance, status of route with Location information on Map.
InApp Notification Settings
Setup Important(Default) Notification
Notification Settings : This option allows users to customise notification for the actions performed on the records.
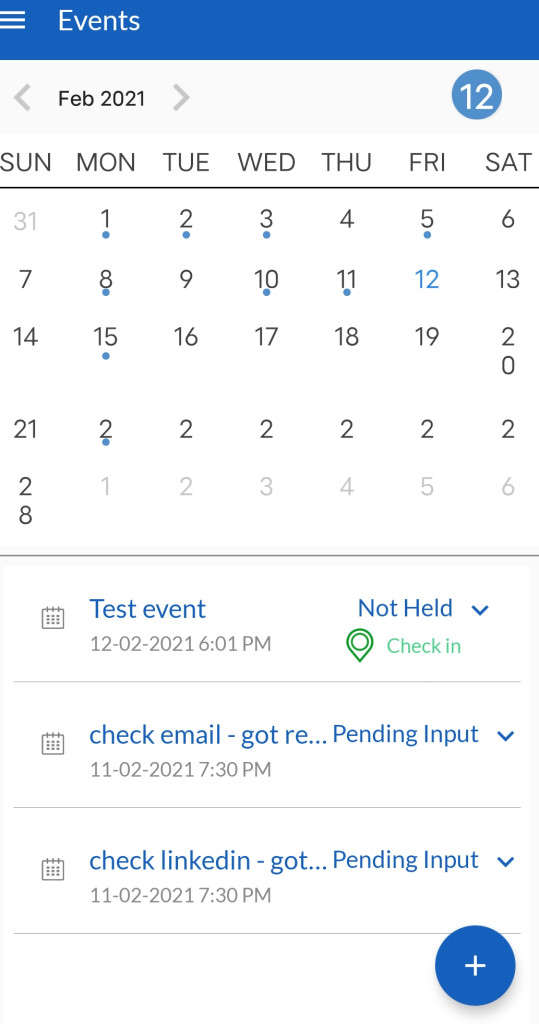
Events
Event Invitation : This option allows admin users to set up the customised event invitation to notify the users assigned to.
Example
Notification Title – You’ve event Invitation
Add Field – Event:subject
Notification Message – $events-subject$ $events-date_start$ $events-due_date$

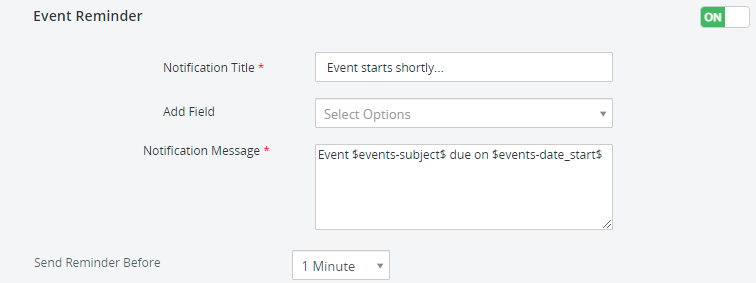
Event Reminder
This option allows admin users to set up the reminder before the event to the assigned records.
Example
Notification Title – Event starts shortly.
Add Field – Event:subject
Notification Message – Event $events-subject$ due on $events-date_start$
Set Reminder Before – 1 minute
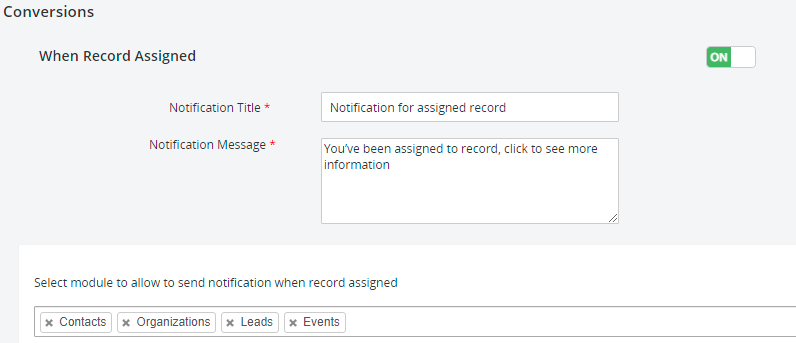
Conversions
When Record Assigned : This option allows admin users to set up the custom notification when records have been assigned to the users for the added modules.
Example
Notification Title – Notification for assigned record
Notification Message – You’ve been assigned to record, click to see more information
Select module to allow you to send notification when record assigned – Contacts, Organizations, Leads, Events…
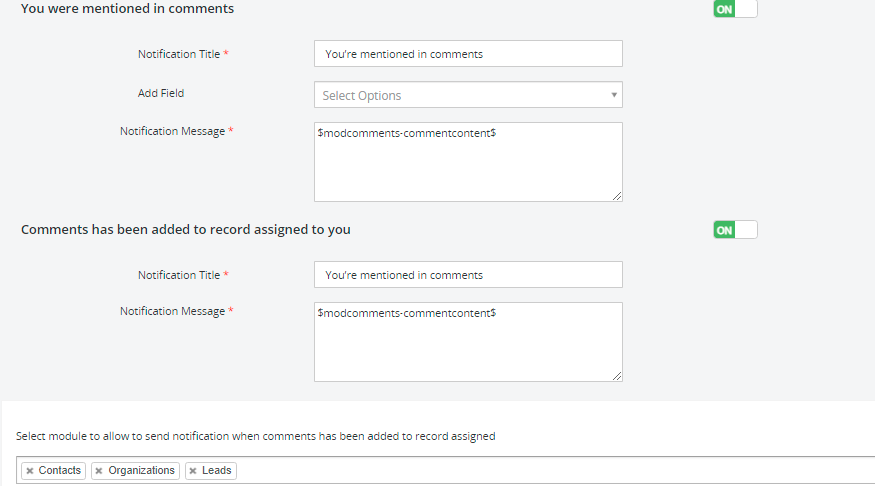
You were mentioned in comments
This option allows admin users to set up the custom notification when any user has been mentioned in the comment.
Example
Notification Title – You’ve event Invitation You’re mentioned in comments
Add Field – Comments:Assigned To
Notification Message – $modcomments-commentcontent$
Comments have been added to the record assigned to you : This option allows admin users to set up the custom notification when any record assigned to the users has been mentioned in the comments.
Example
Notification Title – You’ve event Invitation You’re mentioned in comments
Notification Message – $modcomments-commentcontent$
Select module to allow you to send notification when comments have been added to record assigned – Contacts, Organizations, Leads, Events…
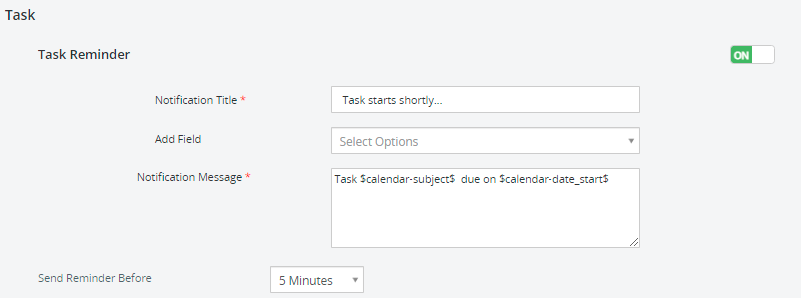
Task
Task Reminder : This option allows admin users to set up custom reminder for the assigned tasks to the users.
Notification Title – Task starts shortly…
Add Field – Calendar:Assigned To
Notification Message – $calendar-date_start$$calendar-smownerid$$calendar-subject$Task $calendar-subject$ due on $calendar-date_start$
Set Reminder Before – 1 minute
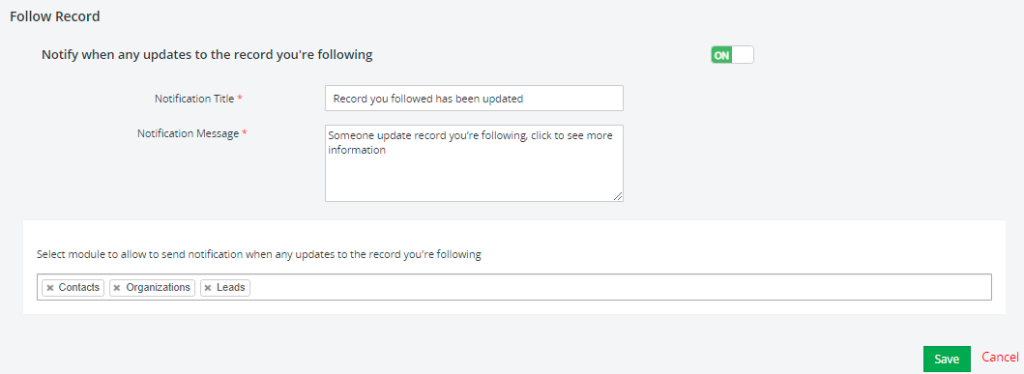
Follow Record
Notify when any updates to the record you’re following : This option allows admin users to set up custom notification when any updates noticed to the records users are following.
Notification Title – Record you followed has been updated
Notification Message – Someone update record you’re following, click to see more information
Select module to allow you to send notification when comments have been added to record assigned – Contacts, Organizations, Leads, Events…
Push notification
Section of SalesHiker Mobile Apps allows you to Broadcast Push notification to all users or send push notification on workflow events.
- Setup Push notification from Workflow
- This notification has been set up from the workflow of the CRM. When you Install SalesHiker Mobile Apps extension It will add “SalesHiker Push Notification” Action in Workflow.
- There are two types of Push notification when setup Push notification from workflow
- Link message : This type of message will send push notification to users accessing SalesHiker Mobile Apps, so clicking on that will redirect the browser to the option page specified in Link message settings.
- Send Push notification to Users
- This notification allows admin or manager(User having access to manage other users) users to send Push notification to all active users using SalesHiker Mobile Apps.
- There are two types of Push notification when setup Push notification
- Normal message : This type of message will send push notification to users accessing SalesHiker Mobile Apps, so clicking on that push notification in mobile apps will open a specific record in mobile Apps.
- Link message : This type of message will send push notification to users accessing SalesHiker Mobile Apps, so clicking on that will redirect the browser to the option page specified in Link message settings.
General Features
Navigation Elements
Elements which provide easy access to the respective screens and features throughout the platform that gives users a pleasant UI experience turns into productive outcome and platform adoption.
Main Menu Navigation
The Leftmost navigation on top is the main menu that users will use to access available features from any screen of the CRM Mobile App.
- User Profile – user’s profile with username and profile picture with edit right in picture.
- Dashboard – is a home screen including logs of activities held within the app by users provided active parameters set by Admin.
- Marketing – is an access to the marketing activities features that help users perform, track, manage leads, campaign, and audience database.
- Sales – is an access to the sales management flow to simplify planning and tracking of targets.
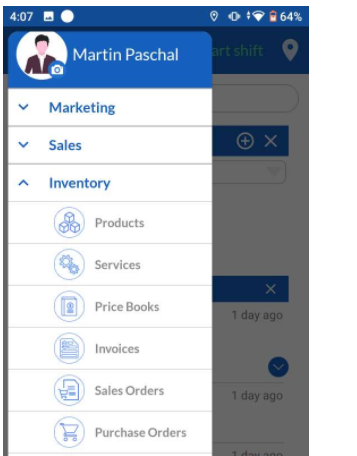
- Inventory – is a key of error free inventory management with the features to keep count on products, services, sale processing and payment process.
- Support – a systematic customer support management that gives users a right to priorities customer tickets, categories, assign, process and clear queue in time without losing any.
- Mail Manager – gives the facility to synchronize as many mail accounts at a single end point.
- Asset/Card Scanner – keep yours or customer’s business cards or related information digitised here.
- Live Tracking – allows admin to view team/user’s geo location.
- Route Planner – give facility to admin to create a sale/project route and assign it to the respective team member
- Time Tracker – calculates time spent by user
- Settings – allows editing the preferences and default arrangements of modules in the CRM mobile app.
Quick Create
This feature allows users to add frequently accessible modules from the list on your home screen to avoid module access time using Quick Create feature
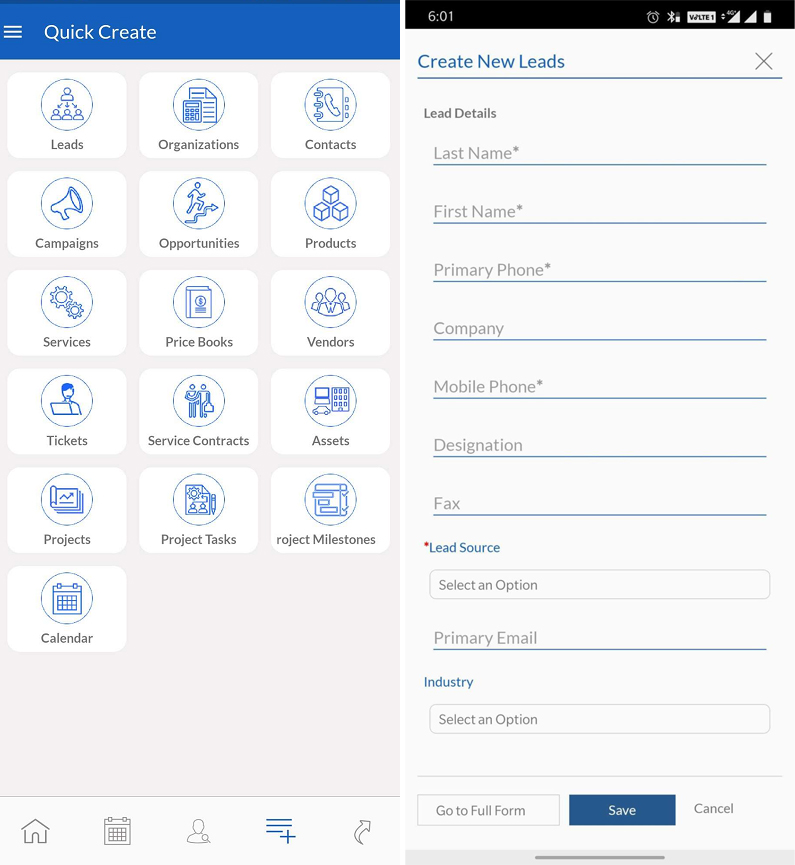
- Click on any of the modules in the list of quick create features to add on screen.
- Enter required details in the pop-up form OR,
- Click on Go to Full which will lead to a detailed form with more fields with respect to the selected module.
- Save the details.
Dashboard Management
Personalize your home screen with the custom dashboard management. You can select multiple types of charts & other widget & customize dashboard as you want
- Daily Attendance -Start / End Shift
For On-field Users to show a presence and record a log of their daily shift duration with Start Shift and End Shift, Shift feature has been introduced to Users.
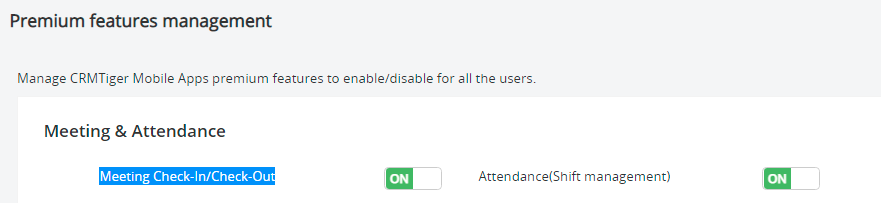
Admin Settings – To make Shift features visible to Users, Admin users have access to Enable/Disable Attendance(Shift Management) using premium features management.
Premium features management settings are accessible from the following path.
- Go To Settings > Other Settings > SalesHiker Mobile App Settings
- Refer Meeting & Attendance > Attendance(Shift management)
- To Enable/Disable Shift for Users Turn On/OFF Attendance(Shift Management) feature as below.
- Access to Mobile Apps user
- How does it work?
Start-Shift : When users click on Start Shift while starting with a work shift. It will capture the start time and location of the user.

- End-Shift : When users click on End Shift while ending a work shift. It will capture the end time and location of the user.

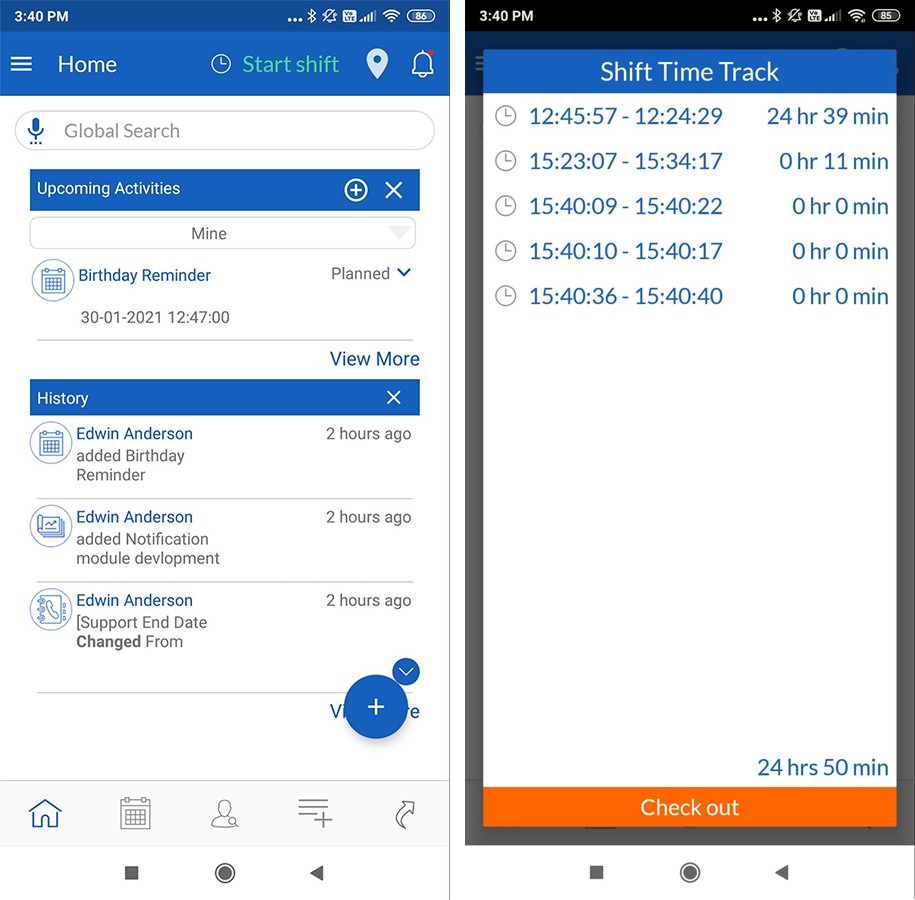
- How does it work?
This feature helps Admin users and end users to maintain accurate shift attendance reports with total spent time on tasks/routes.
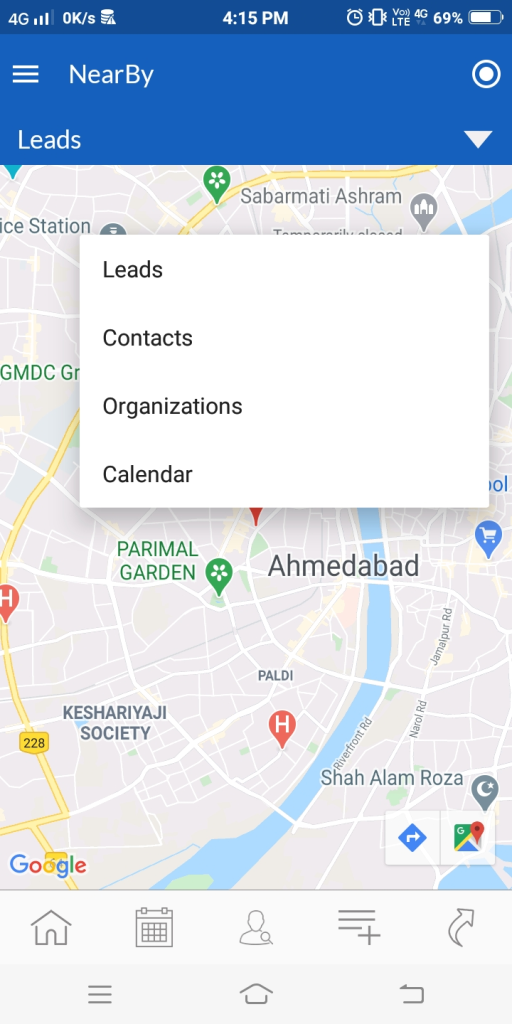
- Near By
On-field end users can view the nearby leads, organizations, or contacts for the user to follow a route plan with respect to the user’s current geo location.
Admin Settings – End Users can only use Nearby feature when admin allows it, Admin users have access to Enable/Disable Nearby using premium features management.
Premium features management settings are accessible from the following path.
- Go To Settings > Other Settings > SalesHiker Mobile App Settings
- Refer GEO tracking & Configuration > Nearby Customer
- To Enable/Disable Nearby feature for Users Turn On/OFF Nearby Customer feature as below.
- Mobile Apps Users
- How does it work?
Whenever an end user will access Nearby features, it will help users to get aligned with his/her nearby leads to plan follow-ups/visit in a better way.
This gives you map views of nearby leads, contacts, organization, calendar.
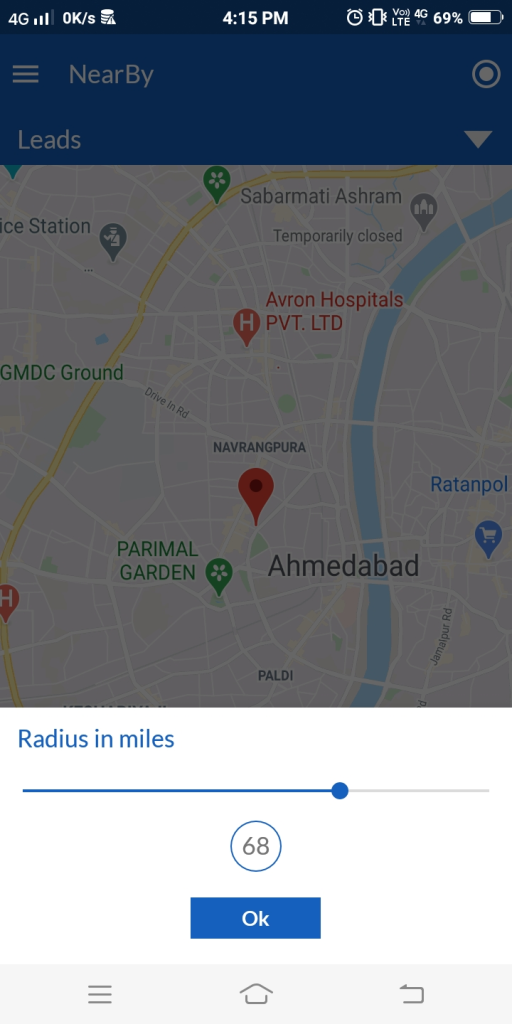
- Radius in Nearby
This feature allows end users to filter out the leads, contacts, organization or calendar in a specific radius/area.
The radius will be Miles.
- Mobile Apps Users
- Add Widget – This feature allows users to customize the dashboard by adding widgets/reports of modules on the home screen that helps users to keep track of the individual modules of their quick activity log or interest.
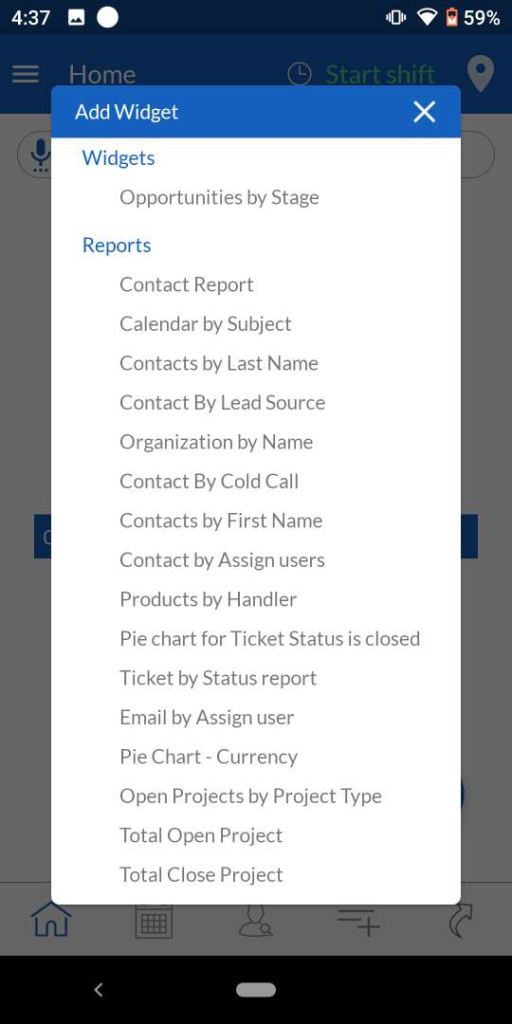
- Click on
 the add widget symbol.
 - Select the widget from the widget list, and it needs to be added to the dashboard.
- Rearrange the dashboard widget sequence if required.
Customized Dashboard View
Graphical presentation of selected widget on dashboard turned out to be the best practice for sales people to keep track of targets over the period.
- Reports on Dashboard
*This feature allows users to have a graphical representation of module summaries on the dashboard.
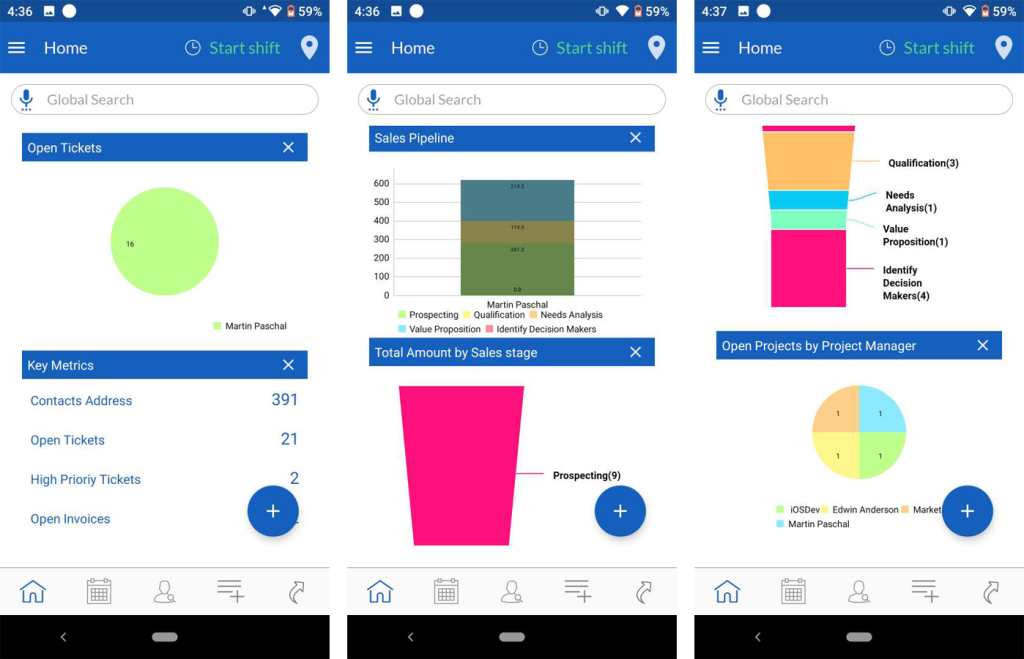
Admin Settings – There are two types of Dashboard graph display on Home page of Mobile Apps
- Default Home Page Widget : In Web CRM, There is an option in Dashboard called Add Widget, Graph or option those that are displayed in Add widget will be added to Mobile Apps Dashboard.
- Chart Pin to Dashboard from Report Module : From Web CRM -> Reports module All Reports with Type Chart and Report set to “Pin to Dashboard” will be displayed as Chart in Dashboard of Mobile Apps.
Access Task/Activity Calendar
- Add Task – This feature allows admin users to add tasks assigned to the respective users or groups. Users can access, attend and start working on the task assigned by Admin.
The Add Task feature is accessible using the following path.
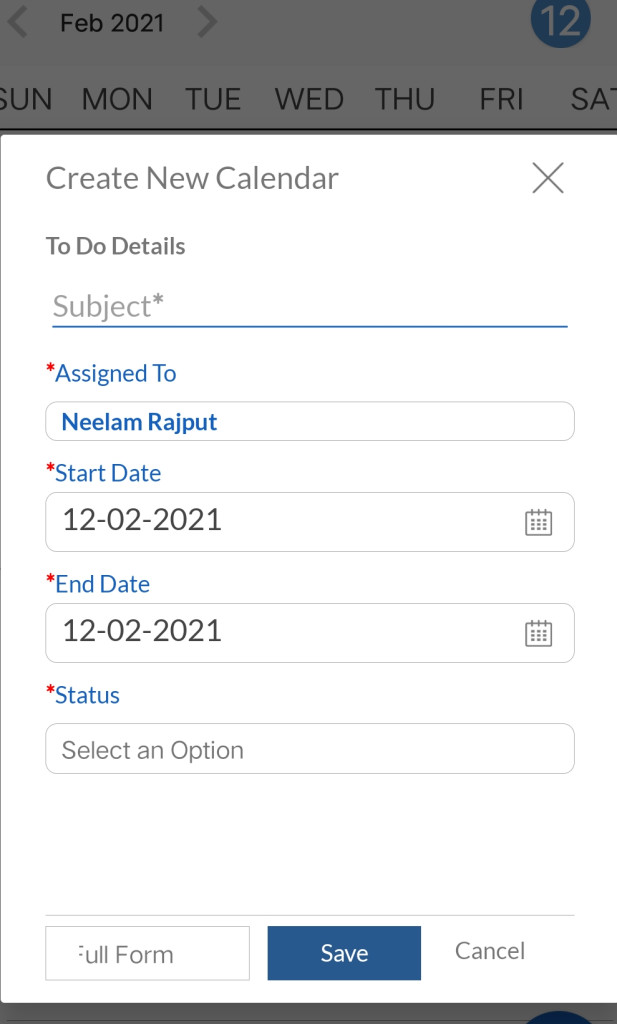
Go to Calendar > Add Task
– Build a task list for the team.
– Assign to the team member.
– Set the timeline by selecting start – end date.
– Keep a track on the task status. - Users

To-Do Task List – Users can view their to-do tasks on the home screen.
Start Task allows users to click on the start task that will keep a log on user activities and geo-location during the task. – Go to the task in the ‘To-Do’ List to refer to details. – Users can add notes if required.– To Update Task Status, allows the user to update task status for admin to keep a track on. users can directly update task status by clicking on status. A drop-down with task status such as Not Started, In progress, Pending.
End Task allows the user to end the task. It captures the geo-location and displays total spent hours on the individual task.
Add Event
Allow Admin users to add an event with start-end date, event time, location and other required details. Admin can assign it to end users or groups. Users can check-in and check-out the events assigned to them.
- Admin
The Add Task feature is accessible using the following path. Go to Calendar > Add Event– Create an event by adding subject, date, time, location and type of event. – Assign to the users/groups – Set the timeline by selecting start – end date.
Meeting and Attendance
Admin Settings
This feature helps admin to keep a log of attendees status of attendance for held/ongoing events. It captures details of end users location, time and status during the event.
*This feature is only accessible to users only when the following settings are enabled by Admin users :
Premium Features Management :
- Go To Settings > Other Settings > SalesHiker Mobile App Settings
- Refer Meeting & Attendance > Meeting Check-In/Check-Out
- To Enable/Disable Check-in/Check-out for Users Turn On/OFF Attendance(Shift Management) Meeting & Attendance feature as below.
Premium Feature
- Track meeting with Geo-Location
- Users
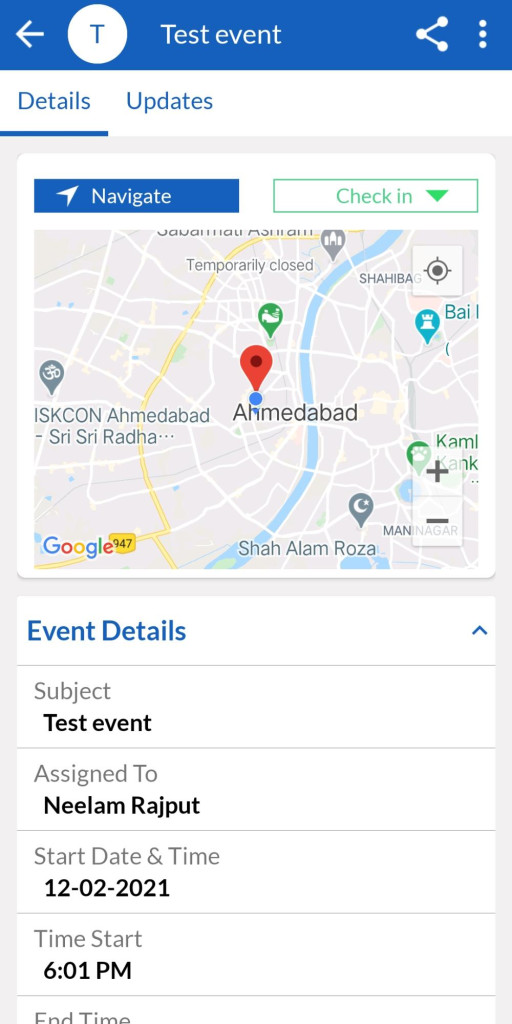
This allows admin users to keep a track on end users geo-location and presence during an event as soon as they check-in.
– Navigate location or online link.
– Check-in to the event. When a user checks-in, it captures users geo-location, Check-in time.
– Check-out from the event. This feature allows access to the user’s check-out location along with the check-out time and status.
– Users can add notes/comments for an acknowledgment purpose.
- Users
- Address Auto Finder
This feature auto fills addresses in the record address details field from map geotag set by user while setting up address during creating a Record.
- Admin Settings
This feature helps admin to allow/disallow Address Auto finder to following modules.
- Admin Settings
- Lead
- Contact
- Organization
- Calendar
This feature is only accessible to users only when the following settings are enabled by Admin users in Web CRM :
- Go To Settings > Other Settings > SalesHiker Mobile App Settings
- Refer GEO(Location) Settings > Edit Google Map or OpenSteet Map option
Note : For Accurate result SalesHiker suggest to use Google Map but you should
have an account with Google.
- Select Module and set the following field.
Auto Address Finder field : This field allows use of Type 3 characters and it will Automatically list addresses from Google.
Address fields : Set various fields for Street, City, State, Country and Zip code so when the user selects address from “Auto Address finder field” it will Automatically copy address to another field selected as address field.
The following are the steps for filling up address details automatically.
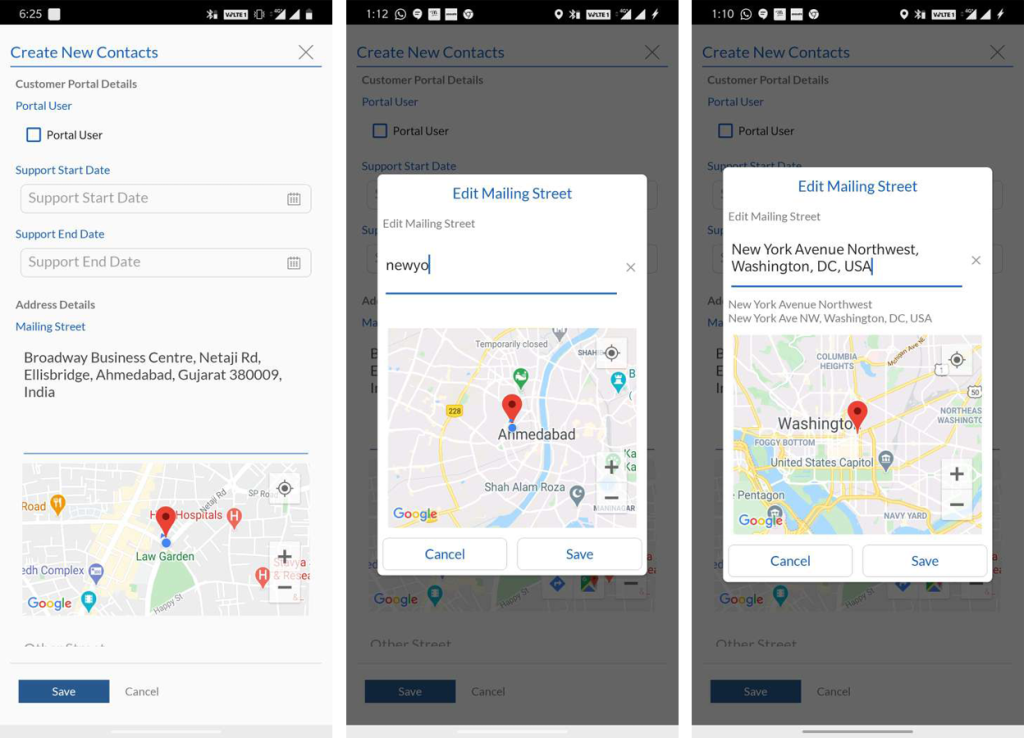
– Go To Main menu > Marketing > Contacts.
– Create new contact, refer to Go To Full form.
– Enter Address details field.
– Users can either type an address or find a location in the map, set geotag on preferred location.
– The location will be auto filled with respect to the geo tag.
- Access to Record
This feature allows users to maintain any record of any module accessible from the menu.
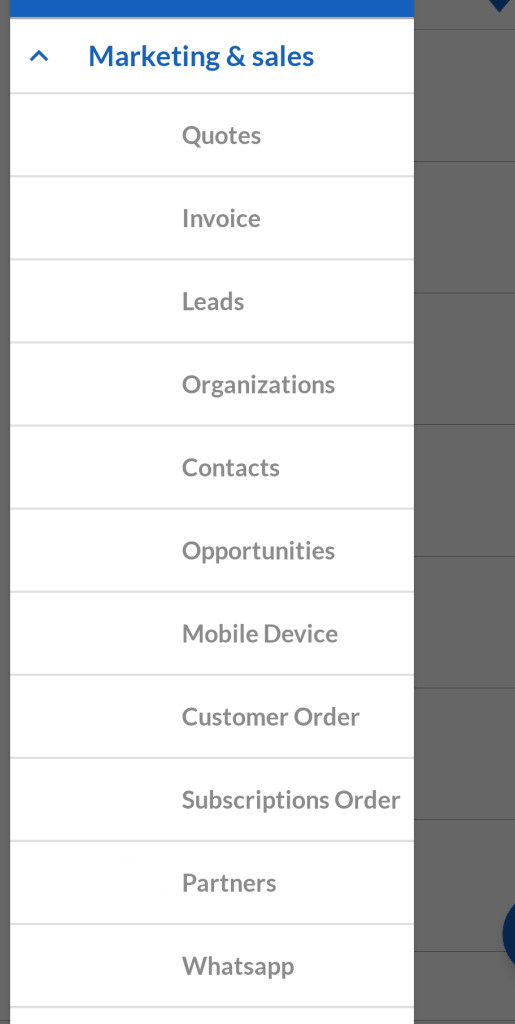
Record are accessible using the following path :
Go To Main Menu > Marketing & sales OR Any other menu item > Leads (example module)
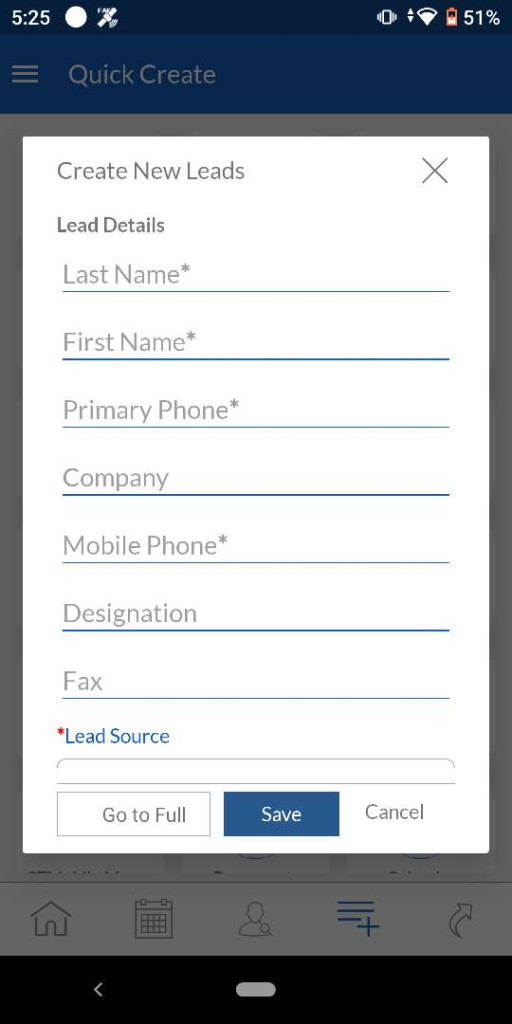
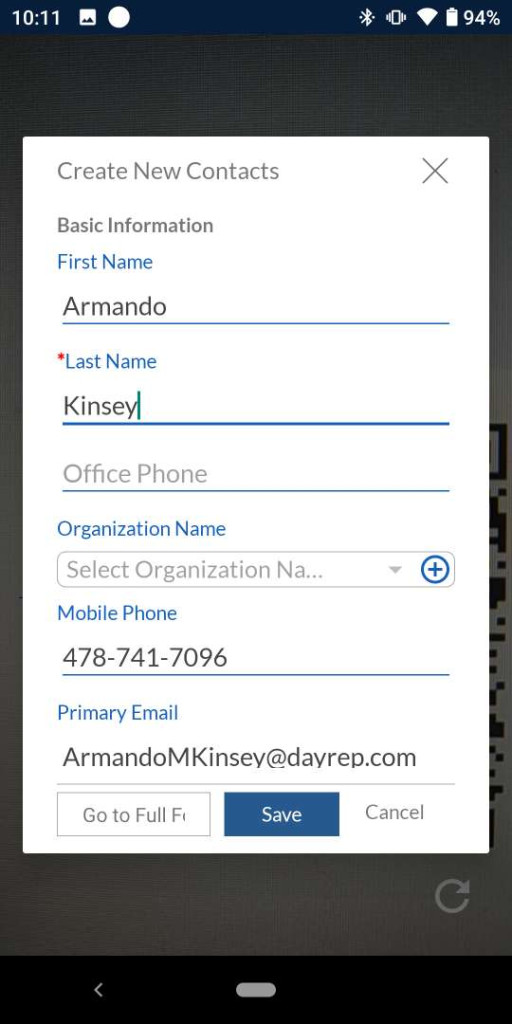
Create New Record
Go To Record section, To create new leads, click on
That will lead to a pop-up form. Fill in the details related to the new Record and save.
Users can use the Go to full option to add Record information in detail if required.
- Record List View

When users access the Record, it appears in the list manner which can be sorted or searched using search and filter options.
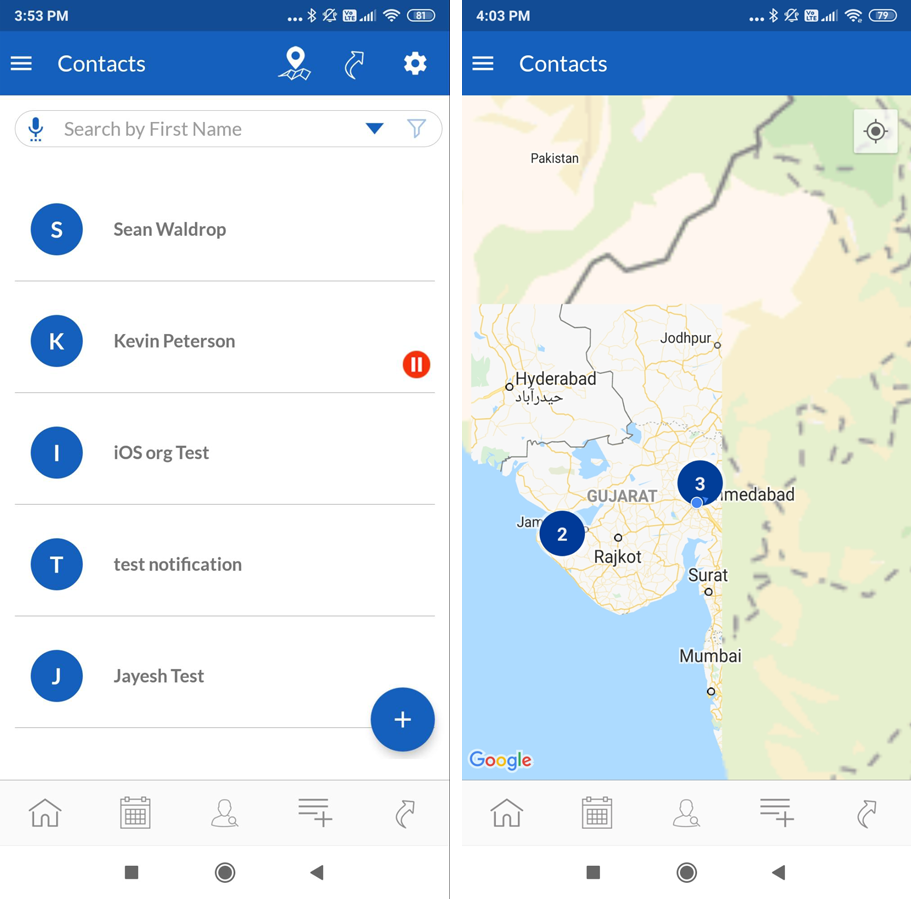
Users can directly approach a record using a call option from the list view.Users can view complete details of the record by clicking on an individual record. - Record view on Map

To check the map view of record, click on Map view on top as shown.
- *Admin have the right to enable/disable the map view for all the records related modules.
- Admin
- Record Map view setting is accessible using the following path:
- Go To Settings > Other Settings > SalesHiker Mobile App Settings > GEO Location Tracking.
- Admin users can Enable/Disable the map view for record related module’s with Turn ON/OFF Record Map View.
- Admin
- Record Options
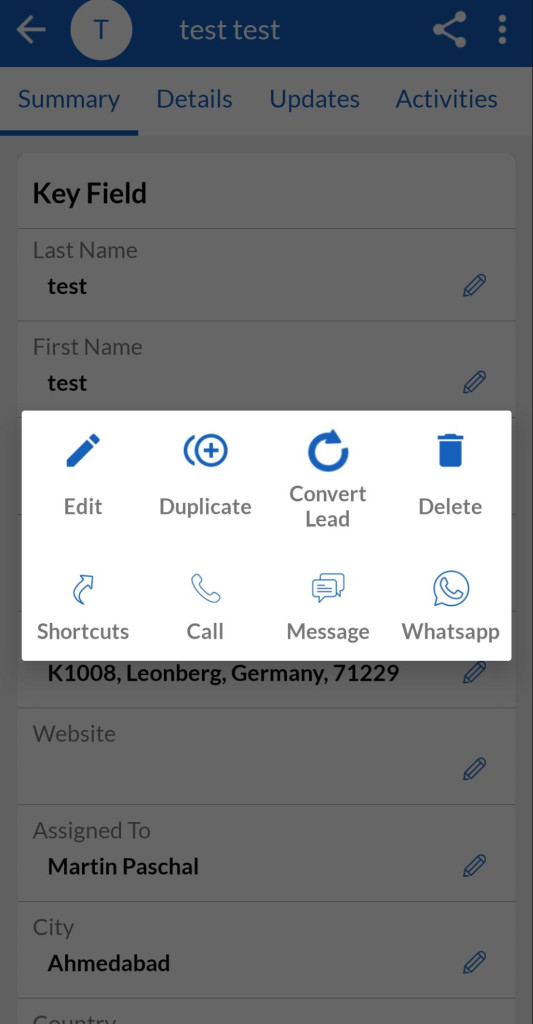
This option allows users to perform a few functions such as Edit, Share, Duplicate, Convert, Call and many more.To access the lead options click on the on the right top corner of the Lead summary page. The following are the options users will
- Edit – allows users to edit lead information.
- Duplicate – allows users to duplicate the record.
- Convert Lead – allows users to transfer lead to contact/opportunity/organization.
- Call – Users can approach a call directly using this option.
- Message – allows users to leave a message to the individual lead.
- Whatsapp – allows users to approach leads on whatsapp to the individual lead.
- Shortcuts for quick access this option allows users to add shortcuts of an individual lead on the home screen.
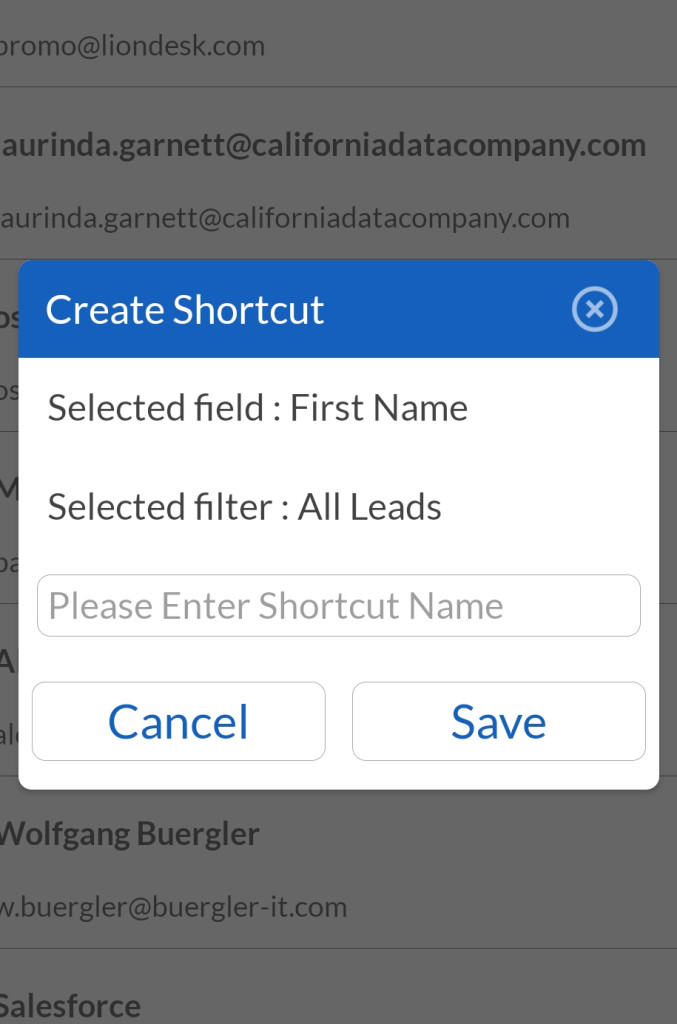
– Click on the shortcut option to create a shortcut. – It will lead to a pop-up form. Add Shortcut Name and save.
- Customize Record Display Fields
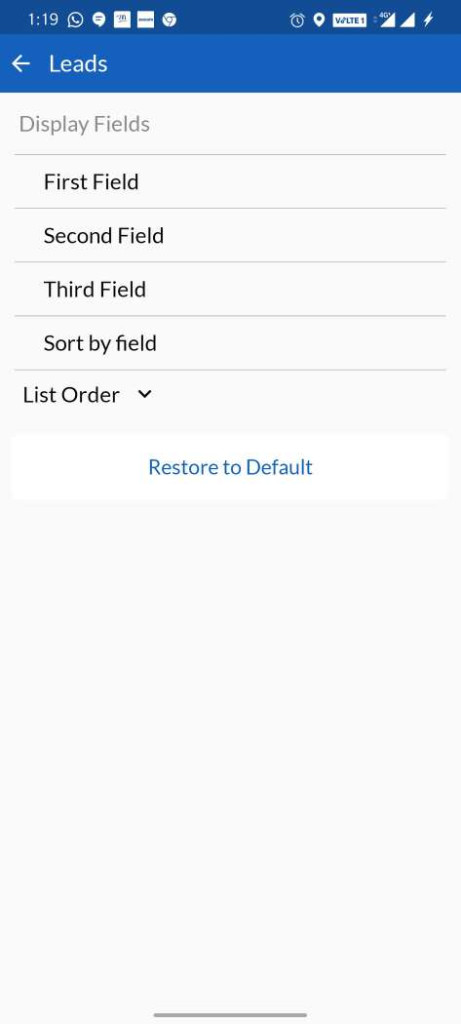
This feature allows users to customize record field display order based on the information priority user would like to set in record as required.– In the lead module, Go to settings , to change display fields.– In Display fields users can select from the drop down list for the First field, Second field, Third field .
- Allow module access
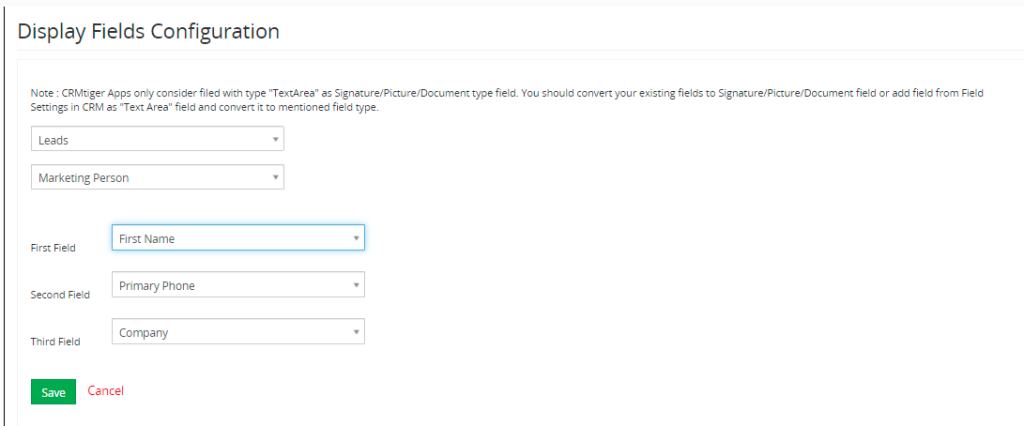
Admin users are allowed to change the primary order of users record display fields, for ex. Set First Field like First Name, Phone number, company … in record information display , likewise set Second Field, Third Field.The Display field settings are accessible using the following path :
- Go To Settings > Other Settings > SalesHiker Mobile App Settings > General Settings > Fields Configuration.
- Refer Display Fields Configuration.
- Select the module such as leads, contacts, organization, calendar, etc..
- Select User admin would like to change display field order.
- Select for First fields, Second fields, Third fields for display order and save.
- Quick Record Search
This feature allows users to search an individual lead/record using different parameters such as search by First Name, Last Name, Phone number, Company etc.Multiple field search
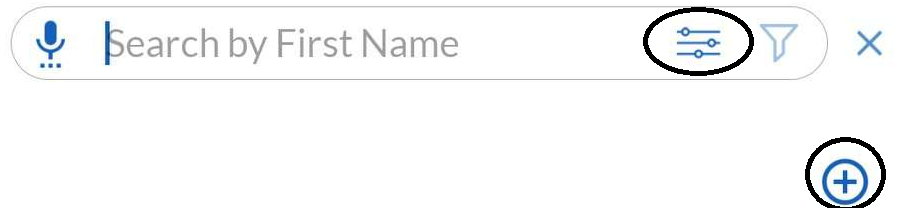
– This Feature allows users to set multiple search criteria using add multiple field search fields against record modules.– Referring to any record module, as shown use search option or add search fields option. 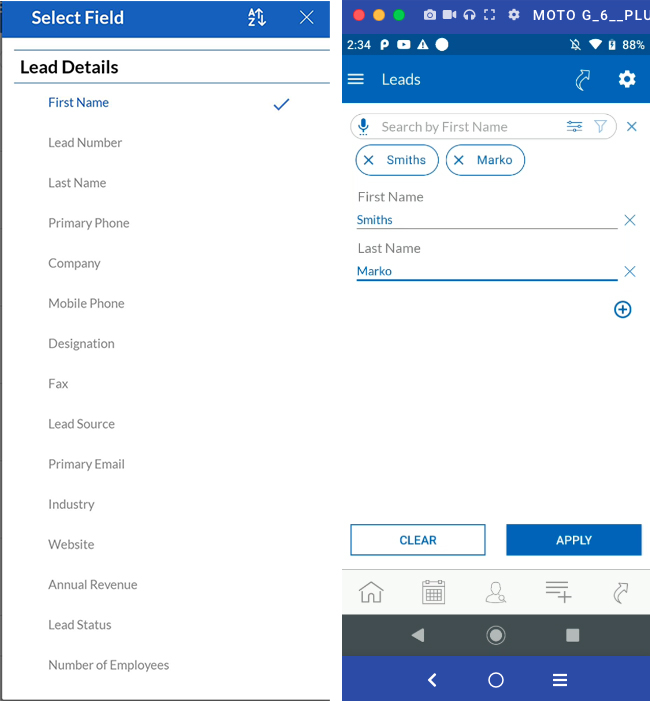
– When clicking on the search option, it will give a list of search fields the user might want to search with.

– Users can search with more than one parameter using multiple searches.
Search by Custom Filter
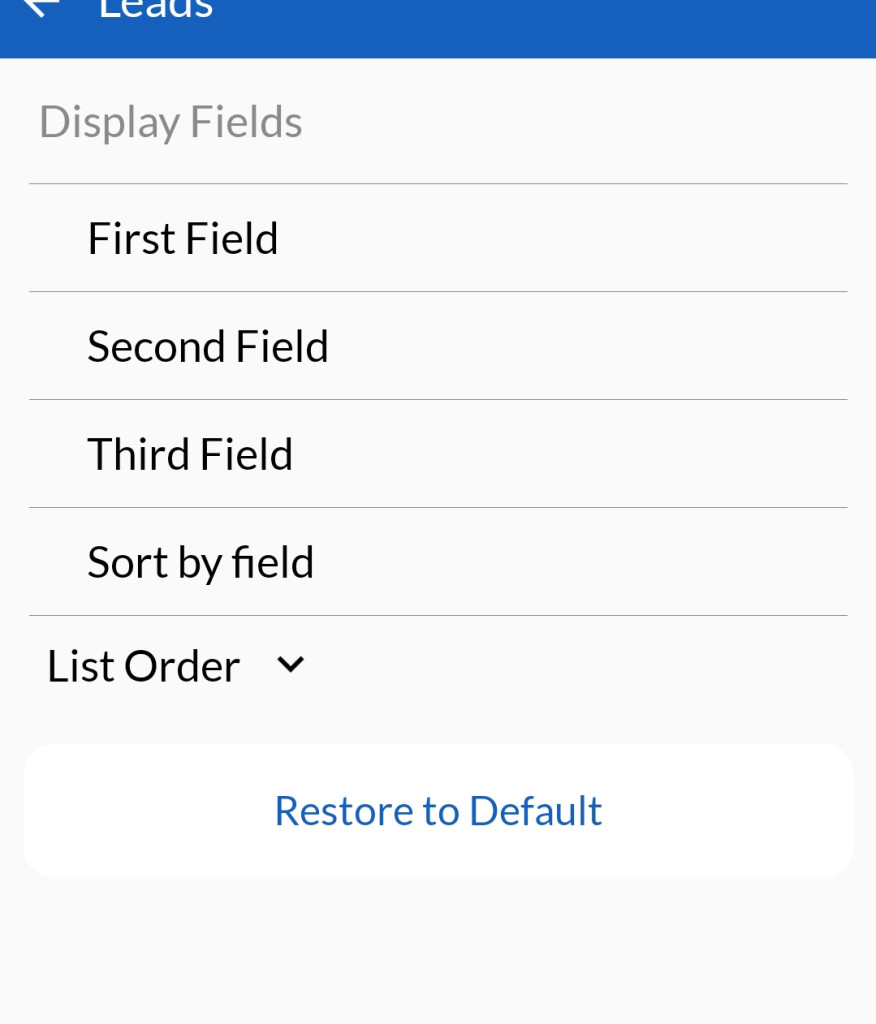
- This feature allows users to filter records using parameters such as the first field, second field, and third field to narrow down the search criteria.
- It also allows users to sort records using the list order option in ascending or descending order.
Custom Filter
- Filter-by-option allows users to create filters with custom conditions to ease record sorting.
Create Filter

The following are the steps to create own custom filter :
- Click on Create Filter.
- Enter the Custom Filter Name.
- Users can set this filter as a default filter or add it to the list of filters using List in Metrics and sort data using the parameter when required.
- Set a field using which users want to sort records, such as first name, last name, phone number, company, etc.
- Select conditions such as equals to, start with, end with, etc., and save.
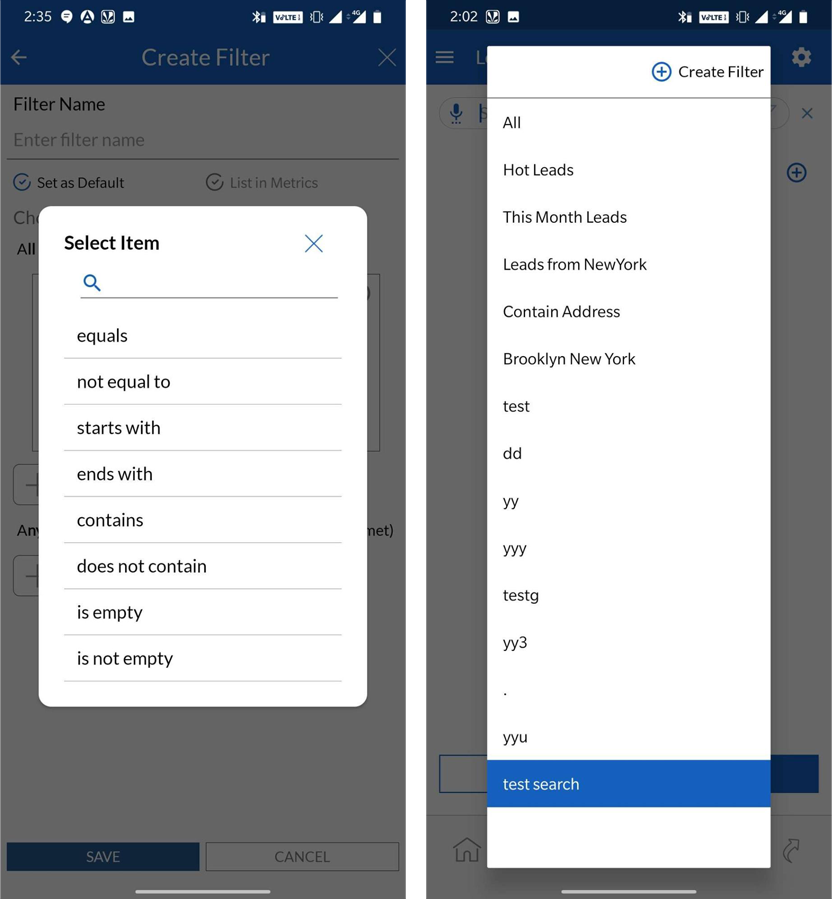
- Once saved it will appear in the list of filter metrics.
- This feature allows users to share leads or records with other users using supporting apps available on their devices, such as WhatsApp, mail, contacts, SMS, etc.
- Users will receive the shared resource in the form of a link that can be accessed by clicking on the link to view the resource.
- Users can share individual leads, contacts, or organizations using the share record option .
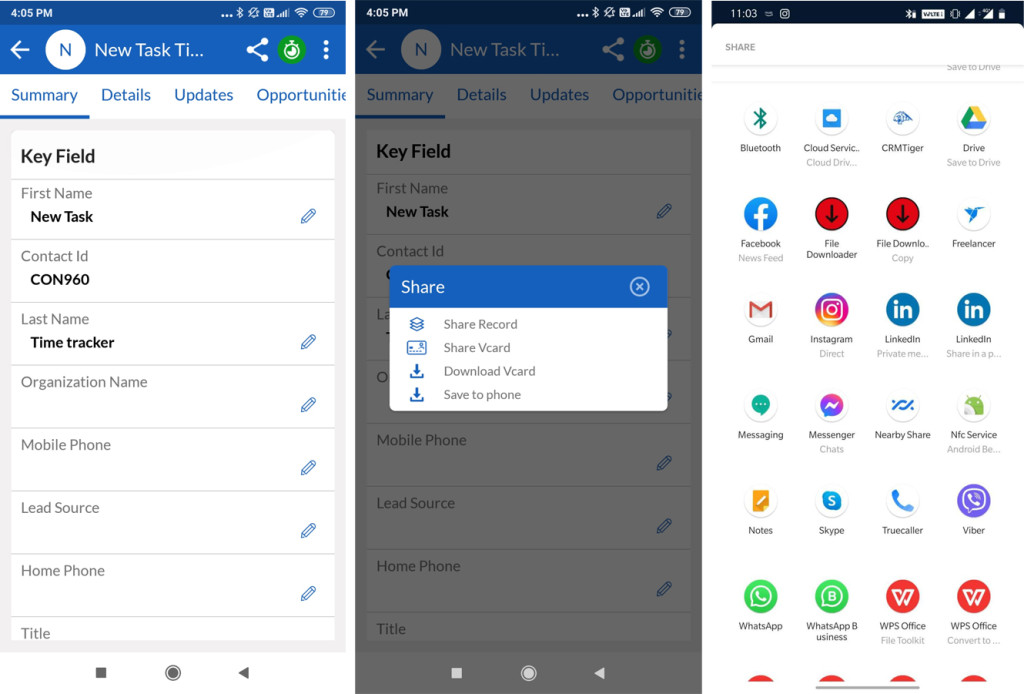 Share vCard
 - This option allows users to share a Vcard of any record directly with other users on supporting apps available on the device that has the SalesHiker app.
- Users can save record vcards on the device using the Save to Phone option.
- Admin
- Admin users can control the fields to be exported in the vcards while using the Share/Download Vcard option.
- Admin users can access the Vcard configuration settings using the following path:
- Go to Other Settings > SalesHiker Mobile App Settings > SalesHiker Mobile Apps – Fields Configuration > VCard Configuration.
- To configure or change the default settings of record fields, admin users are required to select the module, i.e., contacts, leads, or vendors.
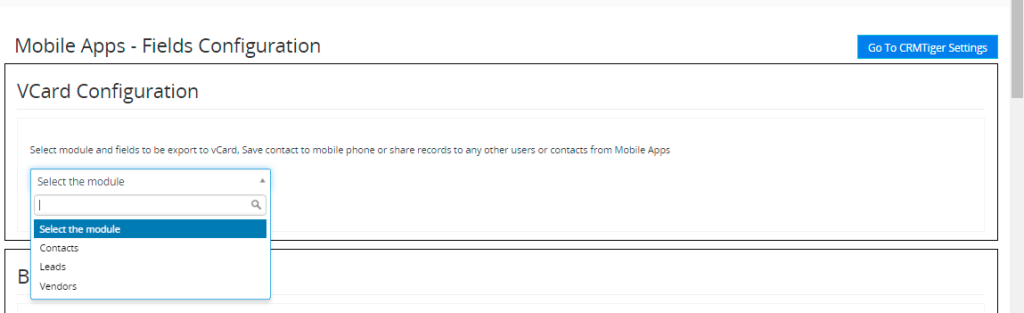
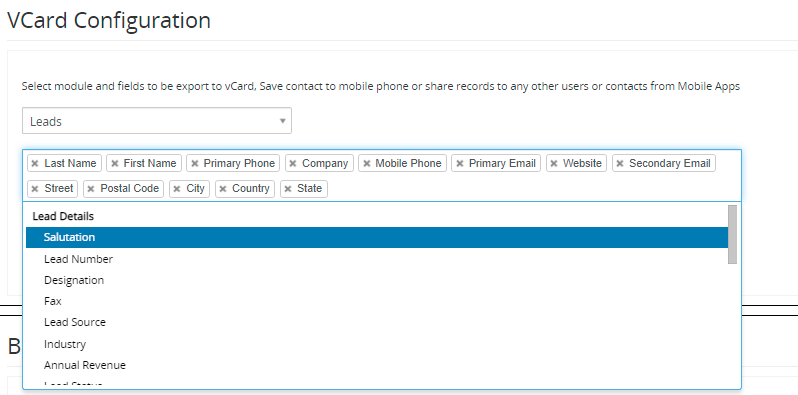
- Upon selecting the module, ex. Leads, admin users can add/remove required fields for the individual module and save.
- These settings will allow users to include required fields in the record vcards.
Asset/Card scanner
- Admin
- Admin users have control over this feature access. For users to access this feature, admins must enable it using premium feature management.
- Premium Feature Management settings are accessible using the following path:
- Go To Other Settings > SalesHiker Mobile App Settings > SalesHiker Mobile Apps – Feature management > Premium features management.

- Refer to Asset / Card Scanner configuration.
- To allow users to access QR/card scanner and Asset Tracking Turn ON/OFF the following options :
- Go To Other Settings > SalesHiker Mobile App Settings > SalesHiker Mobile Apps – Feature management > Premium features management.
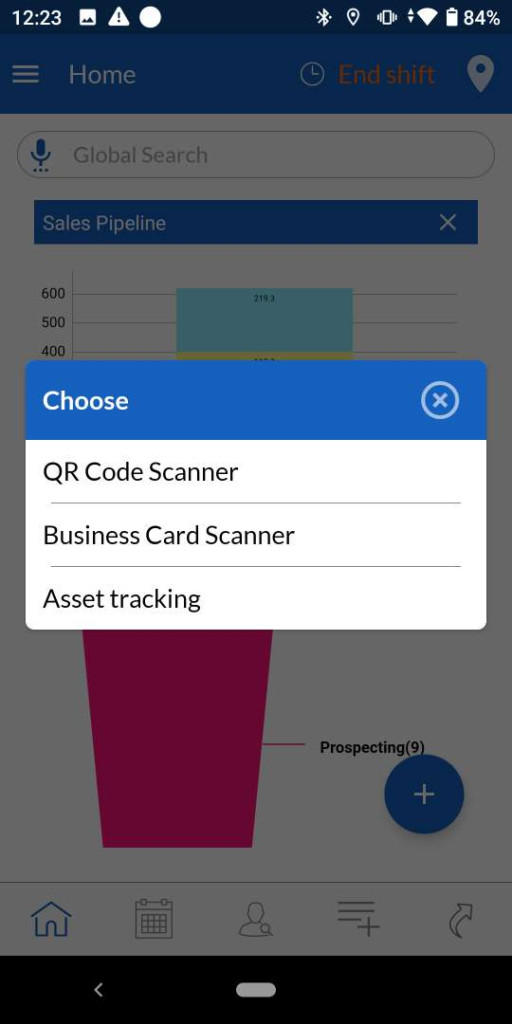
- QR Code Scanner
- Business Card Scanner
- Asset Tracking
Card Scanner
This feature allows users to scan assets such as a business card, QR code, product barcode, or product ID, which can be added as leads, contacts, or opportunities.
QR Code Scanner
This feature allows users to scan QR codes using the device camera of an organization or business, and this feature will help users fetch details automatically from the form fields and create a vcard for the records.
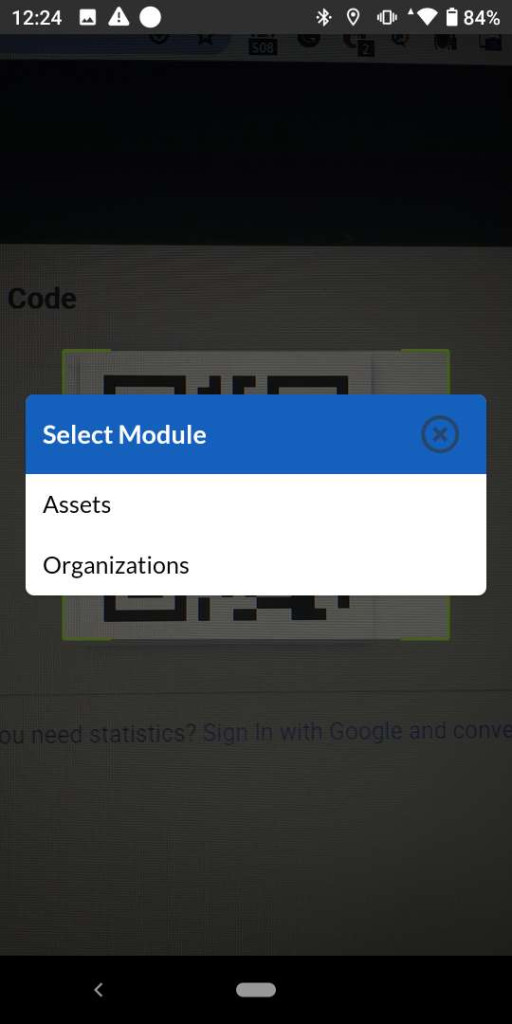
Select the contact type upon scanning QR Code.
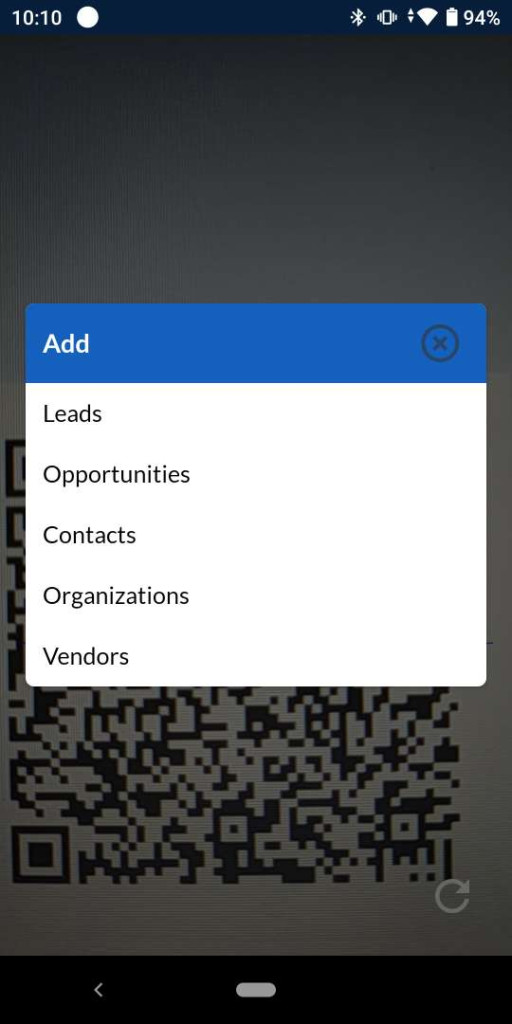
– Enter the required details in the selected contact type pop up form.
– Save the record as lead/opportunity/contact/organization/vendor.
Business Card Scanner
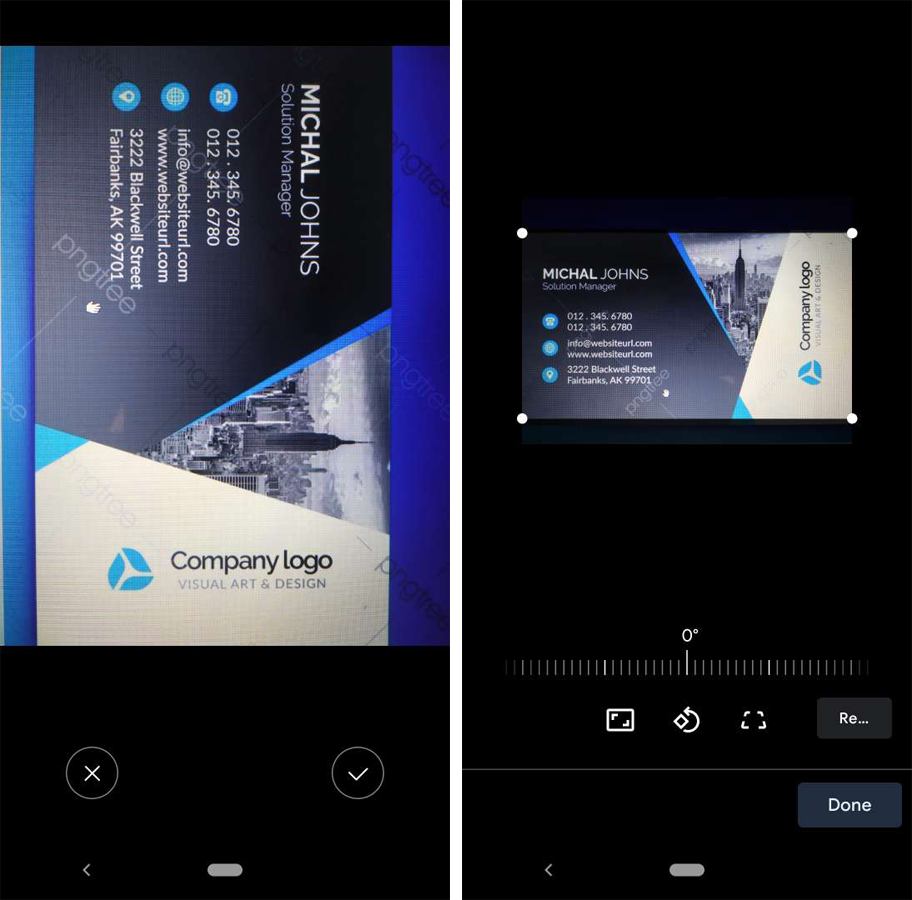
– If any business card doesn’t have a QR code, this feature allows users to scan business cards using a device camera to fetch details such as business name, person name, email, or phone number that will automatically fill in the required details to add the record.
– Adjust or edit the capture.
– Retake if required.
– Done to move further with a record entry.
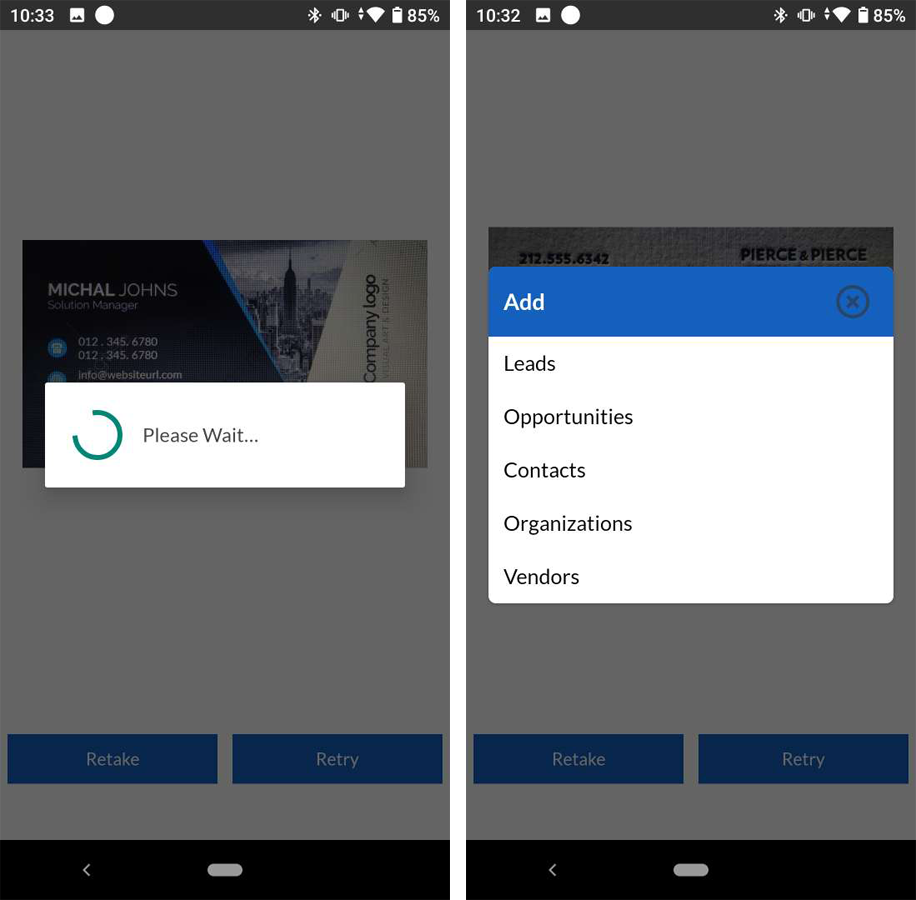
– Select the contact type of scanned card.
– Enter required details in the selected contact type pop up form.
– Save the record as leads, opportunities, contacts, organizations or vendors.
Asset tracking
– This feature is very useful for warehouses and organizations that have large numbers of assets to handle. Using this feature, they can scan the barcode available on a particular product, and the app will open those product details. The user can view or update required details, like stock management.
Admin
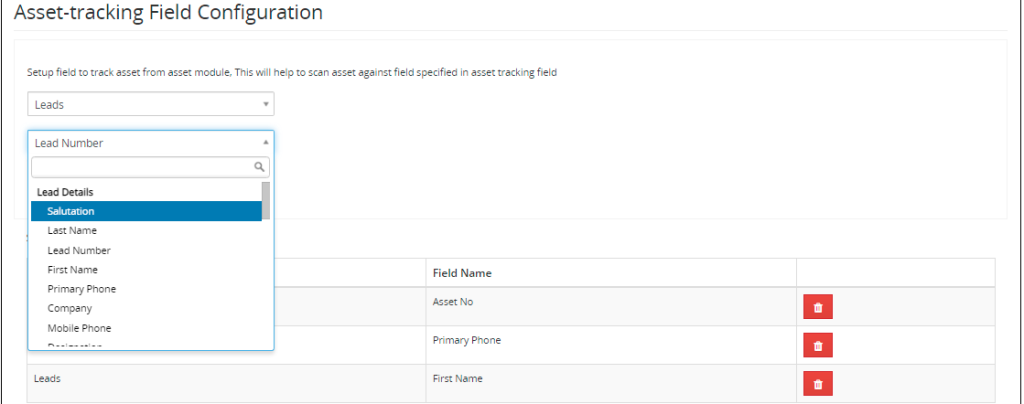
Admin users can control the asset fields of tracking against asset modules such as leads, contacts, organization, calendar, tickets etc.
Asset tracking field configurations are accessible using the following path :
- Go To Other Settings > SalesHiker Mobile App Settings > SalesHiker Mobile Apps – Fields Configuration > Asset-tracking Field Configuration.
- Select the asset module against which the user needs to track.
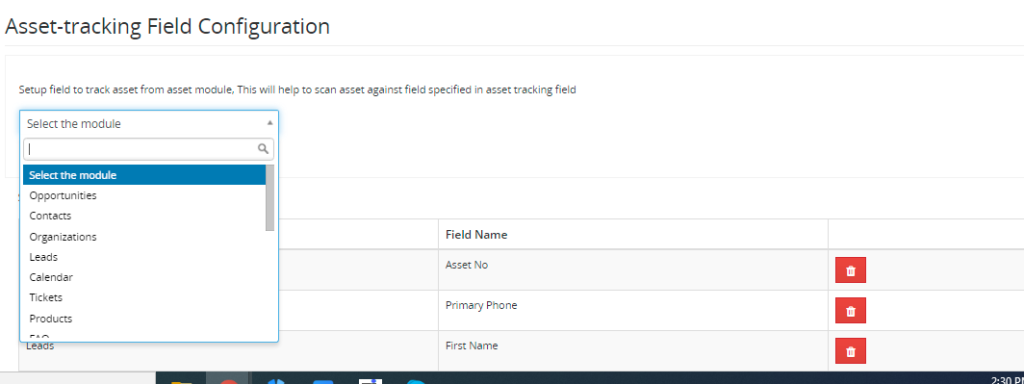
- Select the field of the asset module specifically against which tracking needs to be set and save the configuration.
- Barcode Field Configuration
- This feature allows admin users to set up the field of products for barcode scanning, such as product number or ID, product name, part number, etc., to add to the inventory.
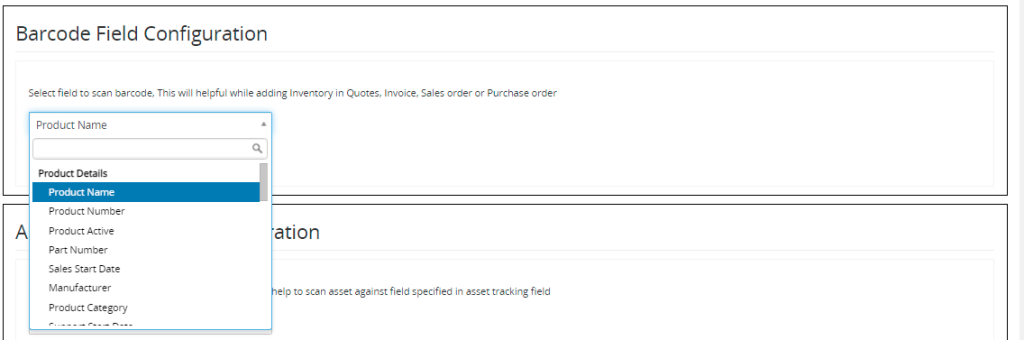
Barcode field configurations can be accessible using the following path :- Go To Other Settings > SalesHiker Mobile App Settings > SalesHiker Mobile Apps – Fields Configuration > Barcode Field Configuration.
- Select the product field to scan the barcode and save.
Live Tracking
- This feature will allow the admin or sales head to live track their on-field salesperson.
- Admin can control the live tracking list of users.
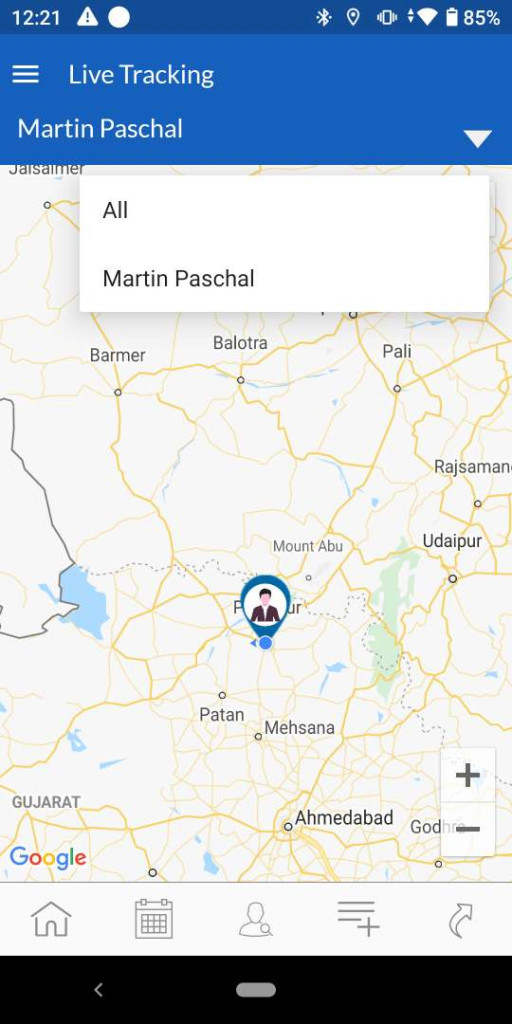
- Admin
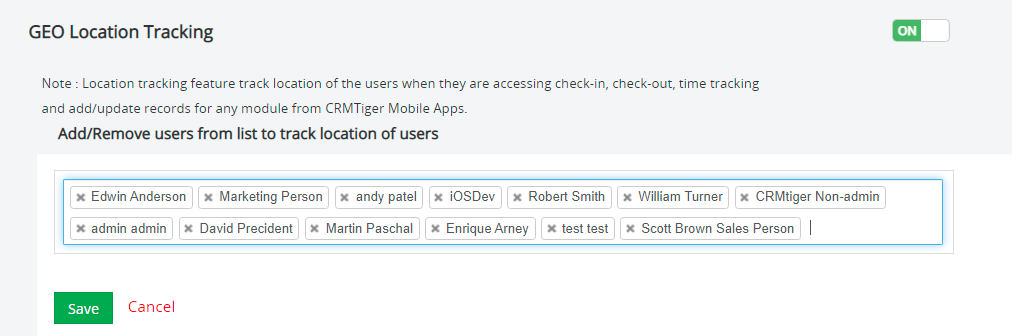
- Live tracking allows admin users to build a user list for whom they wish to set live tracking. Admins can add or remove users from the tracking list.
- Live tracking user settings are accessible using the following path :
- Go to Settings > Other Settings > SalesHiker Mobile App Settings > GEO Location Tracking
- Turn on or off the GEO location tracking to enable or disable live tracking.
- Add or remove the users from the list of locations that need to be tracked.

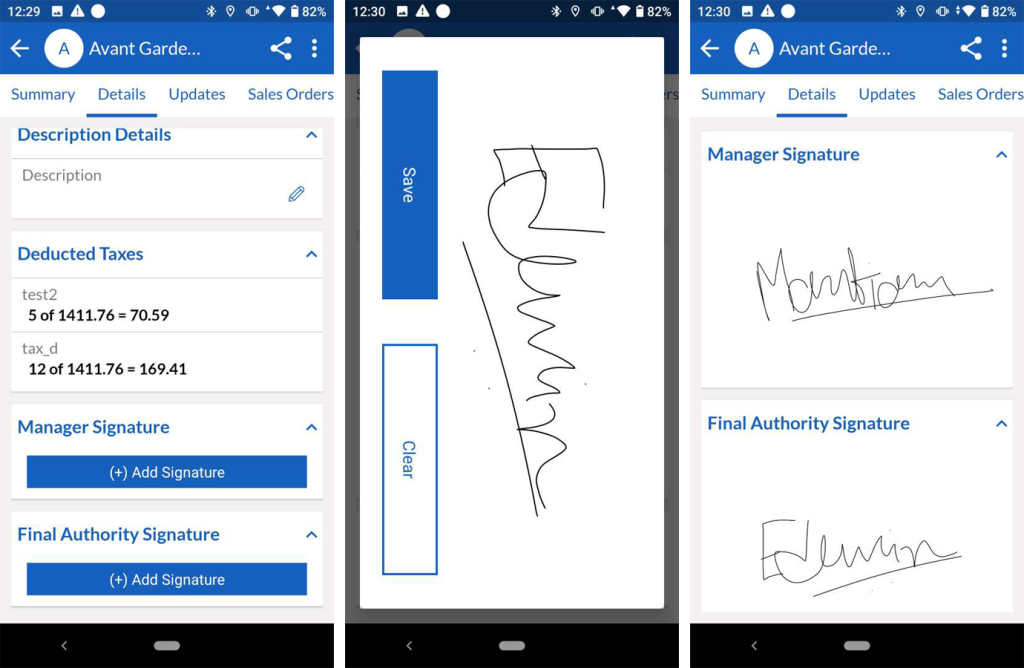
Electronics Signature
- This feature helps users with delivery- or service-based requirements where customer approval is required upon delivery or service completion by a team member.
- Admin
- This feature allows users to set up the signature field type against sales or service-based modules.
- Signature fields configuration are accessible using the following path :
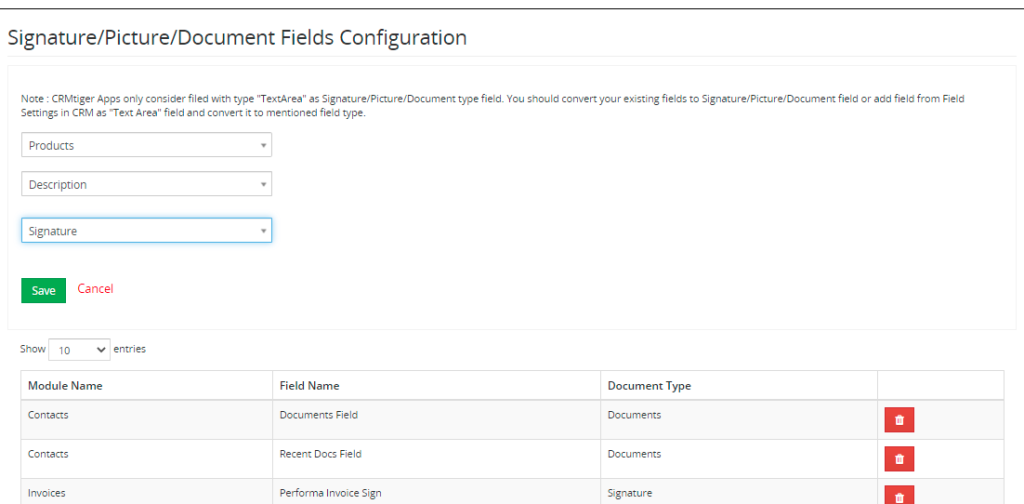
- Go to Other Settings > SalesHiker Mobile App Settings > SalesHiker Mobile Apps – Fields Configuration > Signature/Picture/Document Fields Configuration
- Select the module, such as product, leads, or opportunity, for which admin users are required to set up the signature type.
- Select the module Signature field.
- Select the signature field type and save.3
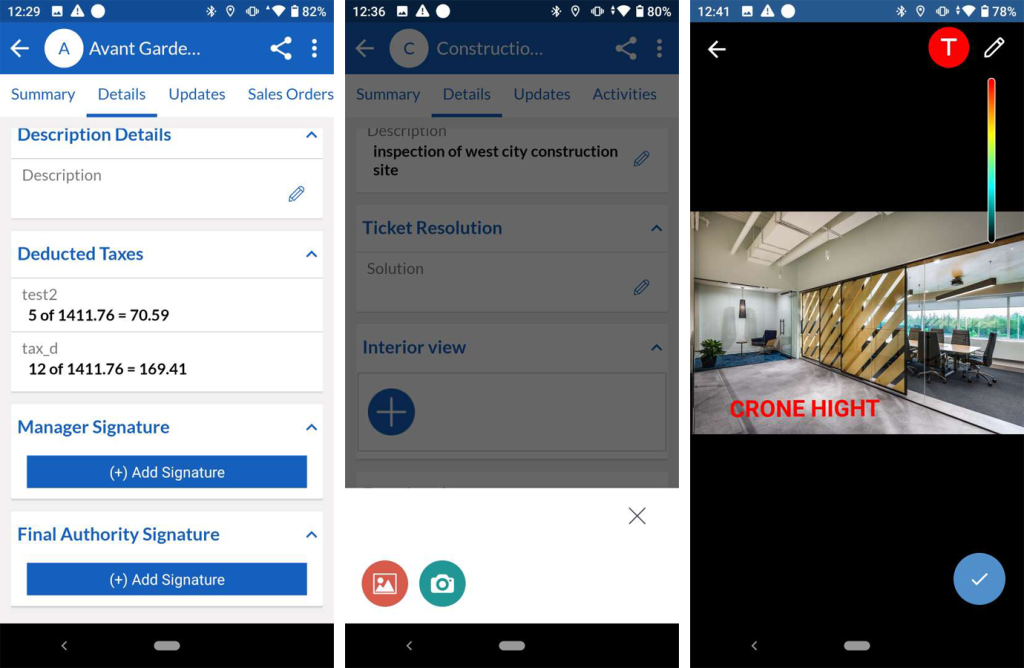
Site Inspection/Visit
- This feature is useful for industries that include site work such as construction and mechanical, where users may take pictures highlighting specific areas and taking notes.
- Admin
- This feature allows users to set up the photo/document type against the visit/project based modules.
- Photo/Document fields configuration are accessible using the following path :Electronics Signature
- Go to Other Settings > SalesHiker Mobile App Settings > SalesHiker Mobile Apps > Fields Configuration > Signature/Picture/Document Fields Configuration
- Select the module, such as project, site, organization, or opportunity, for which admin users are required to set up the picture or document type.
- Select the module field.
- Select the picture or document field type and save.
Route Planner
- Admin
- Route planner gives admin users control over building the user list that can access assigned routes.
- Route planner configuration settings are accessible using the following path :
- Go to Other Settings > SalesHiker Mobile App Settings > General Settings > Route Planner Configuration.
- Add users to be considered in route planner.
- Distance of the Route can be considered in miles/kilometers from the admin settings.
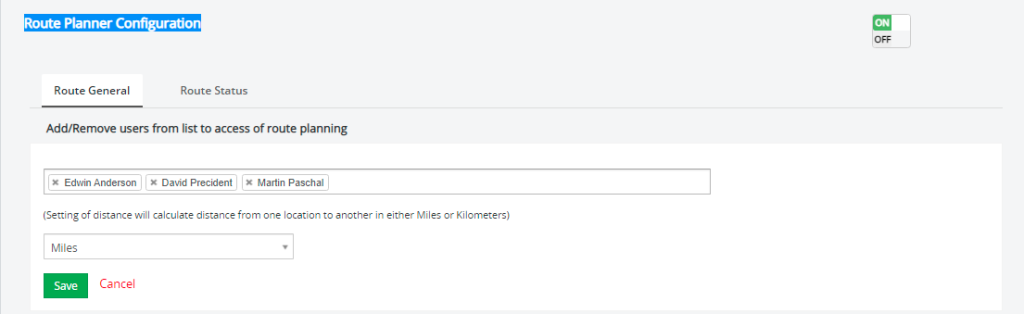
- Turn ON or OFF the Route Planner configuration to enable or disable users accessing Route Planner.
Create Route – Team Head
- This feature allows Admin Team head to create routes using this feature for team members. The following are the steps.–
- Go to Route Planner.
- Select the date of a route.
- Click on create route at ight bottom.
- Select modules of Route such as leads, contacts, organizations etc.
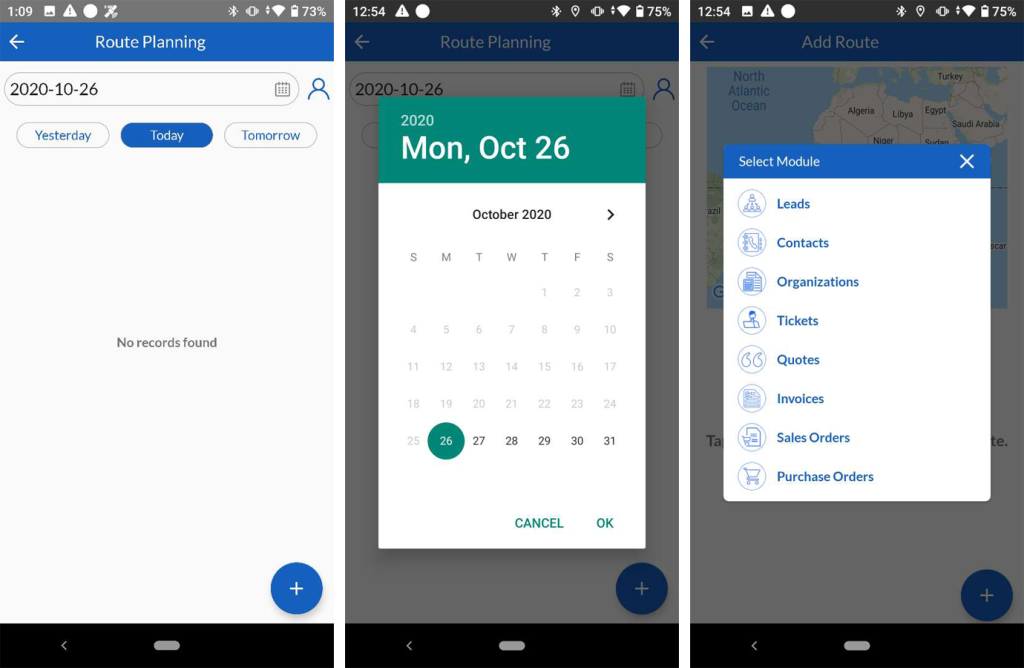
- Select one or multiple routes from the modules.
- Proceed further by click on the Create Route button.
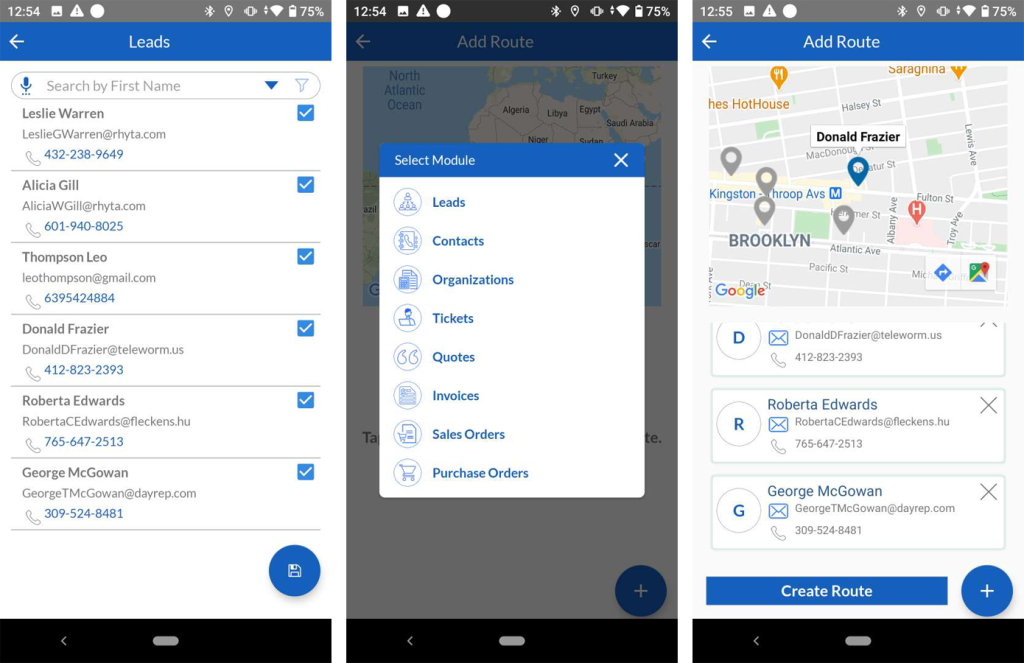
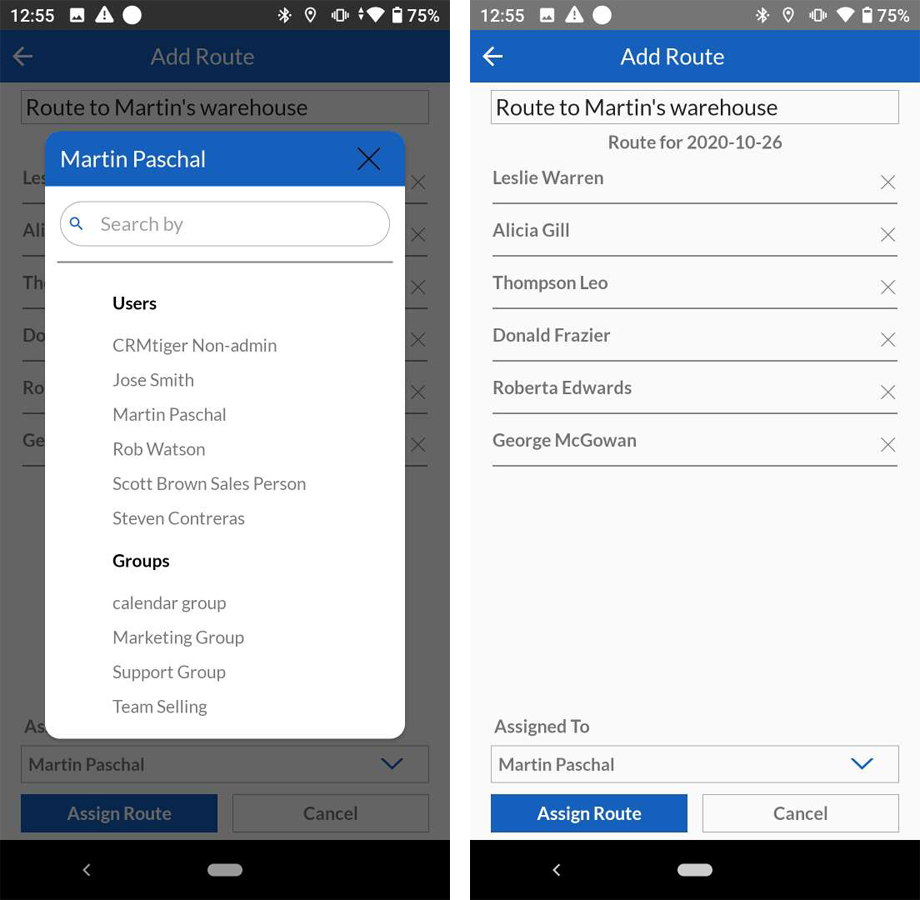
– Select team members or groups to be assigned to.
– Add route title.
– Assign Route.
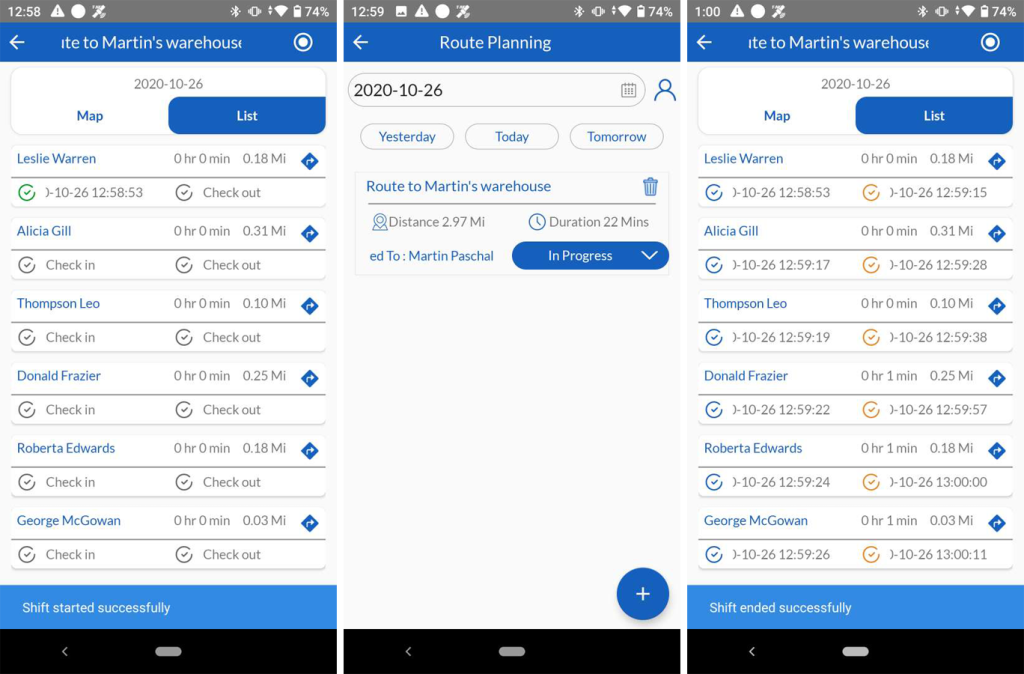
- Follow Assigned Route – User/Team member
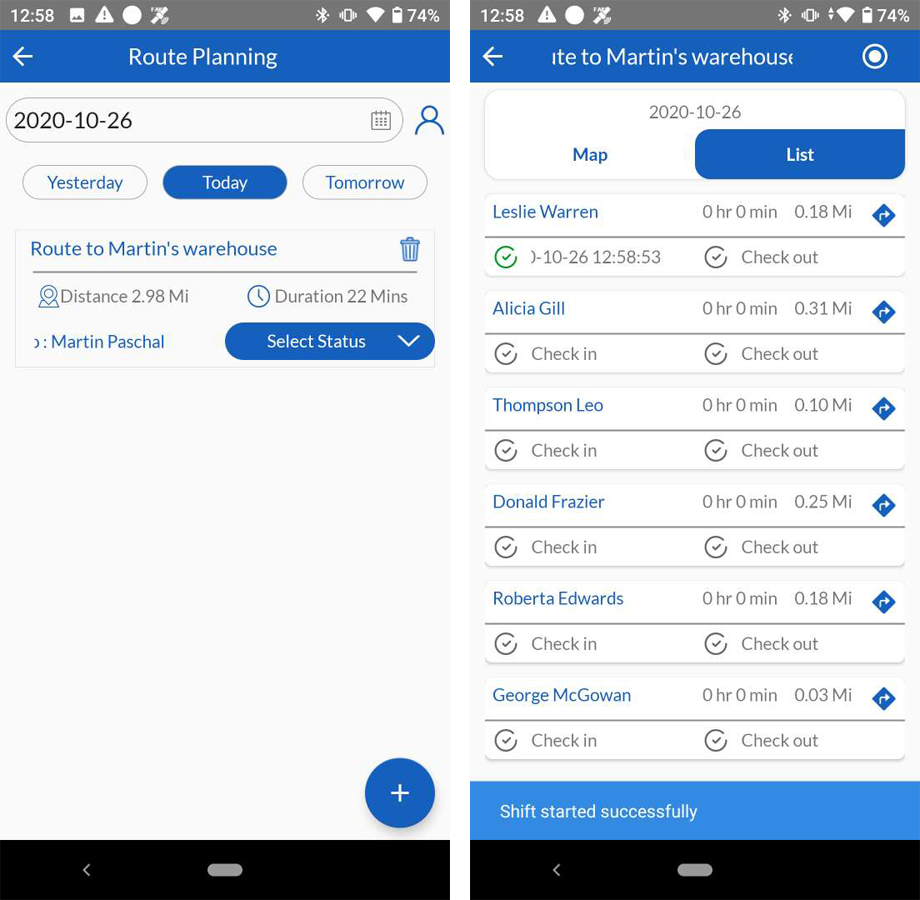
- Assigned Route users will be able to see their route planner in terms of list of leads/contacts or organization/opportunity.
- Direction to the route has been given to ease the user’s follow up.
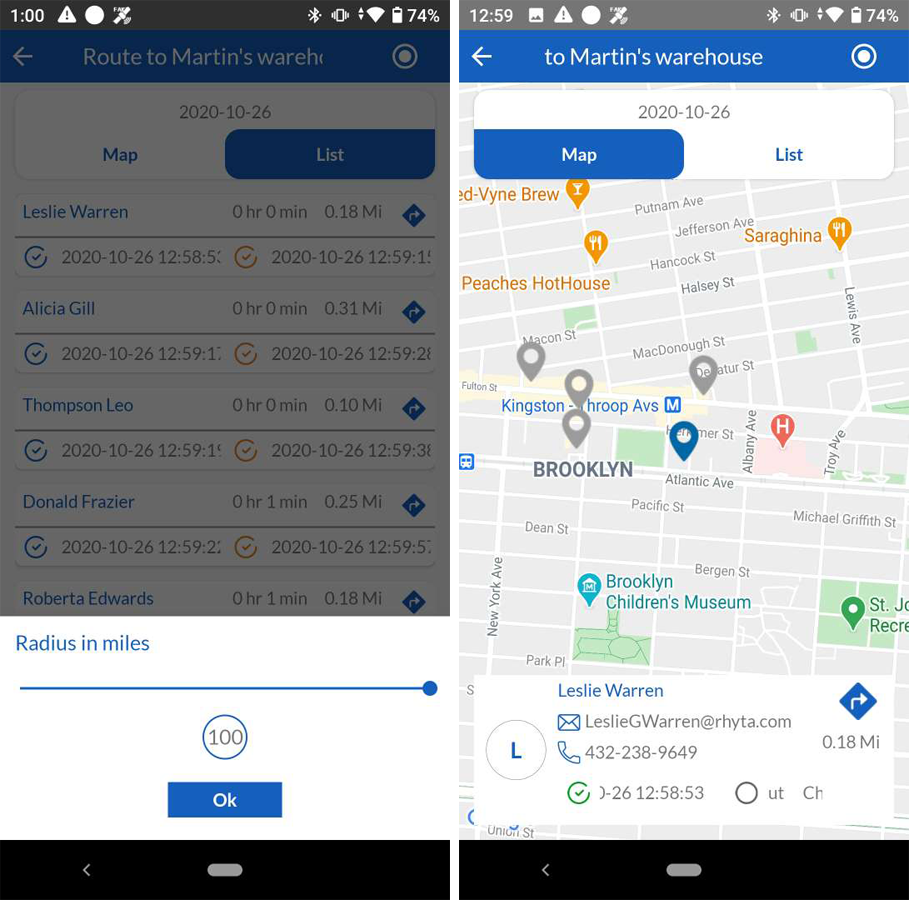
- Narrow down to get leads/opportunities in specific areas/radius using Radius in miles from the list.
- Check-in – Check-out
- With each route, when a salesperson checks-in to start the shift.
- As starts with the route, the status of the task is required to be updated from Select Status that is In Progress.
- On completion of visit/service, to end the shift , the salesperson clicks on the check-out.
- Update the status to Completed at the end of shift.
- Total working hours will be counted automatically.
- The process is repeated for each route to be followed by the salesperson.
Time Tracker
To keep track of spending time on each route or task by the salesperson, users can add a time tracker for multiple tasks, which users and admins will be able to track from particular tasks along with start-end time and total spend duration.
- Admin
- Admin Users are given rights to add modules for which records against the time tracker can be set. Admins can add or remove modules from the list.
- Timer Tracker Module Configuration settings are accessible using the following path:
- Go To Other Settings > General Settings > SalesHiker Mobile Apps – Feature management
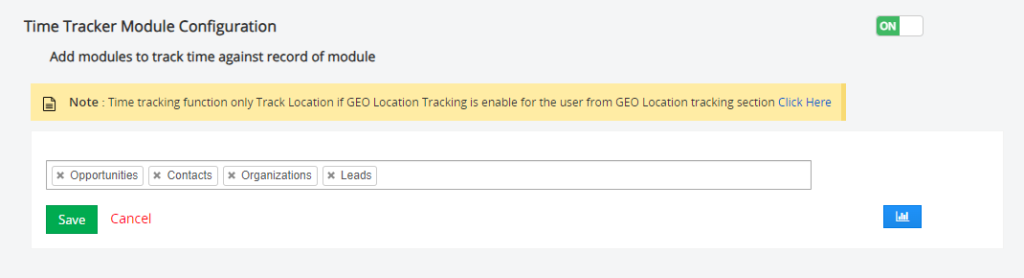
- Refer to Time Tracker Module Configuration.
- Add Modules form against the timer tracker.
- To allow users to access the Time tracker option, Turn ON/OFF Time Tracker Module Configuration.
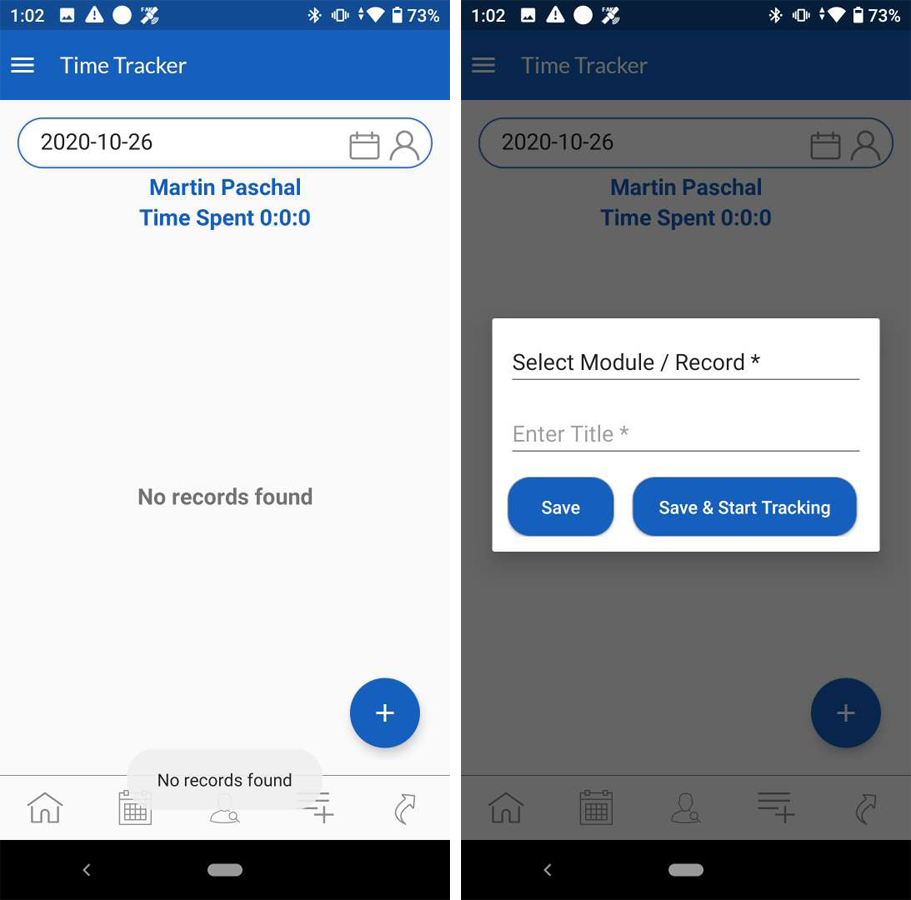
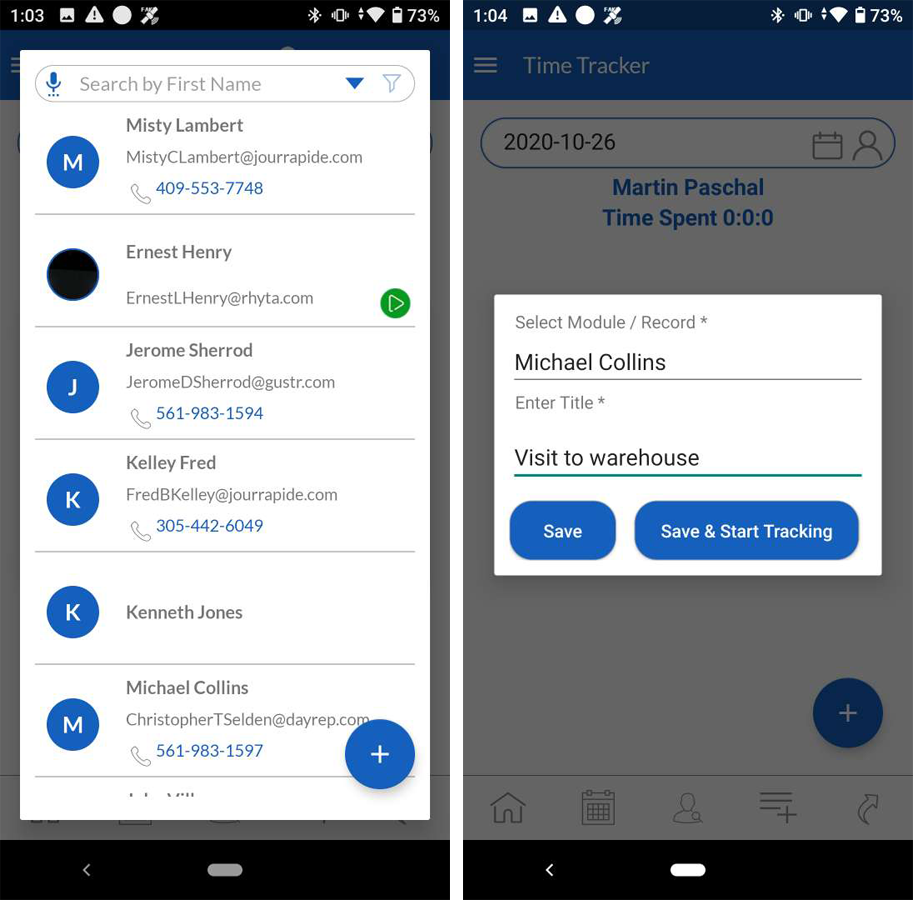
- Click on Add Time Tracker.
- Select module/record from the drop-down for which users want to add a tracker.
- Add a title to the tracker.
- The user can create and save a tracker for future use
- Save and start tracking.
- Once the tracker is created, users can click on the start timer to begin time tracking.
- Users can add notes here if required.
- To end tracking, click on the end timer.
- Go To Other Settings > General Settings > SalesHiker Mobile Apps – Feature management
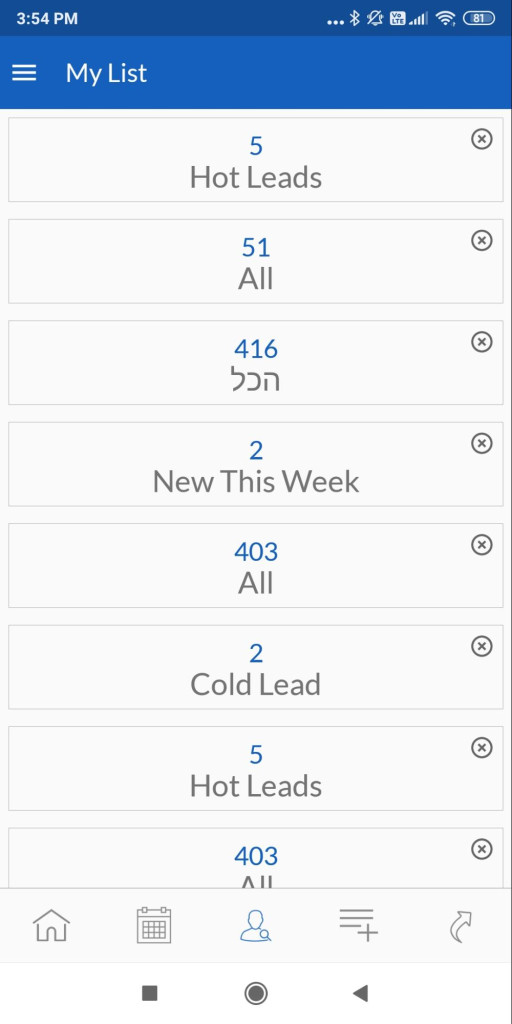
My List
- Personalize your quick view, such as hot leads, open tickets, cold leads, etc., using My List.
- To view detailed information, click on the respective module.
Mobile Apps – Settings
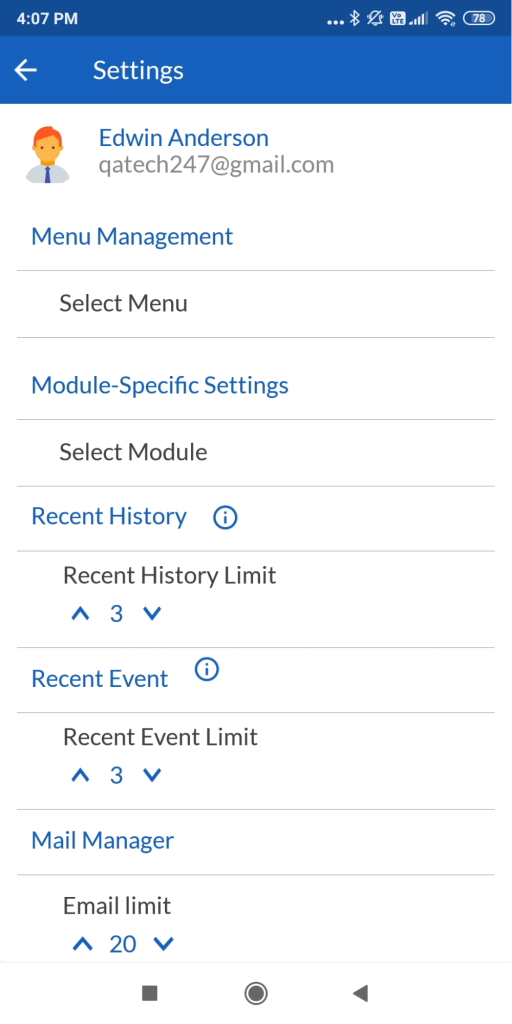
- Customize your screen listing view using the Module Specific Setting feature for the respective modules
- For example, in contacts, users want to modify the display order of details to First Name, E-mail, and Phone Number. Modifications can be made with the help of module-specific settings.
Menu Management
- This option allows users to manage the appearance of the main menu as per its usability. Users can hide or unhide the required main menu module or submodules.
- The menu management settings are accessible using the following path inside the mobile app.
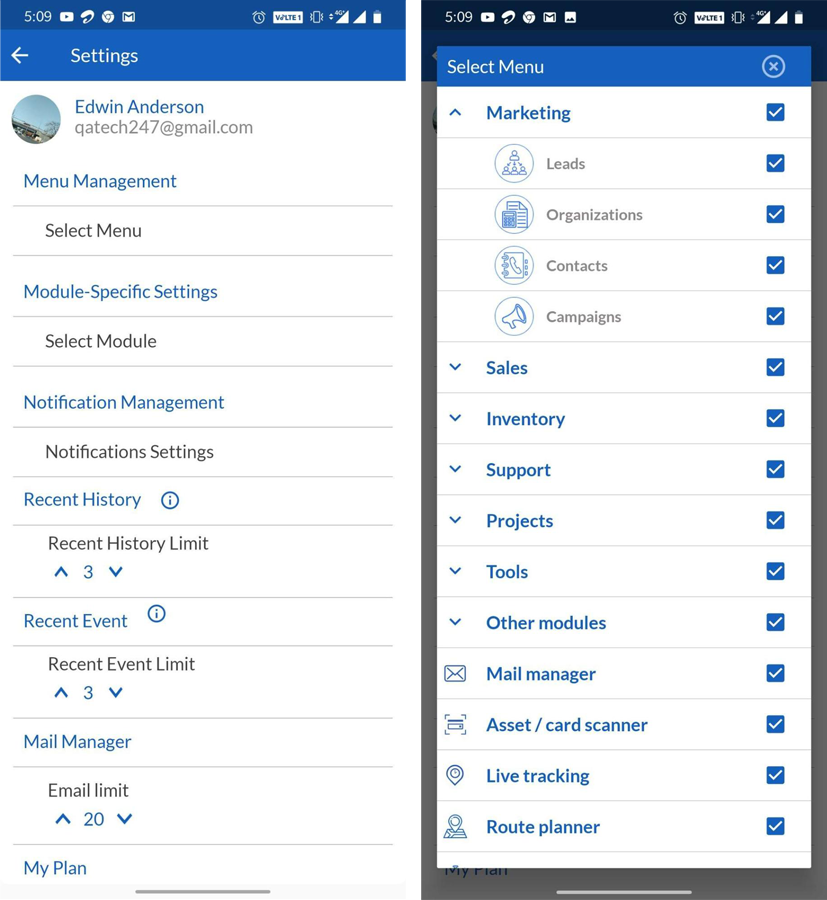
- The following are the step to access the menu management :
- Go to Main Menu > Settings > Menu Management.
- Refer Select menu, which will open up the default menu setup.
- Users can hide or unhide the main menu module or sub-module by marking the check.
Shortcut
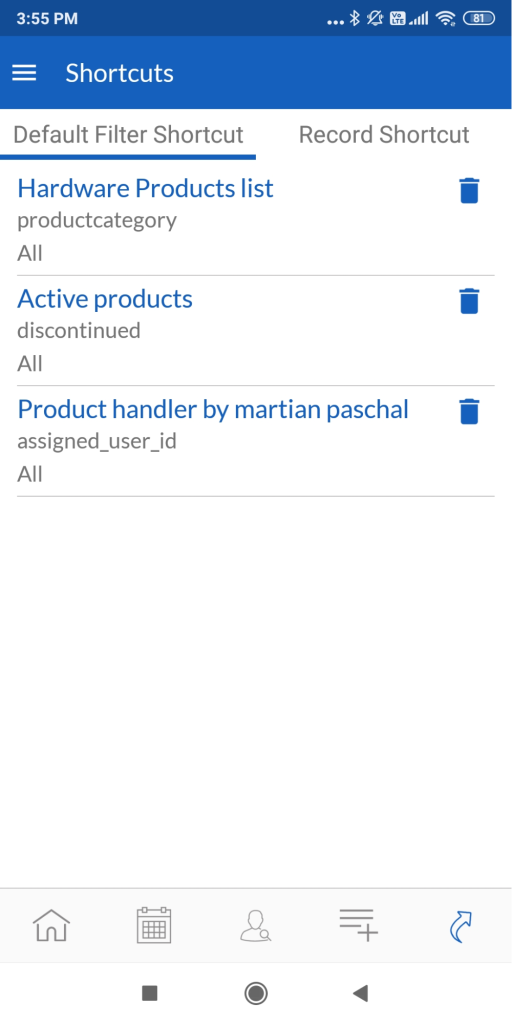
- Add shortcuts to your home screen for quick access to records.
- Types of Shortcut
- Record Shortcut: From any record screen, users can use the shortcut option to add the respective record’s shortcut at home.
- Default Filter Shortcut: From any record screen, users can apply any filter and add a shortcut to search result records at home as a default filter shortcut.
Voice Search
- Speed up search in the record list using voice search.
Comment & Mention Users
- This feature allows users or team heads to mention users in comments in record modules.
- Users can attach voice notes, attach documents, or send a text comment.
- @ mentioned users will receive a notification upon commenting by other users.
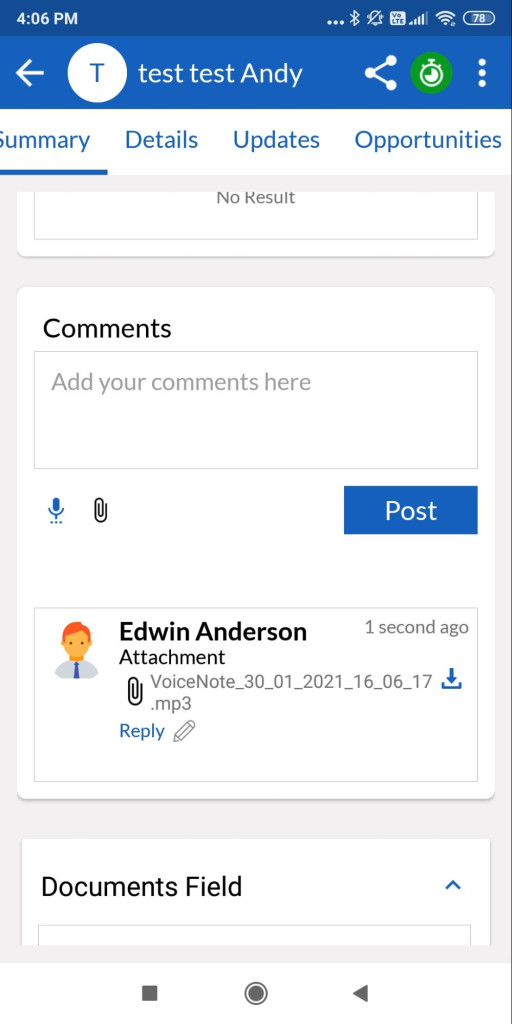
- The comment feature is accessible inside the individual record summary.
- Users can comment using ‘@user_name’.
Call Logging & Recording
- Call logging and recording allow users to log calls when calling prospects or customers from mobile apps by clicking on the phone number.
- This feature is not allowed or available for some mobile devices, like all iOS devices and some Android devices. The SalesHiker team created a list of the mobile devices that allow call logging and recording mentioned in the section “Device Support Call Logging and Recording.”
- Call logging configuration settings are accessible using the following path ;
- Go To Other Settings > SalesHiker Mobile App Settings > SalesHiker Mobile Apps – Feature management .
- Refer Call Logging Configuration to add users in the list.
- Admin users can prefer auto logging by check marking Auto create activities on the finish of call with Date & Time of call.
- This allows users to record calls, calculate call duration, call date & time and save the audio file in the device storage.
Users
- App users can set up the call logging storage path to save audio whenever they complete the call.
- Setting up storage path
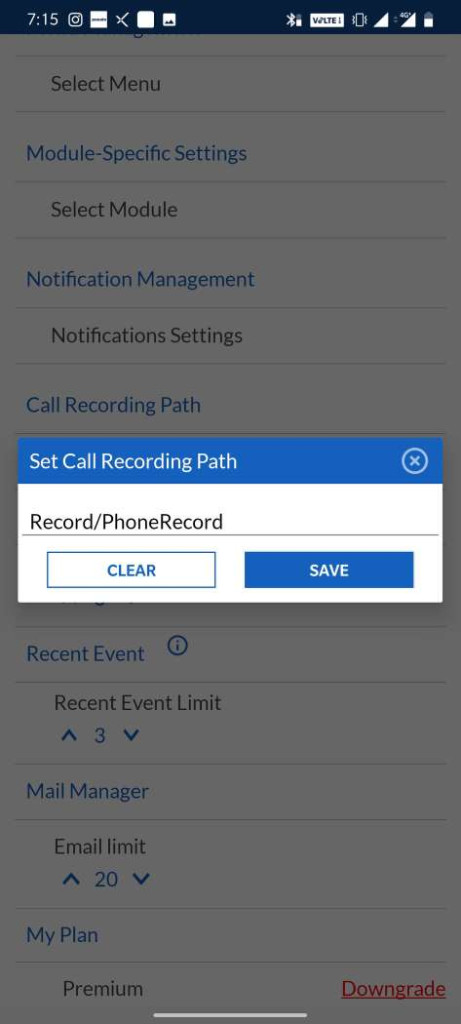
- This setting allows users to pre-define the storage path for logging in the call recordings.– The call logging setting can be accessible using the following steps :1. Go To Main menu > Settings 2. Refer to the Call Recording Path setting.3. Enter the storage folder path in the user device and save .This path will help users to navigate all call recording at one location. Call Recording & Storage This feature allows users to call any record directly using the device call feature, record the call and save the recording using the device storage.

- Call logging feature can be used with the following steps :– Go to any record, call an individual record, start the device phone recorder if available in the user device.– Upon completion of the call, SalesHiker mobile app will lead back inside the app, where a pop-up will be displayed.– A pop-up will fetch the storage path of a user device if already saved, else the user can upload the clip later.– It gives the option to add notes for an individual call if required.– The uploaded recording will be saved in Record details > Documents. Device Support Call Logging/Recording
No Company Name Model Number OS Version Recording Path 1 Samsung Galaxy A50 Android v9.0 (Pie) internalStorage/Call 2 Samsung Galaxy A30 Android v9.0 (Pie) – upgradable to Android 10 internalStorage/Call 3 Samsung Galaxy A20 Android v9.0 (Pie) internalStorage/Call 4 Samsung Galaxy A10 Android 9.0 (Pie), upgradable to Android 10 internalStorage/Call 5 Xiaomi Mi A2 Android 8.1 (Oreo), upgradable to Android 9.0 (Pie) internalStorage/MIUI/sound_recorder/call_rec 6 Xiaomi Mi Note 4 Android 6.0 (Marshmallow), upgradable to 7.0 (Nougat), MIUI 11 internalStorage/MIUI/sound_recorder/call_rec 7 Xiaomi Mi Xiaomi Mi A3 Android 9.0 (Pie), upgradable to Android 11, Android One internalStorage/MIUI/sound_recorder/call_rec 8 realme x2 Android 9.0 (Pie), upgradable to Android 10, realme UI internalStorage/phoneStorage/Music/Recordings/Call Recordings 9 realme 2 Android 8.1 (Oreo), upgradable to Android 9.0 (Pie), ColorOS 6 PhoneStorage/Recordlings/callrecordings 10 Mi Note K20 pro,Note K20 Android 9.0 (Pie), upgradable to Android 10, MIUI 12 internalStorage/MIUI/sound_recorder/call_rec 11 Mi 5 Android 6.0 (Marshmallow), upgradable to Android 8.0 (Oreo), MIUI 10 internalStorage/MIUI/sound_recorder/call_rec 12 Mi 5s Android 6.0 (Marshmallow), upgradable to 7.0 (Nougat), MIUI 10 internalStorage/MIUI/sound_recorder/call_rec 13 Mi 5s Plus Android 6.0 (Marshmallow), upgradable to 7.0 (Nougat), MIUI 10 internalStorage/MIUI/sound_recorder/call_rec 14 Mi 6 Android 7.1.1 (Nougat), upgradable to Android 9.0 (Pie), MIUI 8 internalStorage/MIUI/sound_recorder/call_rec 16 Mi 8 SE Android 8.1 (Oreo), MIUI 9.5 internalStorage/MIUI/sound_recorder/call_rec 17 Mi 8 Lite Android 8.1 (Oreo), upgradable to Android 10, MIUI 11 internalStorage/MIUI/sound_recorder/call_rec 18 Mi 9 Lite Android 9.0 (Pie), upgradable to Android 10, MIUI 11 internalStorage/MIUI/sound_recorder/call_rec 19 Mi Mi 9 Pro,Mi 10 youth,Mi 10 Lite Zoom Android 10, MIUI 11 internalStorage/MIUI/sound_recorder/call_rec 20 Mi Mi Note 10 Lite Android 10.0 + MIUI 11 internalStorage/MIUI/sound_recorder/call_rec 21 Mi Mi Note 10 Pro Android 9.0 (Pie), upgradable to Android 10, MIUI 12 22 Mi Mi Max 2 Android 7.1.1 (Nougat), MIUI 11 internalStorage/MIUI/sound_recorder/call_rec 23 Mi Mi Max 3 Android 8.1 (Oreo), upgradable to Android 10, MIUI 11 internalStorage/MIUI/sound_recorder/call_rec 24 Mi Mi MIX Android 6.0 (Marshmallow), upgradable to 7.0 (Nougat), MIUI 10 internalStorage/MIUI/sound_recorder/call_rec 35 Mi Mi MIX 2 Android 7.1.1 (Nougat), MIUI 11 internalStorage/MIUI/sound_recorder/call_rec 26 Mi Mi MIX 3, Pocophone F1 Android 8.1 (Oreo), upgradable to Android 10, MIUI 12 27 Mi Redmi 5,Redmi 5A, Redmi 5 Plus Android 7.1.2 (Nougat), MIUI 11 internalStorage/MIUI/sound_recorder/call_rec 28 Mi Redmi 10X, Redmi 10X Pro, Redmi Note 9 Pro, Redmi K20 Pro Premium, Redmi K30i, Redmi K30i 5G, Redmi K30 Pro , Redmi K30 5G Android 10, MIUI 11 internalStorage/MIUI/sound_recorder/call_rec
- *There may be other device support Call Logging/recording, above list is just for informational purpose.
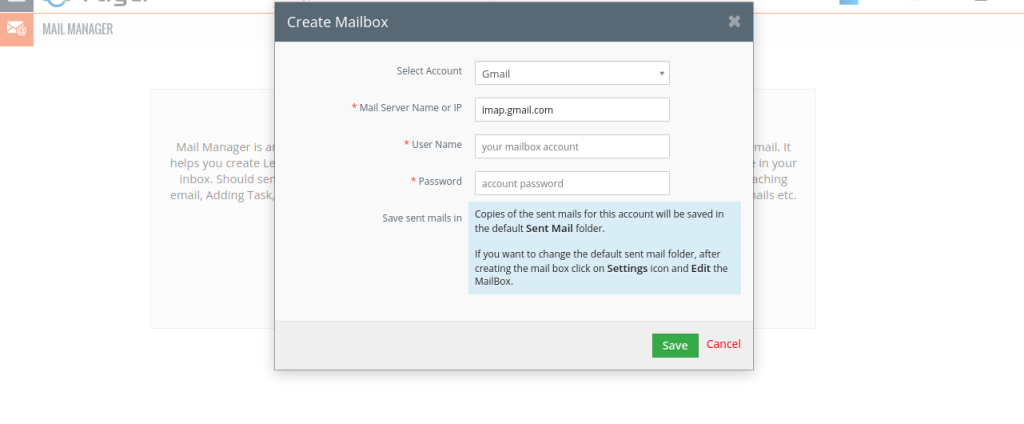
Mail Manager
- Admin
- Users are required to configure mail before integrating multiple mail accounts in the mail manager.
- Mail manager settings are accessible using the following steps:
- Go to Other Settings > Mail Manager
- Click on Configure Mailbox.
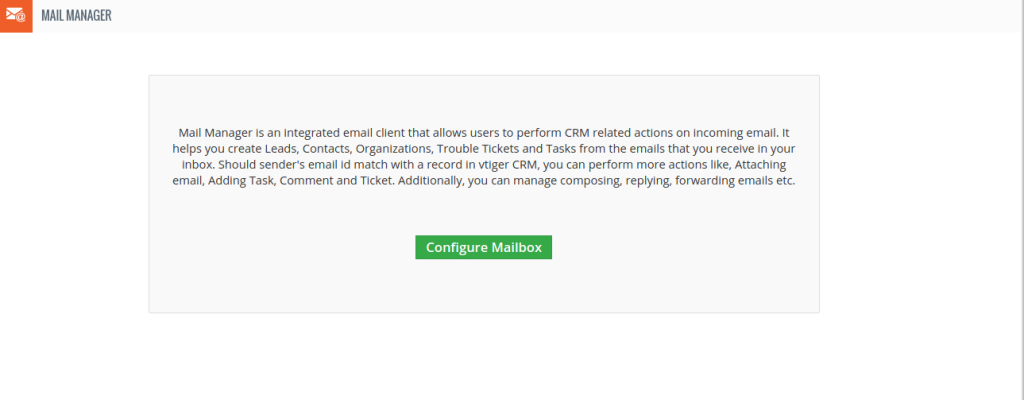
- Enter the required details of the mail server and save.
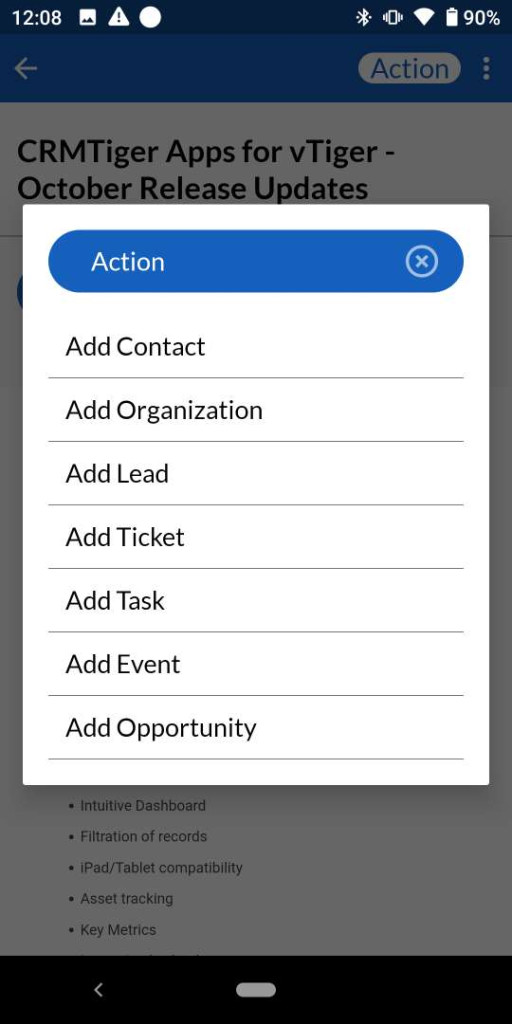
- Users
- Configure multiple mail accounts on a single platform for easy access to user emails.
- Mail manager allows users to narrow down searches by applying search criteria, and categorizing emails in separate folders.
- Users can build contacts, Add organizations, lead / Attach Documents, tickets, or opportunities.
 by
by