Adding the Catalogue and Products in Meta
This functionality enables seamless integration between the product catalogue configured in Meta Platforms and the CRM system. It allows businesses to synchronize catalogue products with the CRM and use them within chatbot workflows to automate product selection and order creation.
With this integration, businesses can manage products from a central location, display them dynamically during chatbot interactions, and automatically generate transaction records such as Sales Orders, Invoices, Quotes, or Purchase Orders.
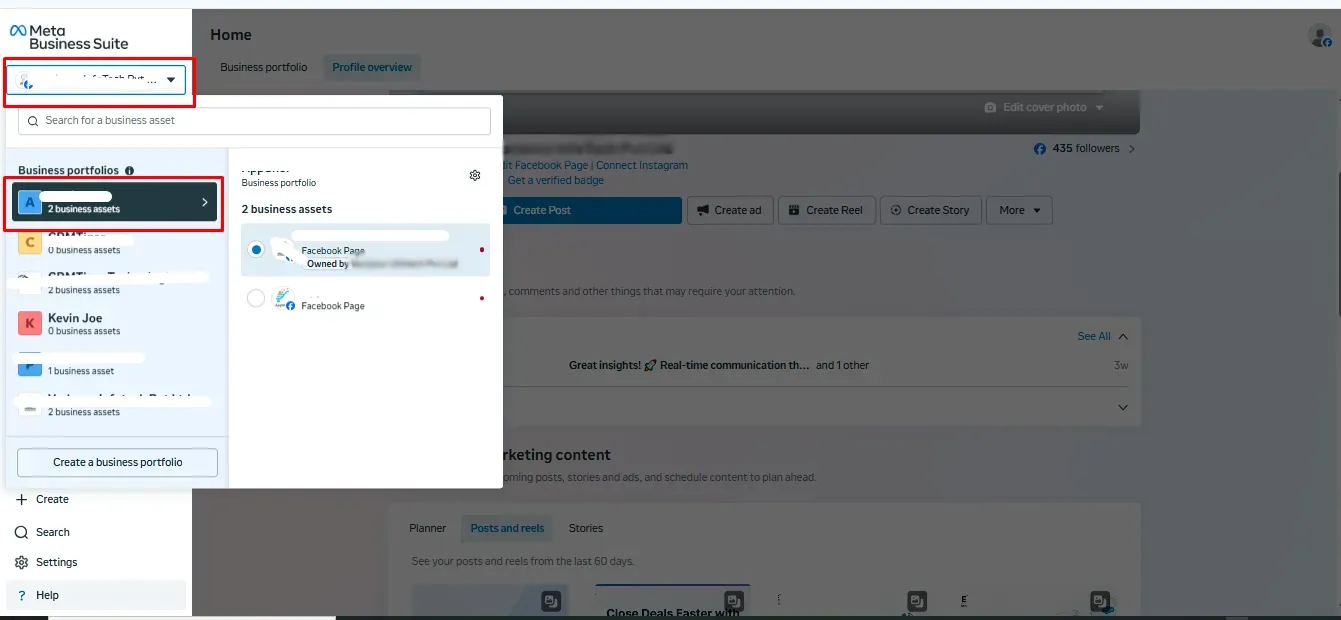
To get started, log in to your Meta Business account and select your Business Profile to add a catalogue.
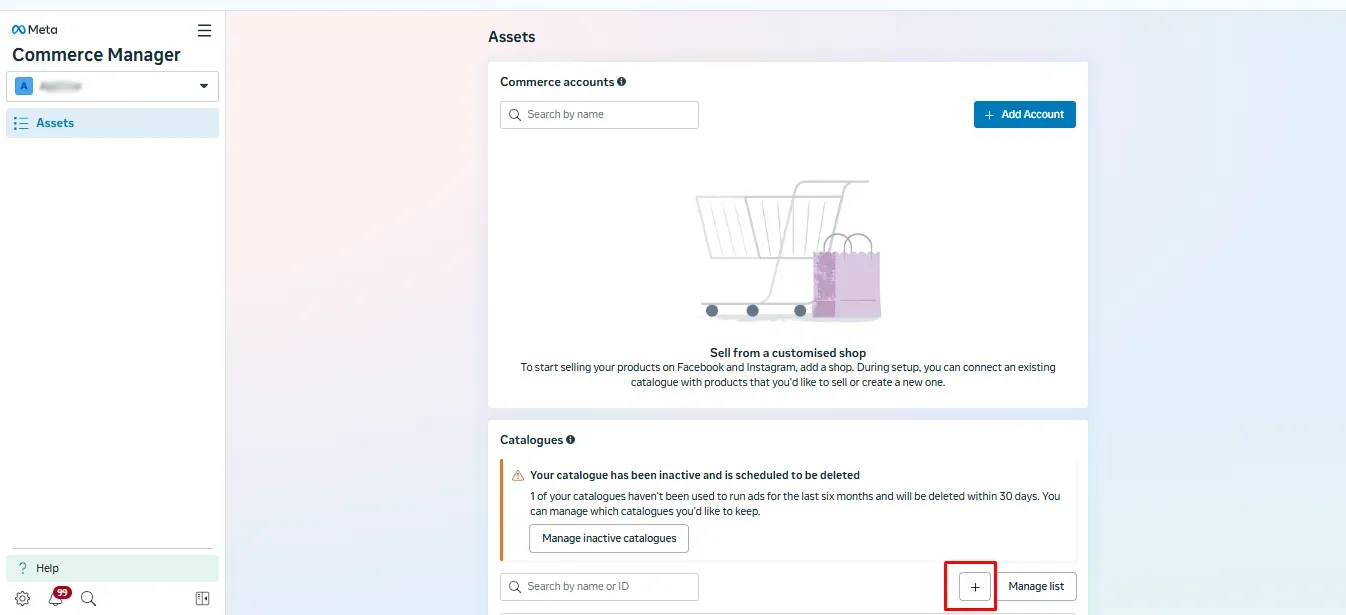
Navigate to All Tools from the sidebar, then select Commerce Manager to continue.

Click on the + (Add) icon to create a new catalogue.
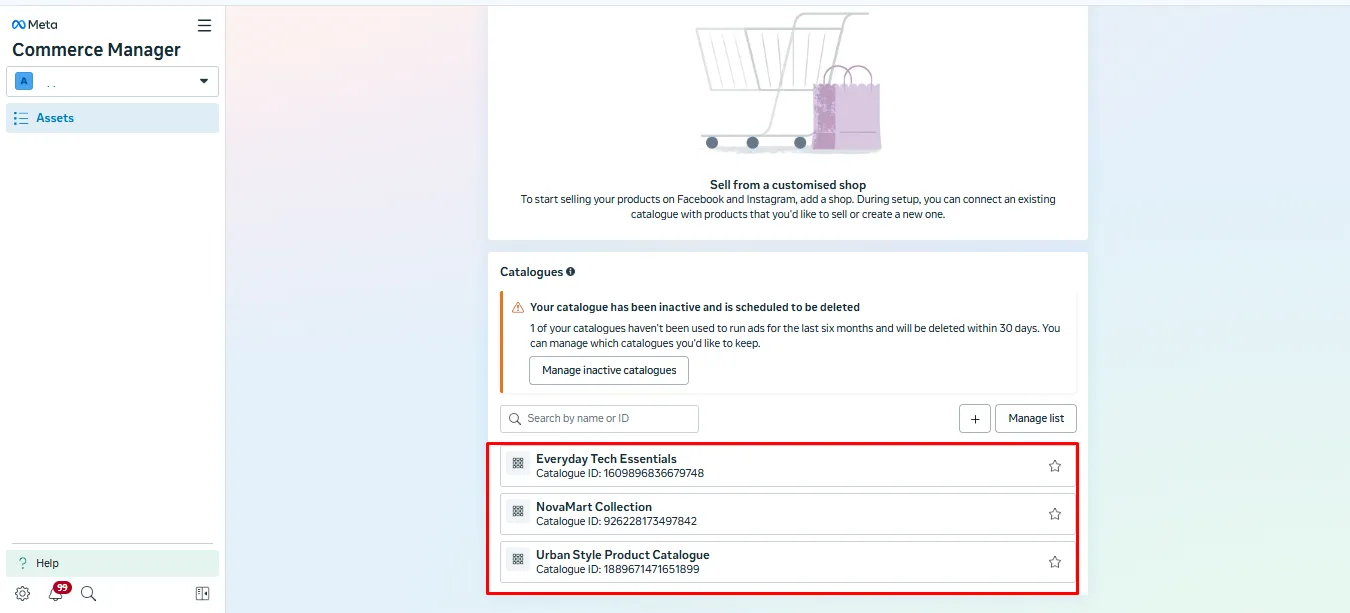
After the catalogue is created, the user will see the list of catalogues on the same page.
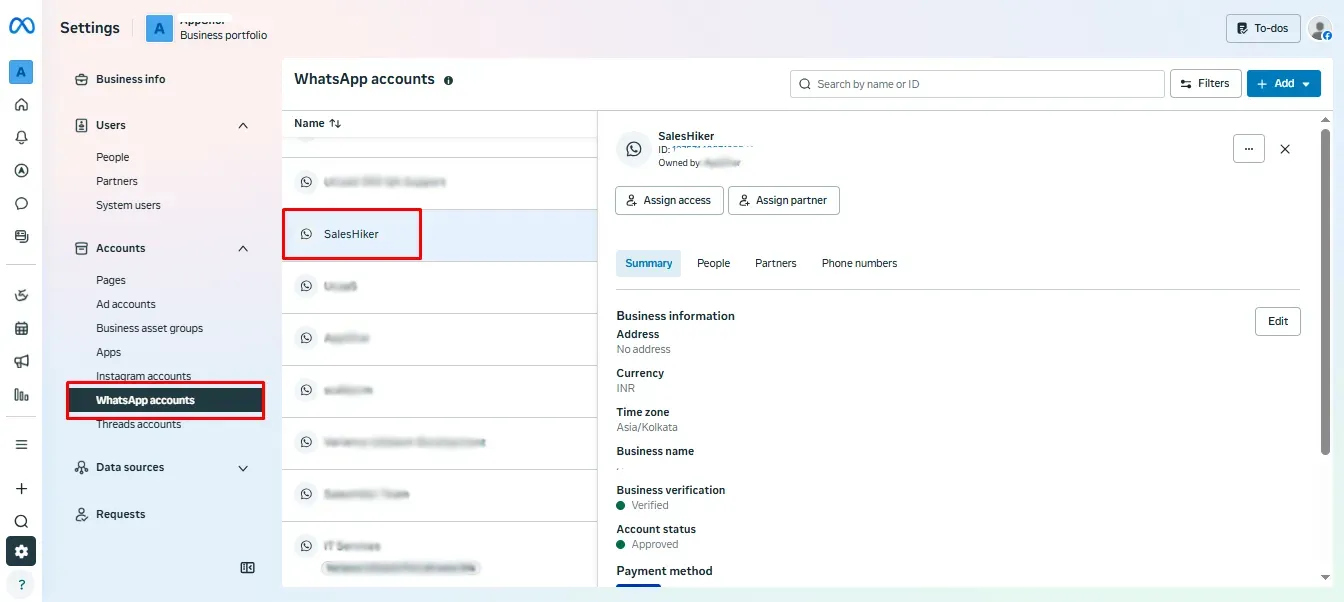
After that, navigate to the Business Account Settings, as shown in the screenshot below.

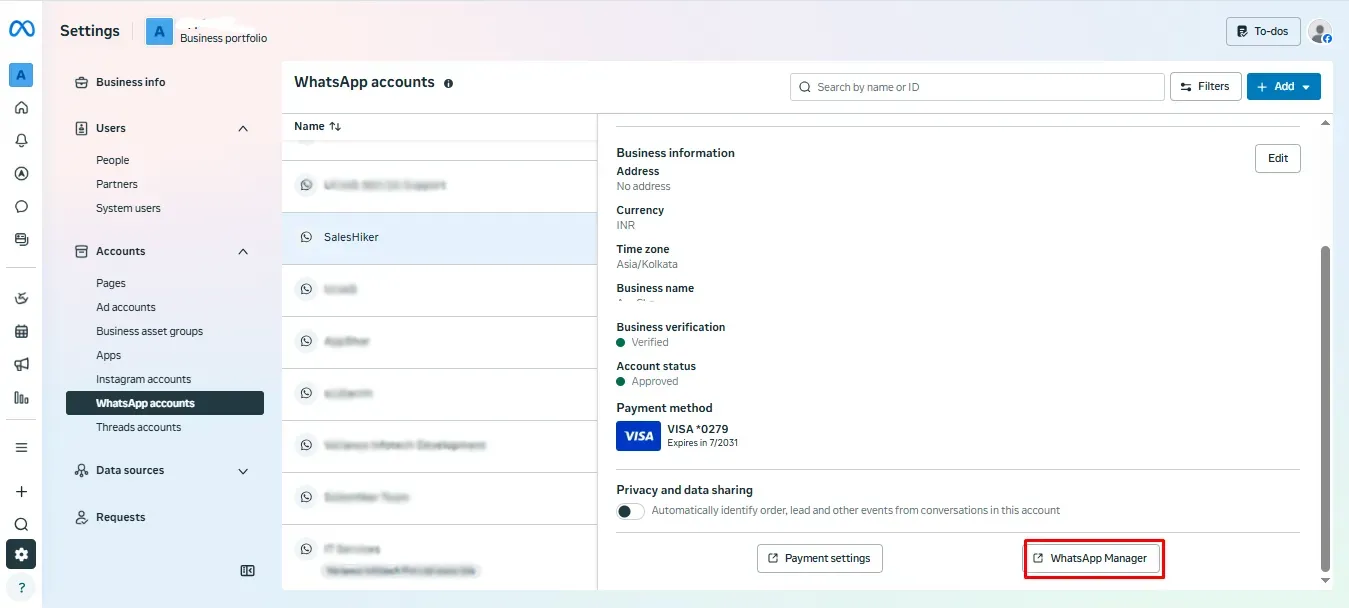
After clicking on “Settings,” select “WhatsApp Accounts” and choose the WhatsApp account connected to your CRM’s WhatsApp Business configuration.
After that, click on the “WhatsApp Manager” button, as shown in the screenshot below.
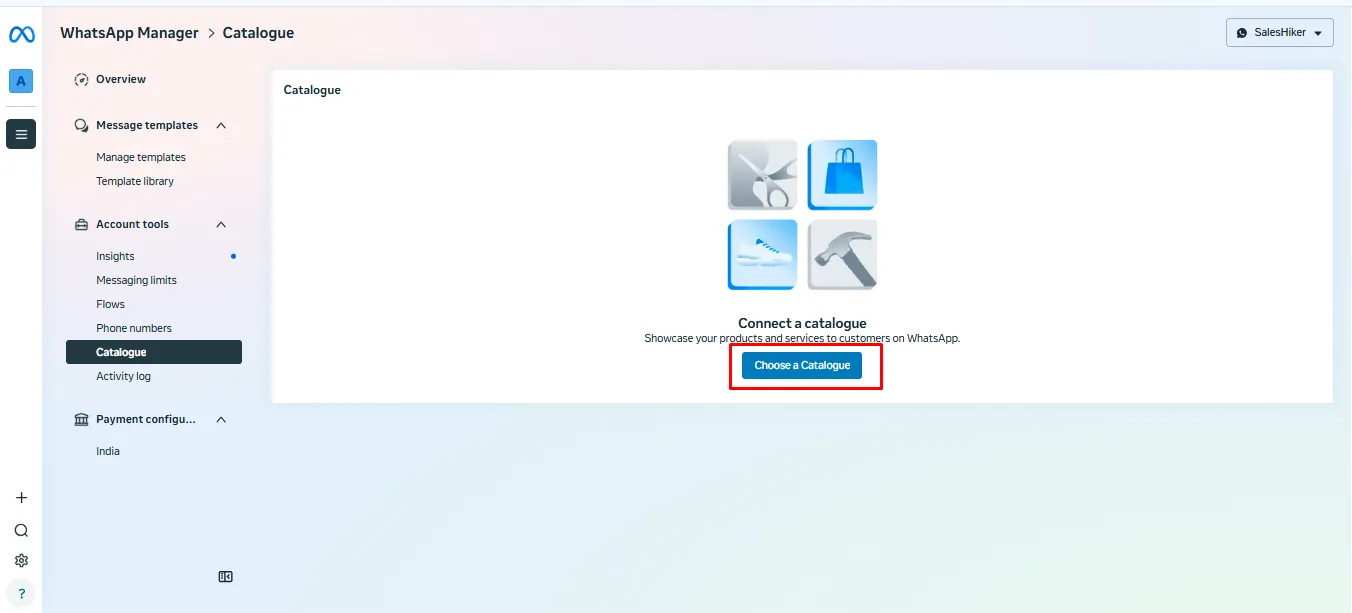
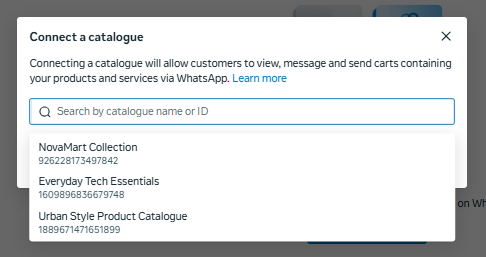
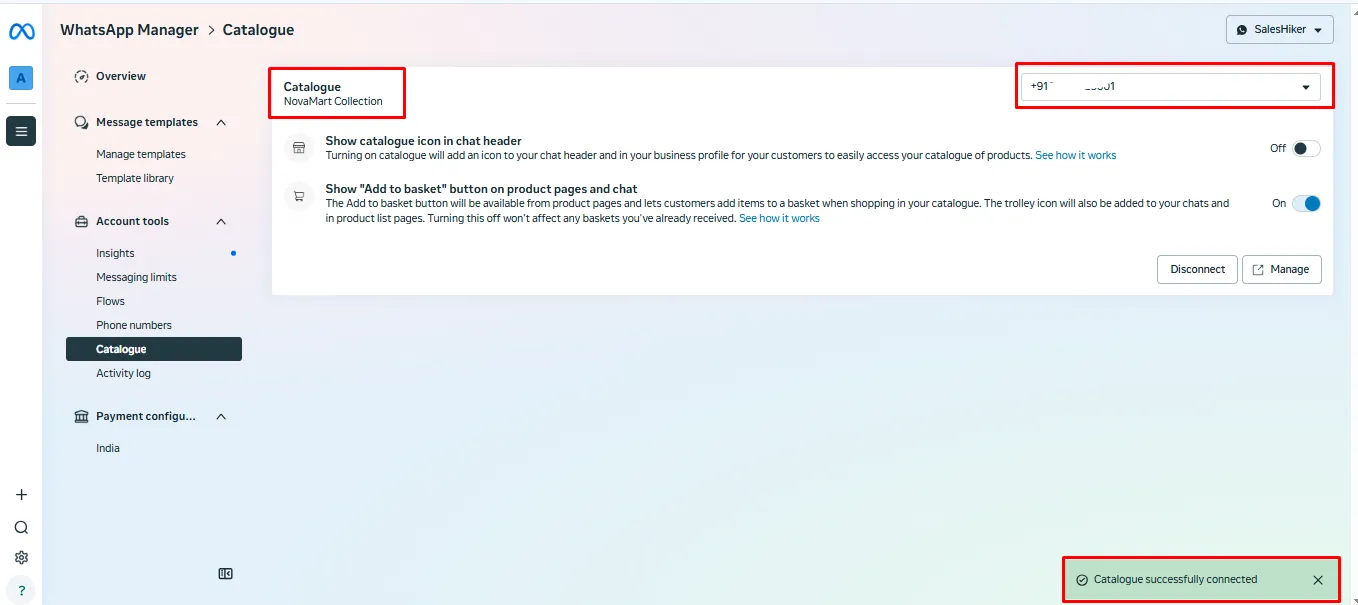
Go to the Catalogue section and click on “Choose Catalogue.” You can select one catalogue at a time to connect and sync its products with the CRM.
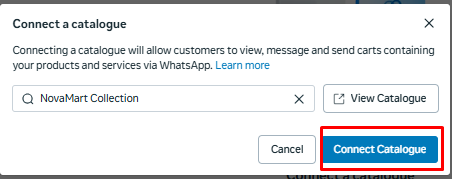
After selecting the catalogue, click on the “Connect Catalogue” button, as shown in the screenshot below.
Once you click on “Connect Catalogue,” the catalogue will be successfully connected and displayed as shown below.
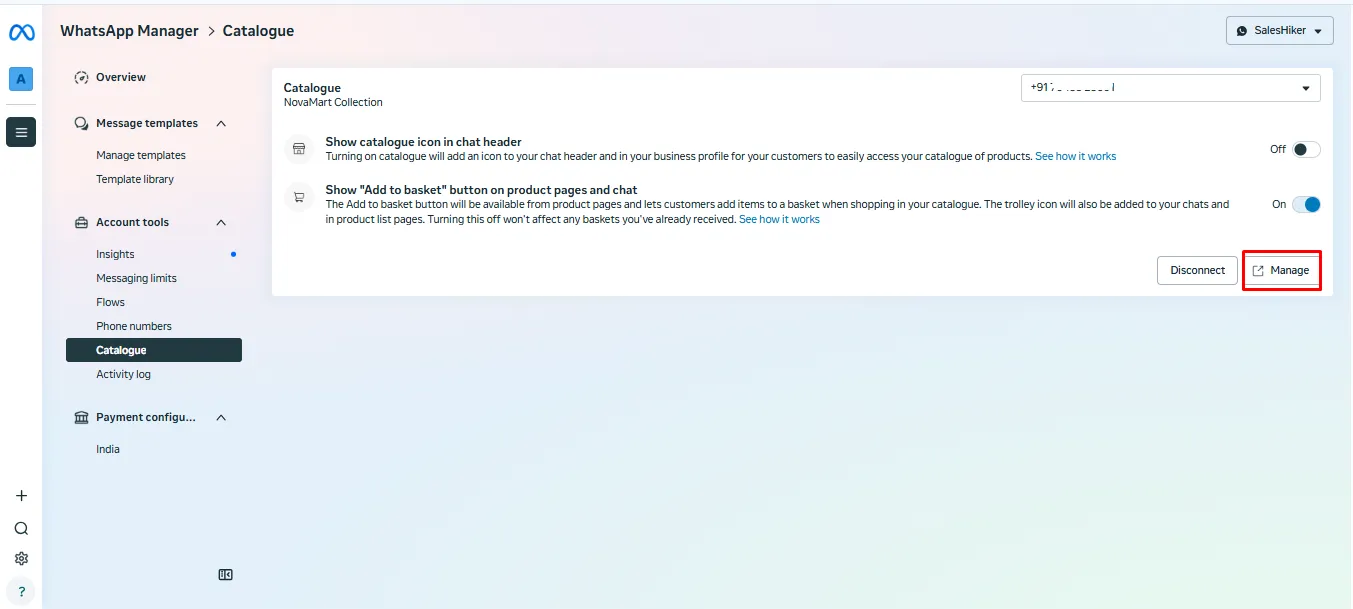
Click on “Manage” to navigate to the “Add Product” section for the connected catalogue.
On this page, the user can click on the “Add” button to add products using options such as Manual Entry, Data File Upload, Partner Platform, or Pixel.
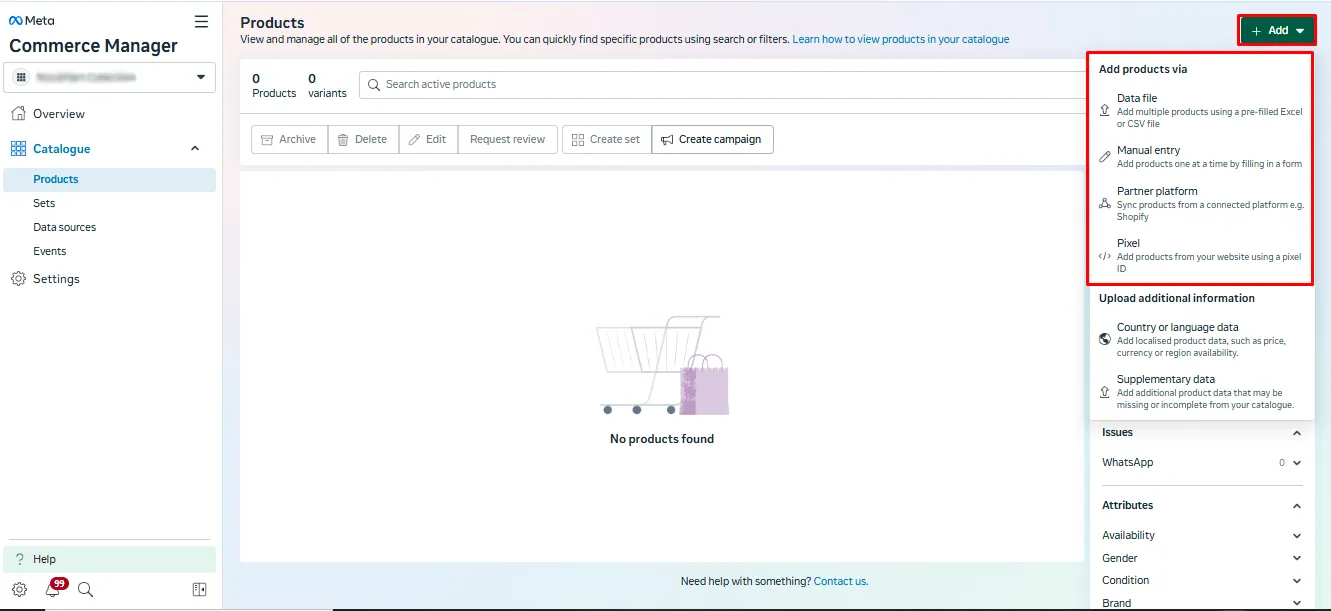
After adding the products, the list will be displayed as shown in the screenshot below.

 by
by