How to Connect WhatsApp Business with Saleshiker CRM
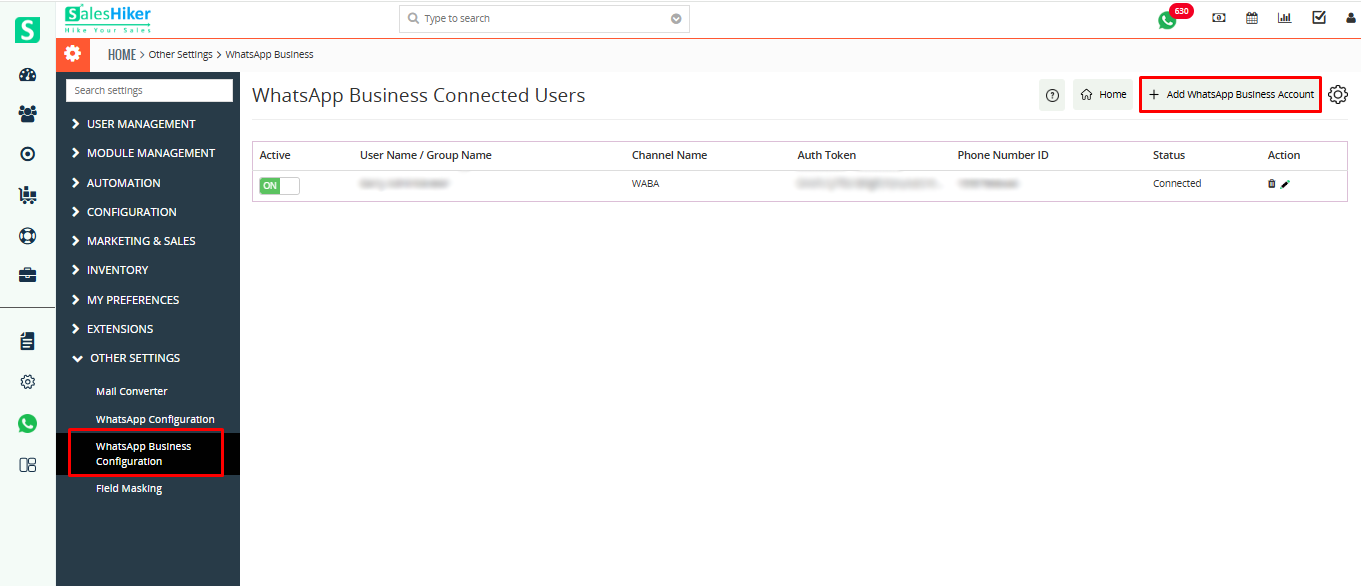
To connect your WhatsApp Business Account with Saleshiker, begin by opening the WhatsApp Business Settings page in your CRM. On this page, you will find an option labeled Add WhatsApp Business Account. Click this button to start the connection process
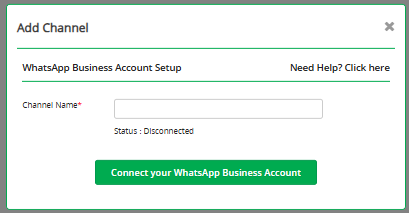
You will be prompted to provide a Channel Name for your WhatsApp connection. After entering the name, select the option Connect Your WhatsApp Business Account to proceed.
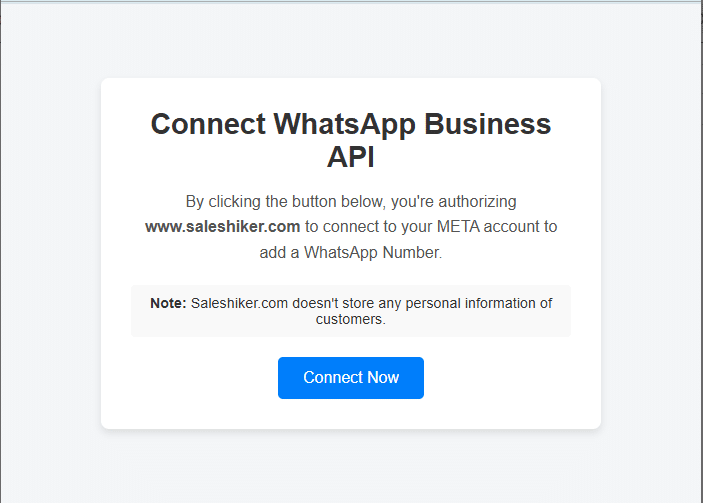
Next, you will be redirected to a page that asks you to connect your WhatsApp Business API. Simply click on the Connect Now button to continue with the onboarding process.
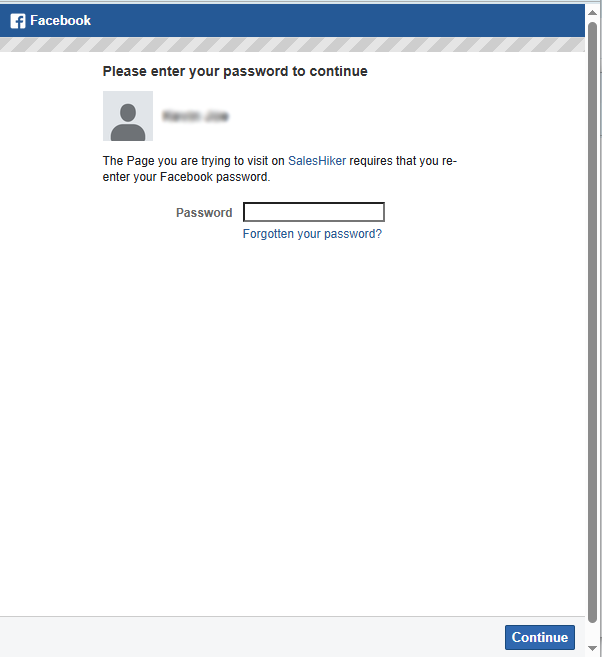
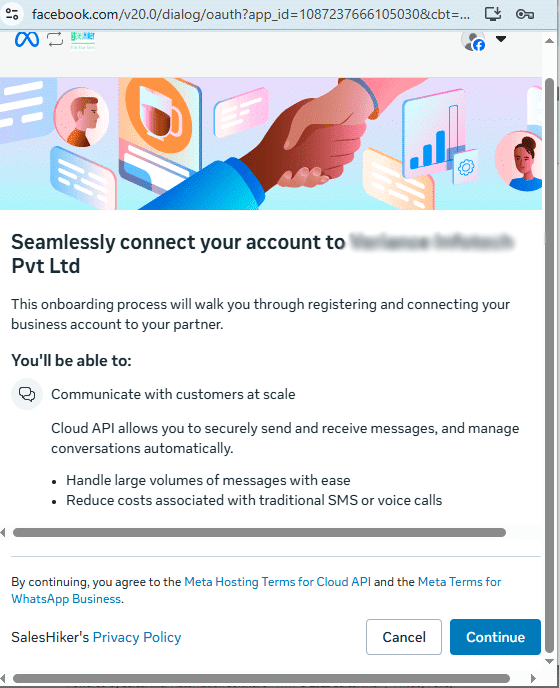
A Facebook login screen will appear, as WhatsApp Business API is managed through Facebook. Enter your Facebook password and click Continue to authorize the connection.
You will then see a page describing the permissions and features you will be able to access using WhatsApp Business API. Review the information and click on the Continue button to move forward.
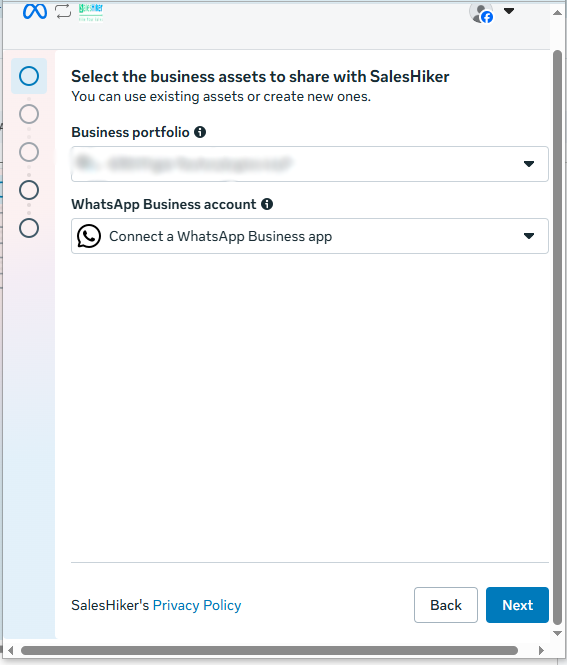
Next, a page will appear asking you to select the business assets you want to share. Here, you must choose your Business Portfolio and WhatsApp Business Account. You may either select an existing WhatsApp Business Account or create a new one directly from this screen.
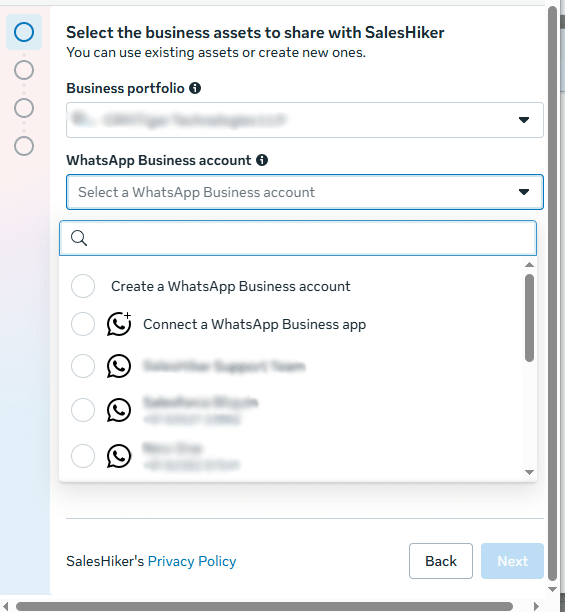
After selecting the appropriate Business Account, click on the Next button to continue.
The system will then prompt you to choose your country code and enter your WhatsApp Business phone number. Make sure the number is active and associated with your WhatsApp Business App.
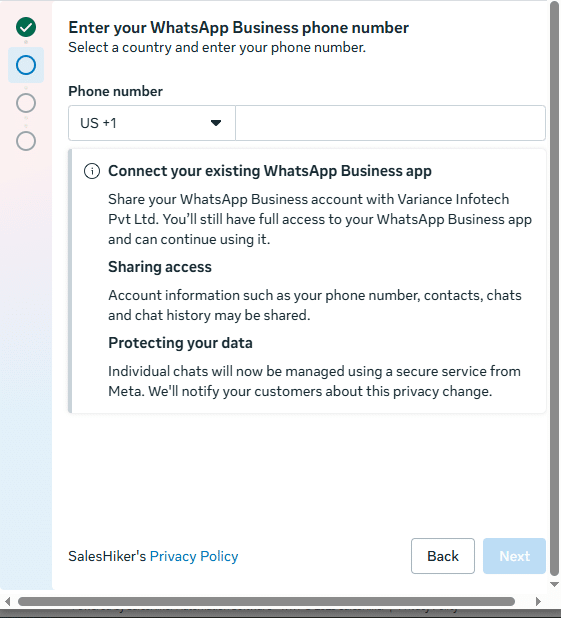
Once you have entered your phone number, click the Next button to proceed to verification.
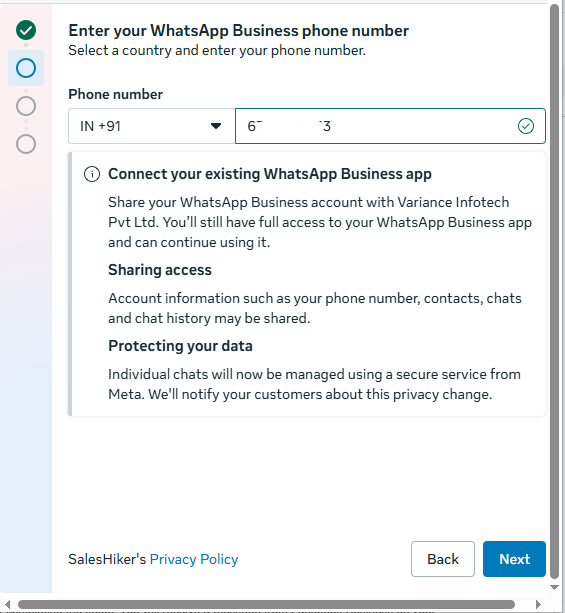
Note: Only WhatsApp Business Account numbers can be added or connected.
The system will then prompt you to choose your country code and enter your WhatsApp Business phone number. Make sure the number is active and associated with your WhatsApp Business App.
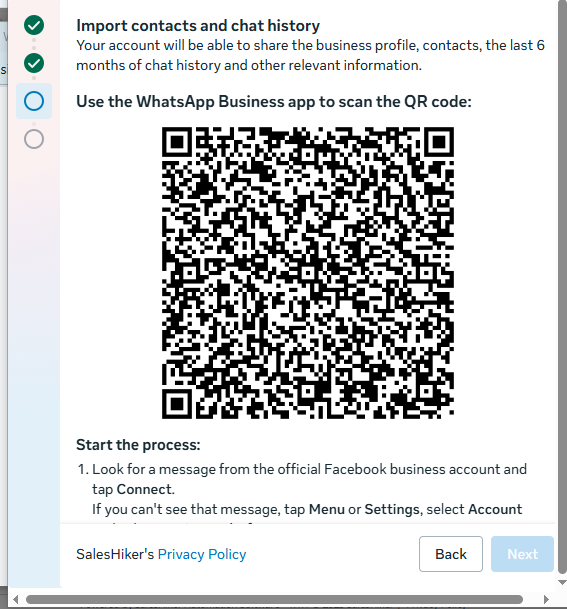
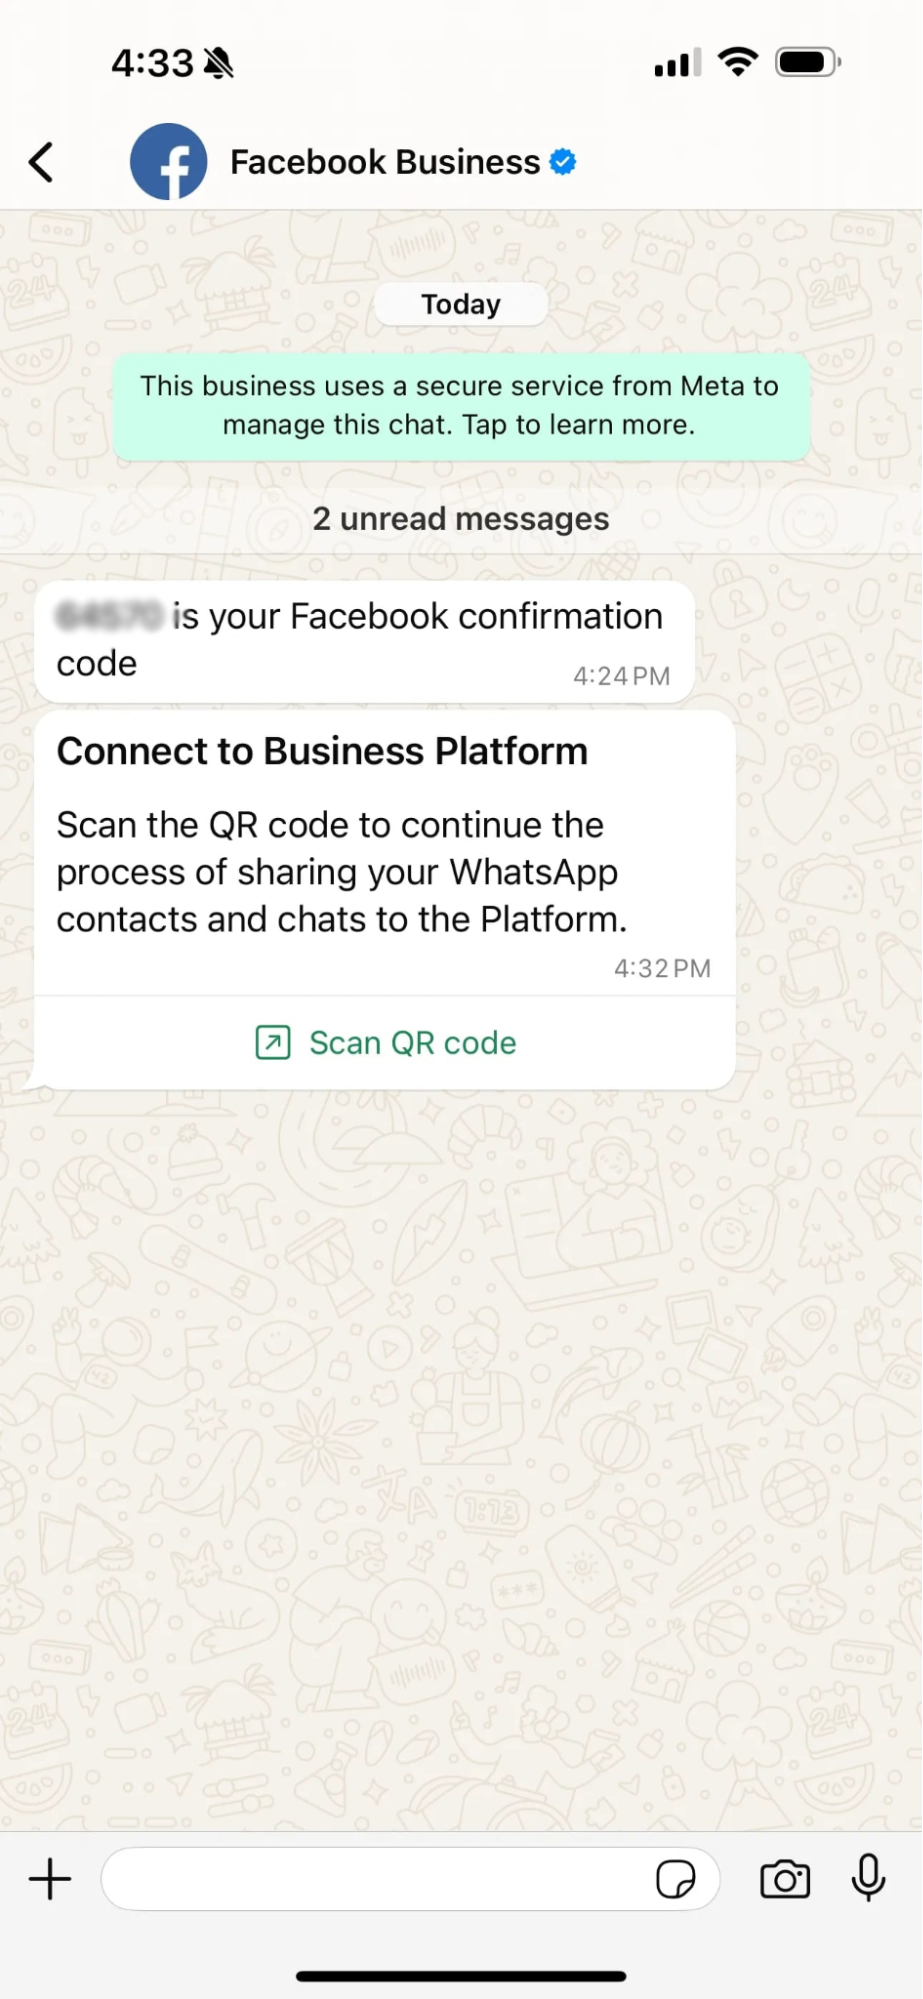
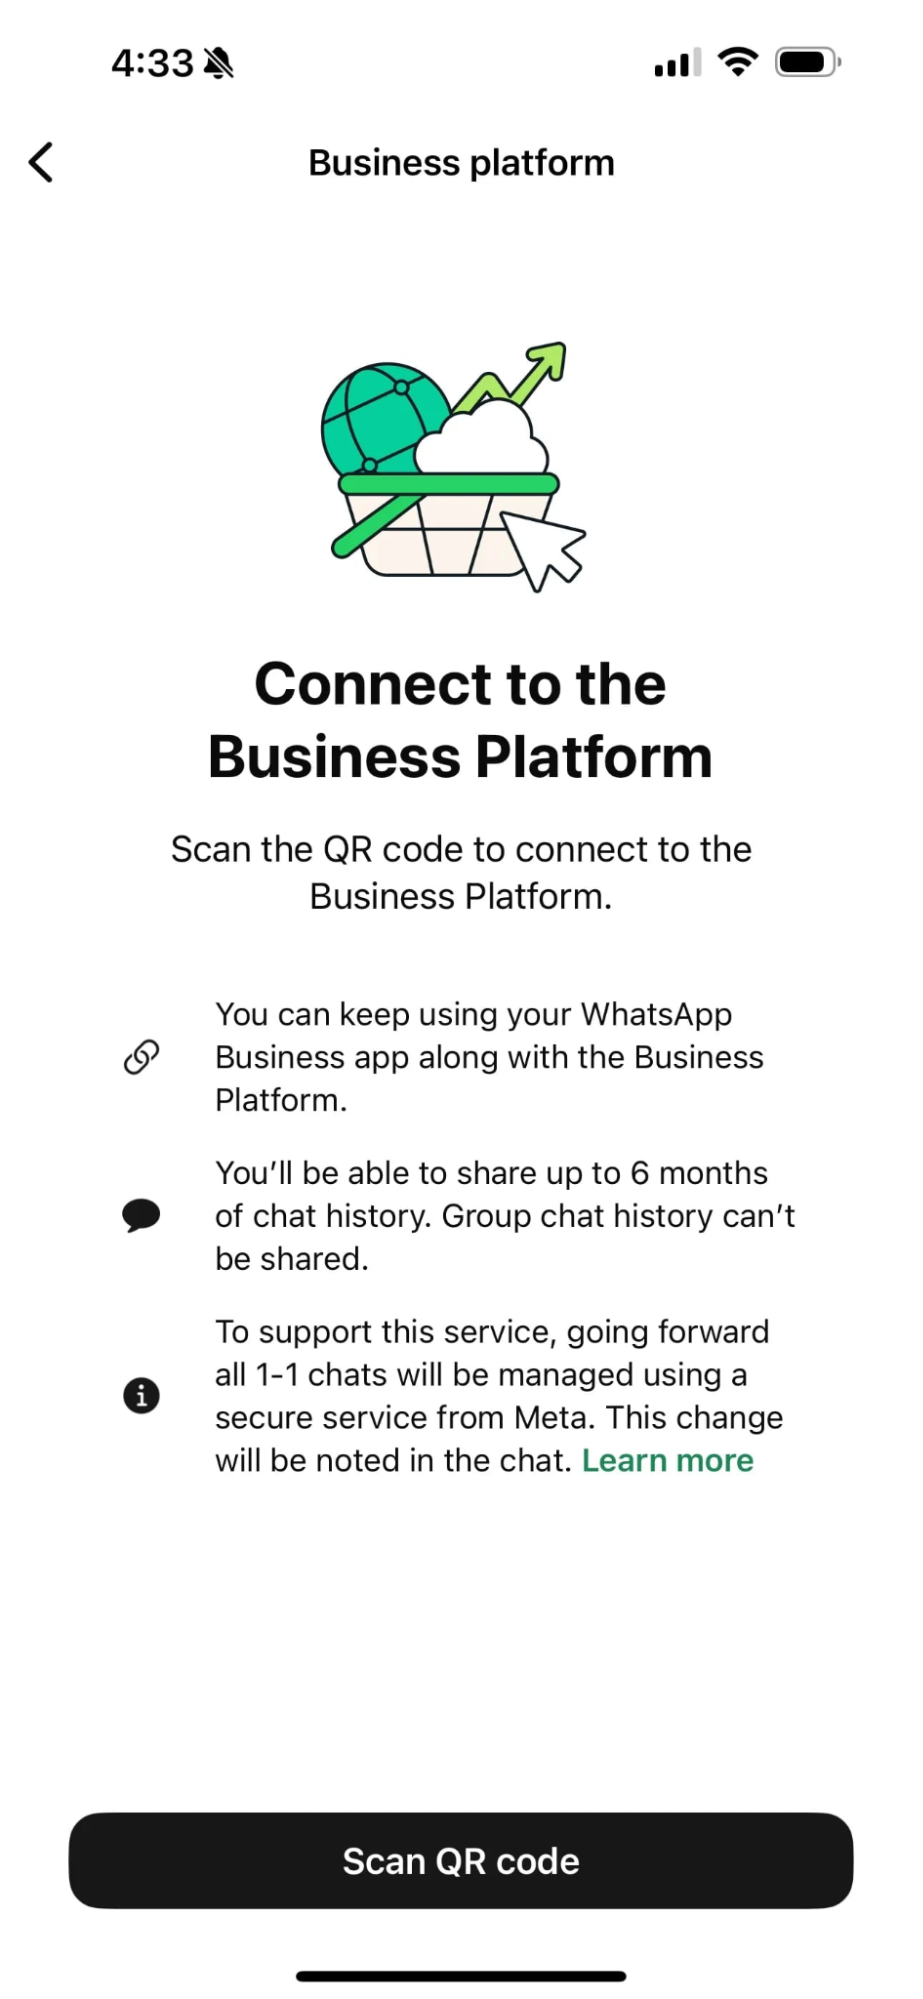
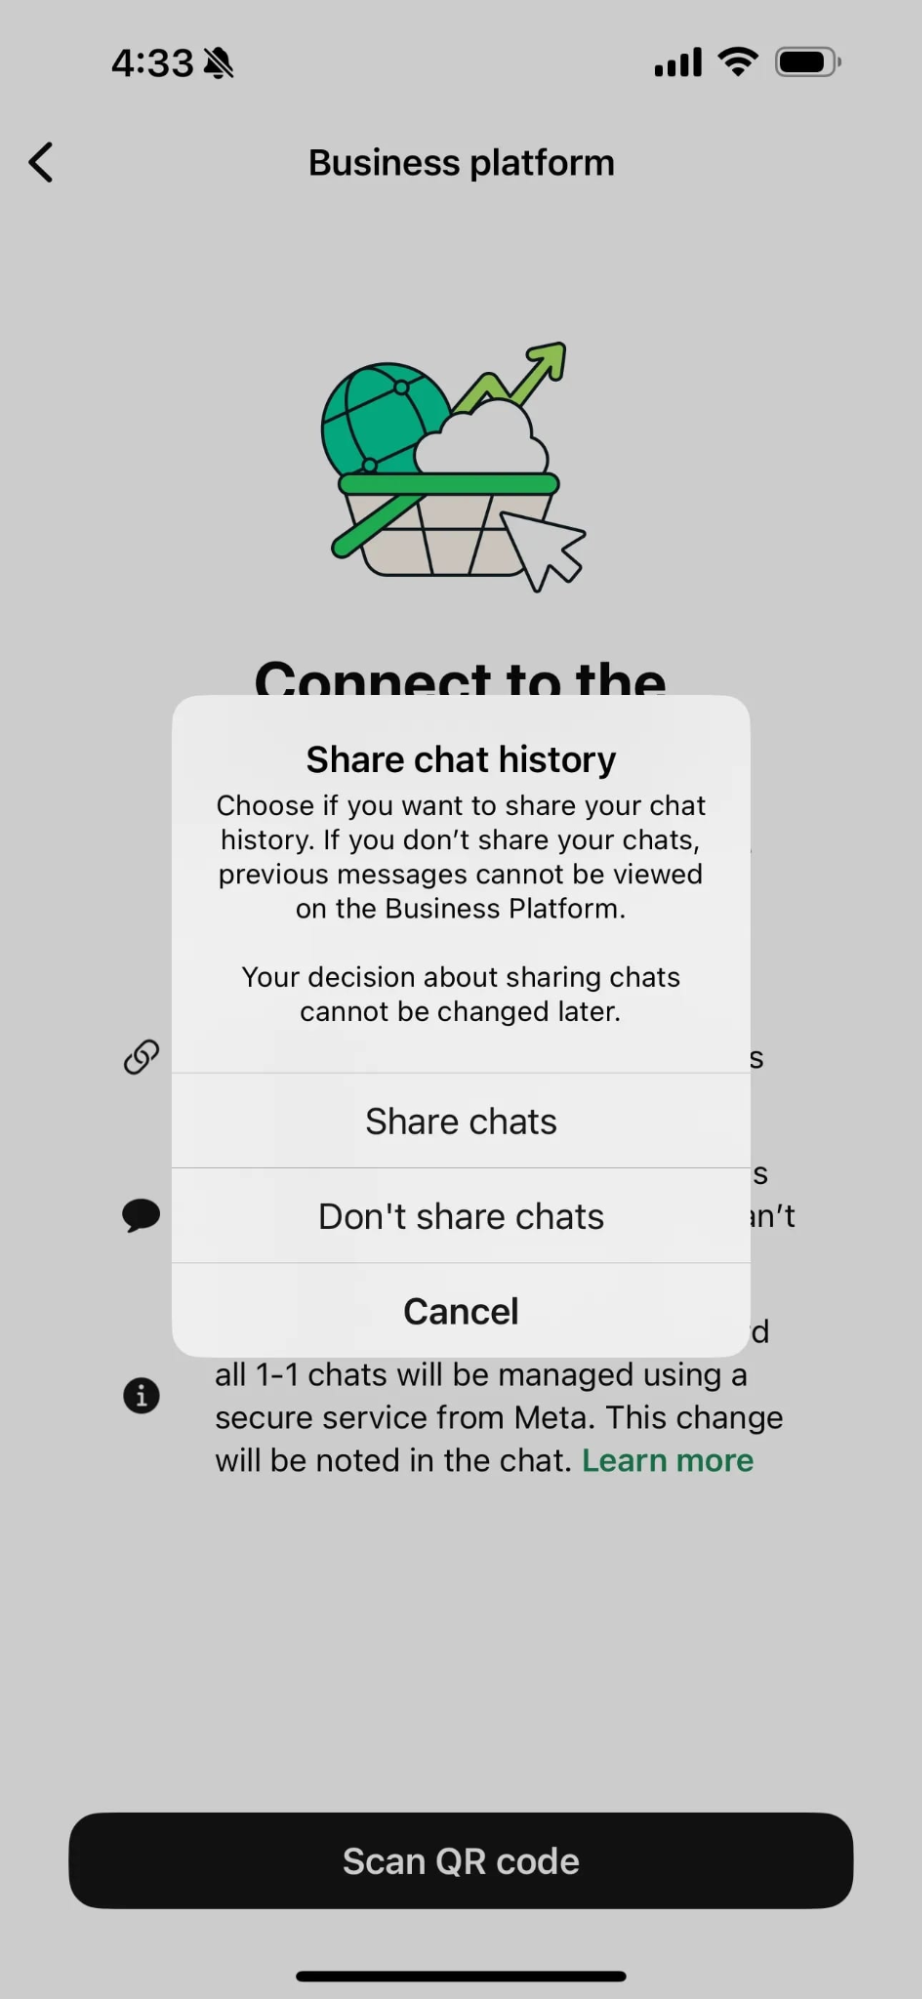
Once the connection request is initiated, your WhatsApp Business App will display a prompt asking whether you want to share your chat history. You can choose to share it or this step based on your preference.
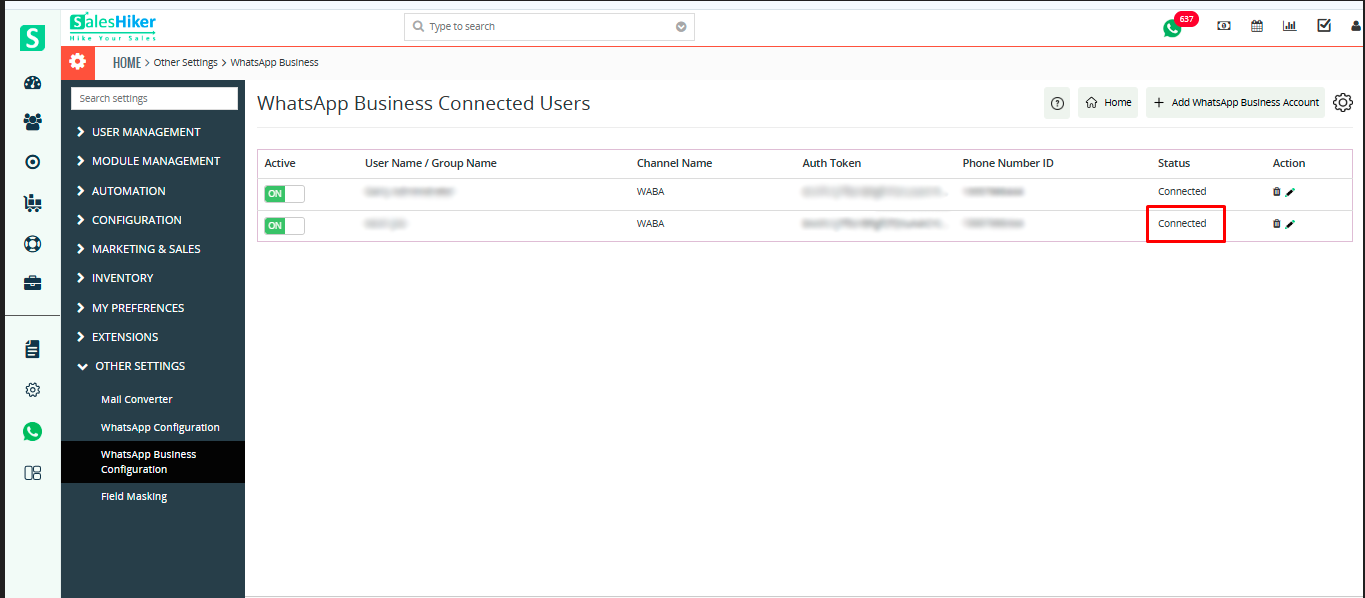
After you confirm your choice, the system will complete the verification, and your WhatsApp Business Account will be successfully connected to SalesHikerCRM.
 by
by