


Navigation Elements
Elements which provide easy access to the respective screens and features throughout the platform that gives users a pleasant UI experience turns into productive outcome and platform adoption.
Main Menu Navigation
The Leftmost navigation on top is the main menu that users will use to access available features from any screen of the CRM Mobile App.
- User Profile – user’s profile with username and profile picture with edit right in picture.
- Dashboard – is a home screen including logs of activities held within the app by users provided active parameters set by Admin.
- Marketing – is an access to the marketing activities features that help users perform, track, manage leads, campaign, and audience database.
- Sales – is an access to the sales management flow to simplify planning and tracking of targets.
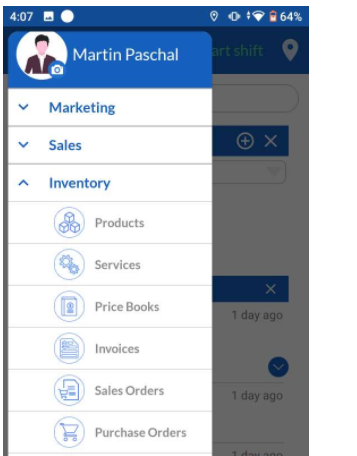
- Inventory – is a key of error free inventory management with the features to keep count on products, services, sale processing and payment process.
- Support – a systematic customer support management that gives users a right to priorities customer tickets, categories, assign, process and clear queue in time without losing any.
- Mail Manager – gives the facility to synchronize as many mail accounts at a single end point.
- Asset/Card Scanner – keep yours or customer’s business cards or related information digitised here.
- Live Tracking – allows admin to view team/user’s geo location.
- Route Planner – give facility to admin to create a sale/project route and assign it to the respective team member
- Time Tracker – calculates time spent by user
- Settings – allows editing the preferences and default arrangements of modules in the CRM mobile app.
Quick Create
This feature allows users to add frequently accessible modules from the list on your home screen to avoid module access time using Quick Create feature
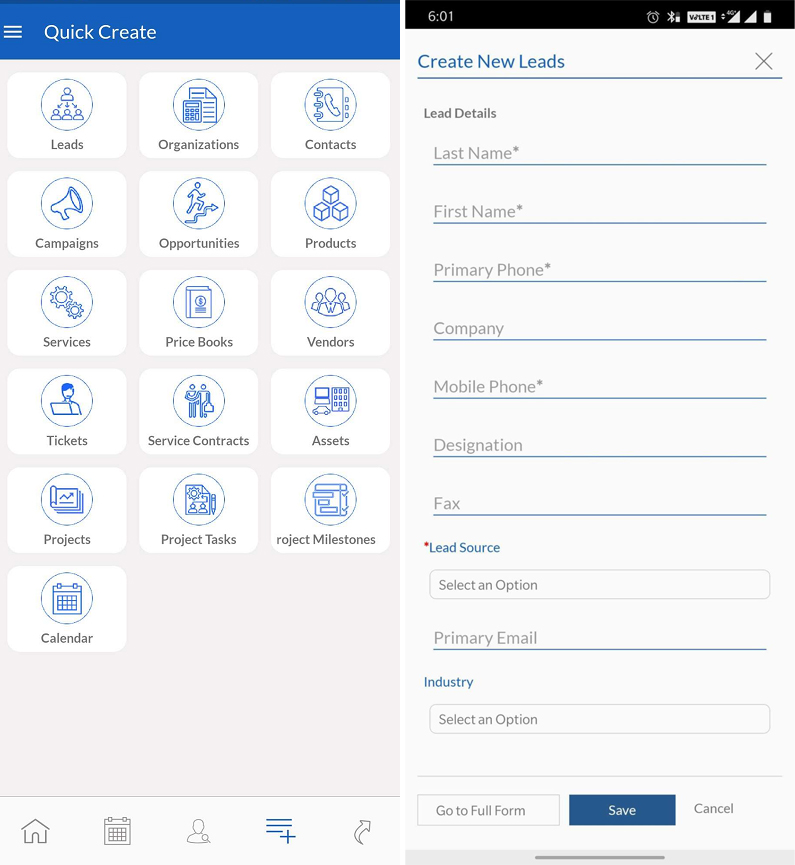
- Click on any of the modules in the list of quick create features to add on screen.
- Enter required details in the pop-up form OR,
- Click on Go to Full which will lead to a detailed form with more fields with respect to the selected module.
- Save the details.
Dashboard Management
Personalize your home screen with the custom dashboard management. You can select multiple types of charts & other widget & customize dashboard as you want
Daily Attendance -Start / End Shift
For On-field Users to show a presence and record a log of their daily shift duration with Start Shift and End Shift, Shift feature has been introduced to Users.
Admin Settings – To make Shift features visible to Users, Admin users have access to Enable/Disable Attendance(Shift Management) using premium features management.
Premium features management settings are accessible from the following path.
- Go To Settings > Other Settings > SalesHiker Mobile App Settings
- Refer Meeting & Attendance > Attendance(Shift management)
- To Enable/Disable Shift for Users Turn On/OFF Attendance(Shift Management) feature as below.
Access to Mobile Apps user
- How does it work?
Start-Shift : When users click on Start Shift while starting with a work shift. It will capture the start time and location of the user.

- End-Shift : When users click on End Shift while ending a work shift. It will capture the end time and location of the user.

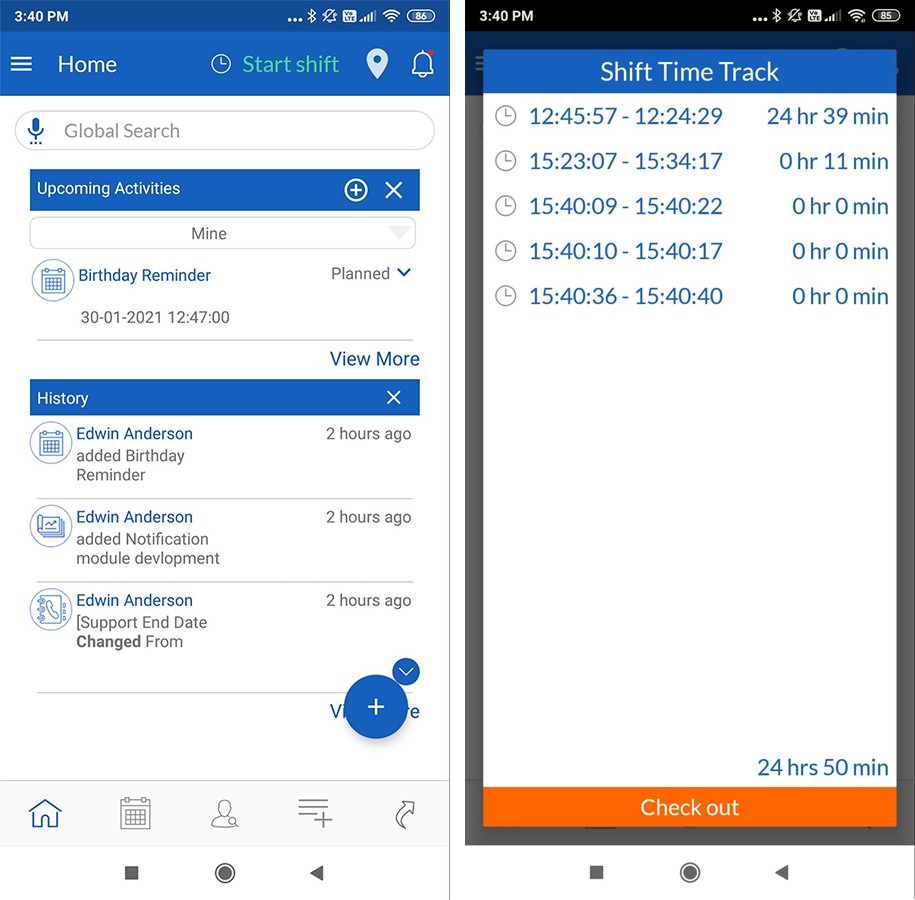
This feature helps Admin users and end users to maintain accurate shift attendance reports with total spent time on tasks/routes.
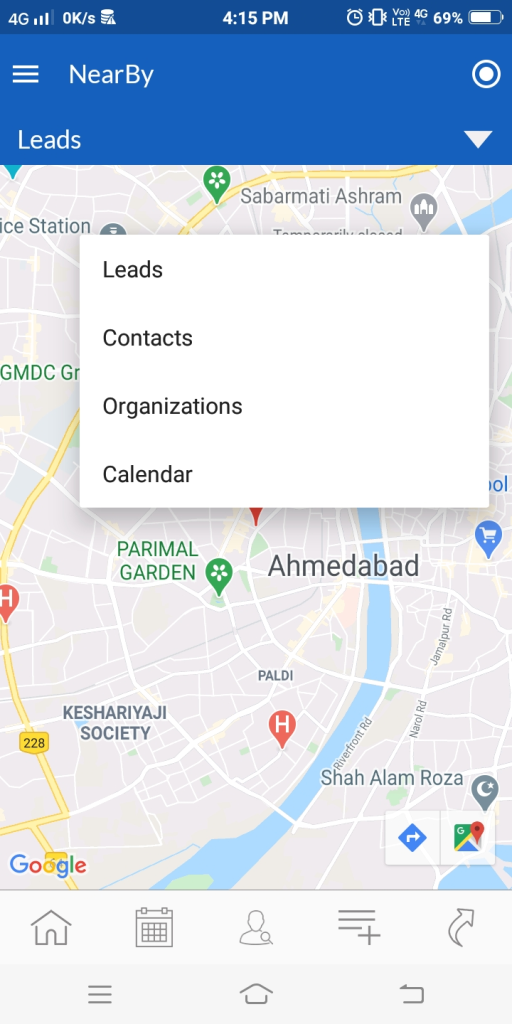
Near By
On-field end users can view the nearby leads, organizations, or contacts for the user to follow a route plan with respect to the user’s current geo location.
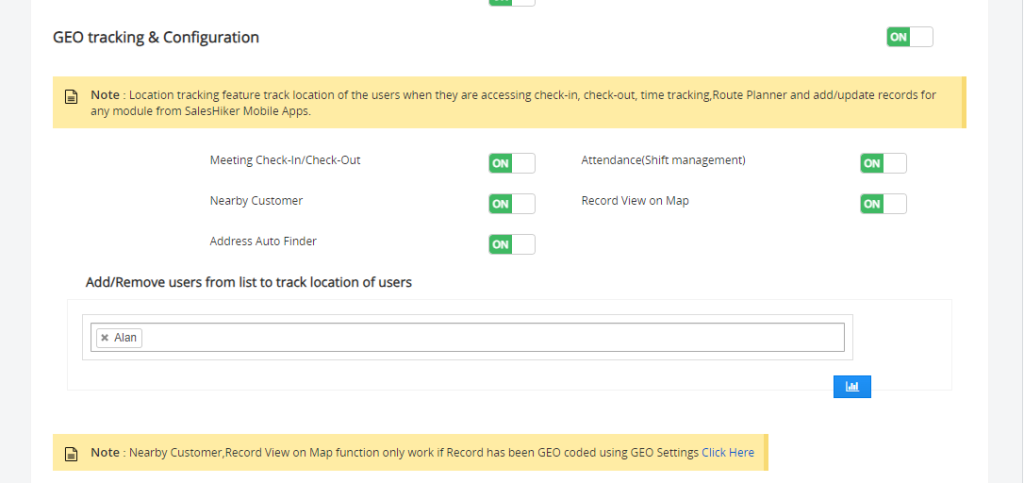
Admin Settings – End Users can only use Nearby feature when admin allows it, Admin users have access to Enable/Disable Nearby using premium features management.
Premium features management settings are accessible from the following path.
- Go To Settings > Other Settings > SalesHiker Mobile App Settings
- Refer GEO tracking & Configuration > Nearby Customer
- To Enable/Disable Nearby feature for Users Turn On/OFF Nearby Customer feature as below.
- Mobile Apps Users
- How does it work?
Whenever an end user will access Nearby features, it will help users to get aligned with his/her nearby leads to plan follow-ups/visit in a better way.
This gives you map views of nearby leads, contacts, organization, calendar.
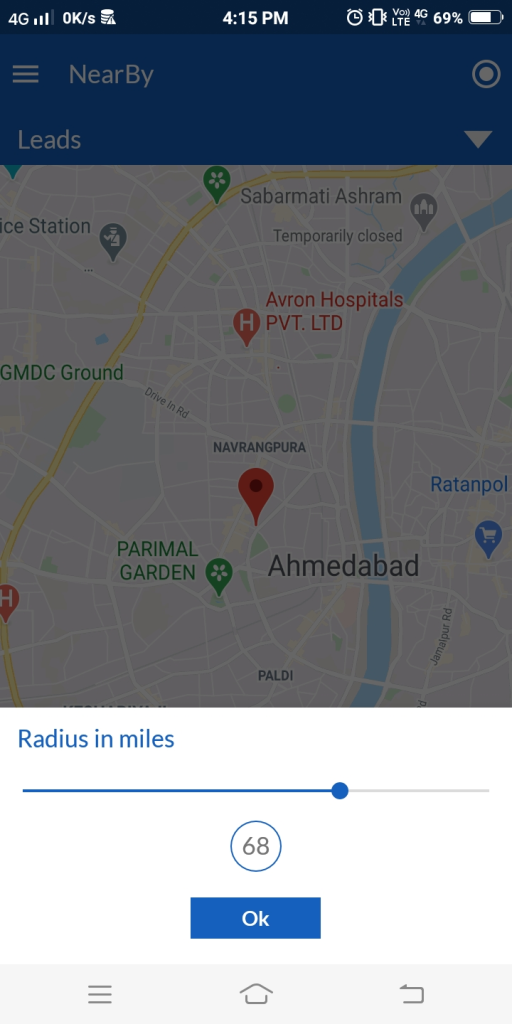
- Radius in Nearby
This feature allows end users to filter out the leads, contacts, organization or calendar in a specific radius/area.
The radius will be Miles.
- Mobile Apps Users
- Add Widget – This feature allows users to customize the dashboard by adding widgets/reports of modules on the home screen that helps users to keep track of the individual modules of their quick activity log or interest.
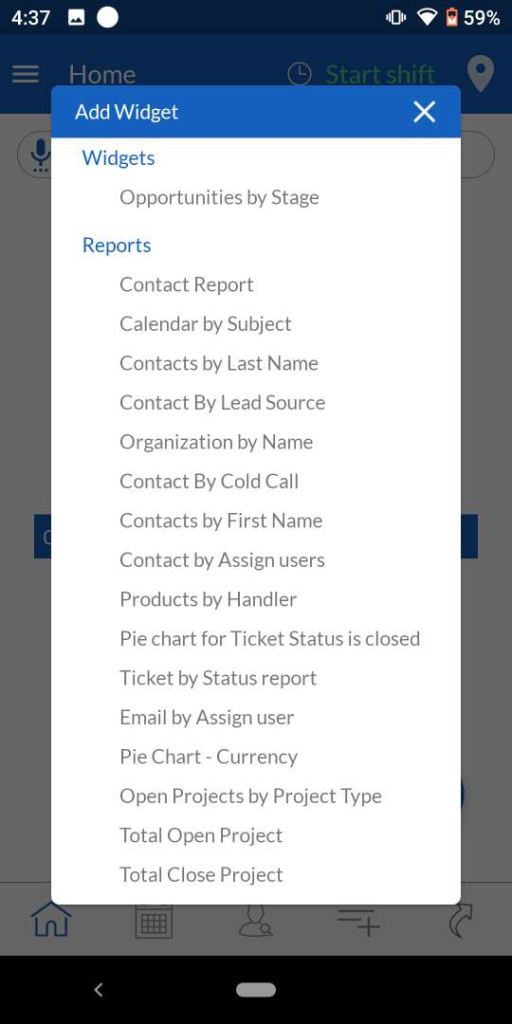
- Click on
 the add widget symbol.
 - Select the widget from the widget list, and it needs to be added to the dashboard.
- Rearrange the dashboard widget sequence if required.
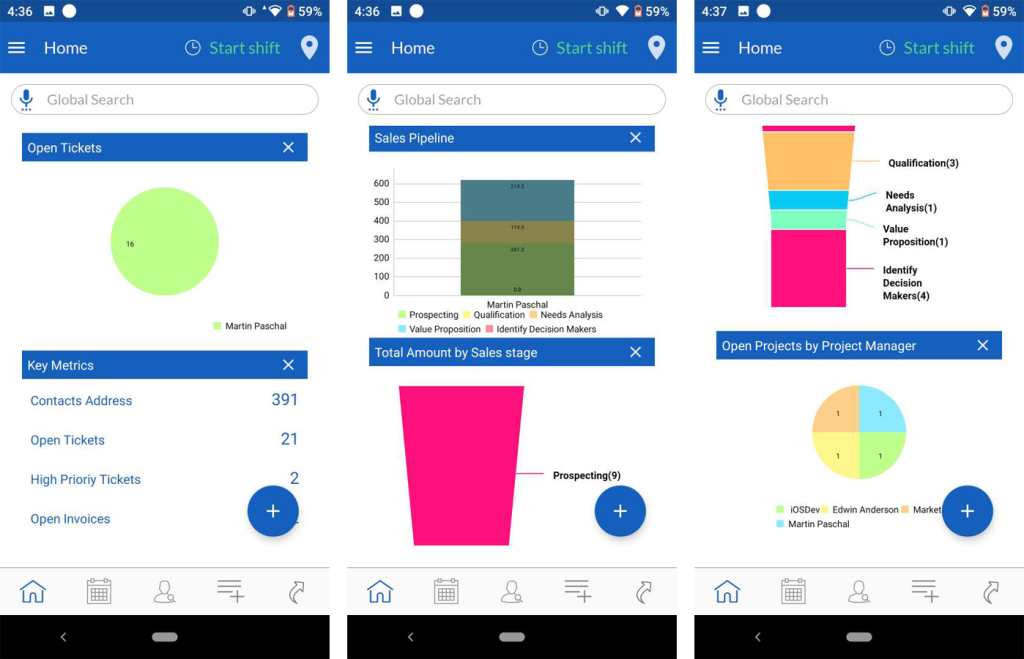
Customized Dashboard View
Graphical presentation of selected widget on dashboard turned out to be the best practice for sales people to keep track of targets over the period.
Reports on Dashboard
*This feature allows users to have a graphical representation of module summaries on the dashboard.
Admin Settings – There are two types of Dashboard graph display on Home page of Mobile Apps
- Default Home Page Widget : In Web CRM, There is an option in Dashboard called Add Widget, Graph or option those that are displayed in Add widget will be added to Mobile Apps Dashboard.
- Chart Pin to Dashboard from Report Module : From Web CRM -> Reports module All Reports with Type Chart and Report set to “Pin to Dashboard” will be displayed as Chart in Dashboard of Mobile Apps.
Access Task/Activity Calendar
- Add Task – This feature allows admin users to add tasks assigned to the respective users or groups. Users can access, attend and start working on the task assigned by Admin.
The Add Task feature is accessible using the following path.
Go to Calendar > Add Task
– Build a task list for the team.
– Assign to the team member.
– Set the timeline by selecting start – end date.
– Keep a track on the task status. - Users

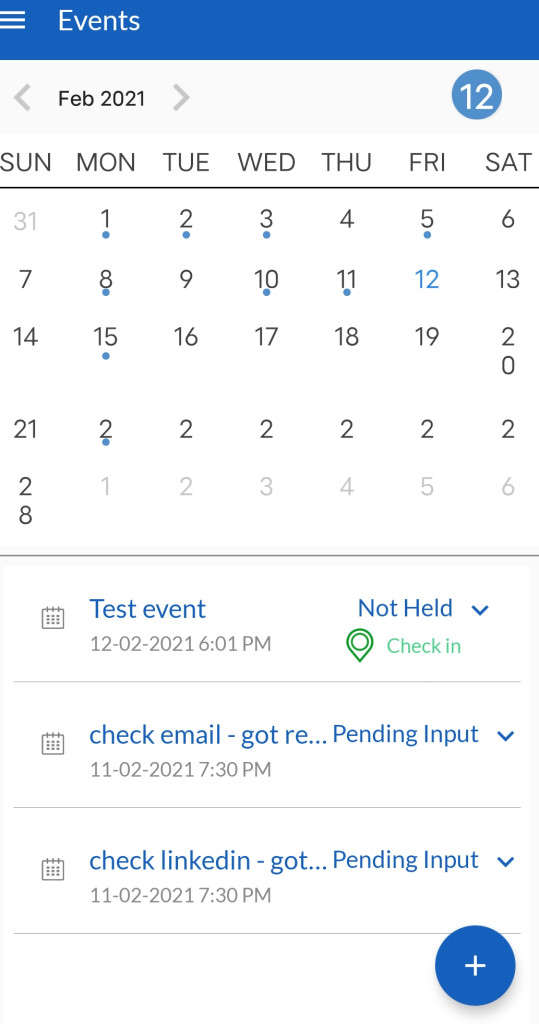
To-Do Task List – Users can view their to-do tasks on the home screen.
Start Task allows users to click on the start task that will keep a log on user activities and geo-location during the task. – Go to the task in the ‘To-Do’ List to refer to details. – Users can add notes if required.– To Update Task Status, allows the user to update task status for admin to keep a track on. users can directly update task status by clicking on status. A drop-down with task status such as Not Started, In progress, Pending.
End Task allows the user to end the task. It captures the geo-location and displays total spent hours on the individual task.
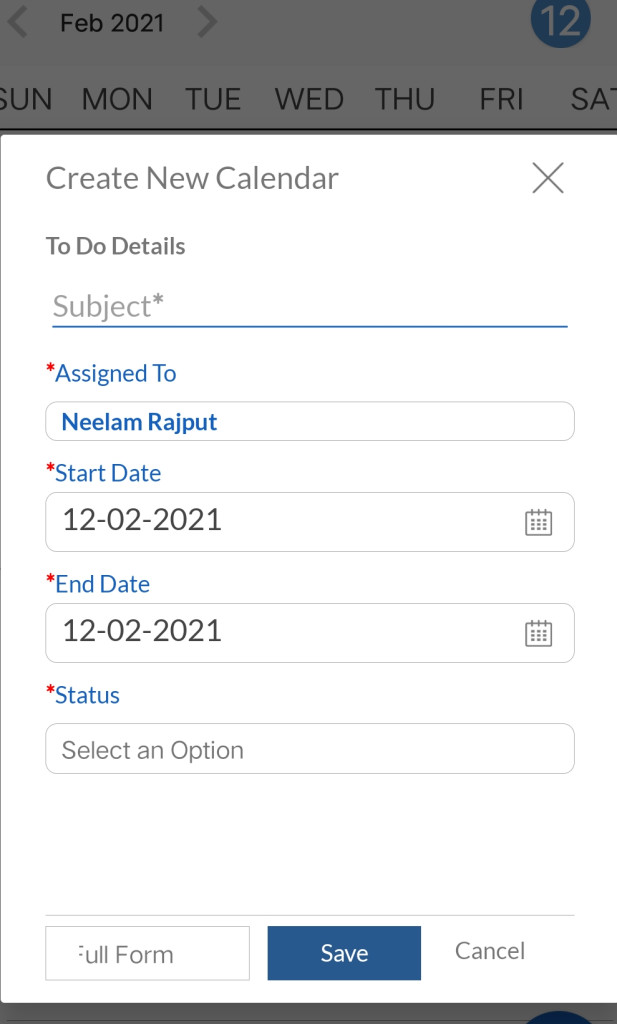
Add Event
Allow Admin users to add an event with start-end date, event time, location and other required details. Admin can assign it to end users or groups. Users can check-in and check-out the events assigned to them.
- Admin
The Add Task feature is accessible using the following path. Go to Calendar > Add Event– Create an event by adding subject, date, time, location and type of event. – Assign to the users/groups – Set the timeline by selecting start – end date.
Meeting and Attendance
Admin Settings
This feature helps admin to keep a log of attendees status of attendance for held/ongoing events. It captures details of end users location, time and status during the event.
*This feature is only accessible to users only when the following settings are enabled by Admin users :
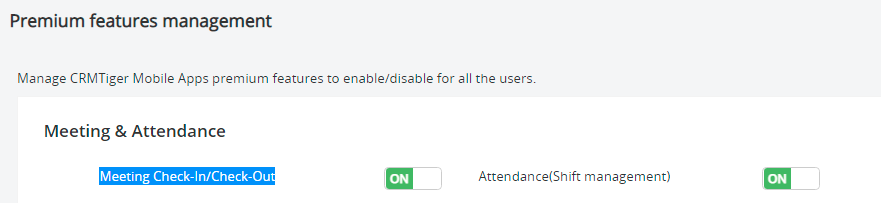
Premium Features Management :
- Go To Settings > Other Settings > SalesHiker Mobile App Settings
- Refer Meeting & Attendance > Meeting Check-In/Check-Out
- To Enable/Disable Check-in/Check-out for Users Turn On/OFF Attendance(Shift Management) Meeting & Attendance feature as below.
 by
by