Module Layouts & Fields
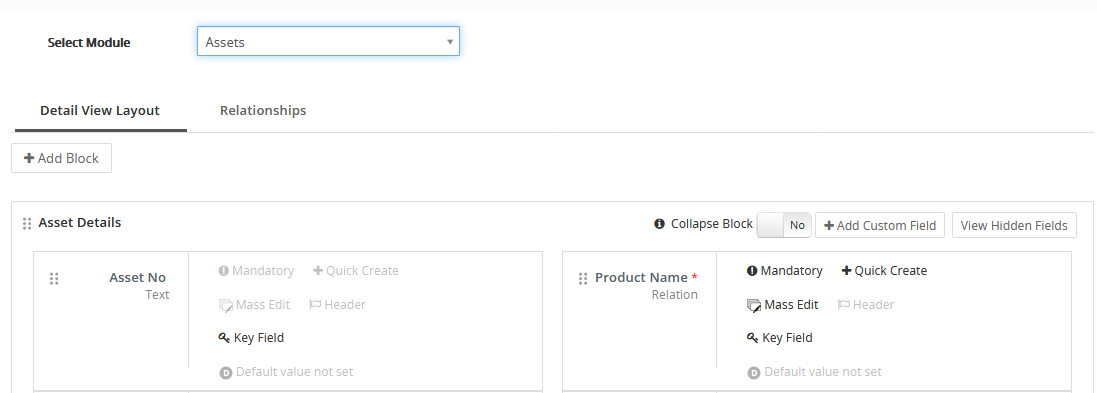
SalesHiker CRM offers a set of default fields. Module Layouts & Fields feature enables you to create custom fields, rearrange fields, edit field properties, and move fields inside and across blocks.
The fields you create are accessed by all users across your SalesHiker CRM account, unless you’ve defined permissions through Profiles.
- Click gear icon
 in the upper left.
 - Click settings.
- Click CRM settings.
- Click Module Management.
- Click Module Layouts & Fields.You can click on
 pin icon next to it to add a shortcut to your settings home page
 - Select a module from the drop-down in top-right

Adding Custom Fields
This feature enables you to add custom fields in addition to default fields offered by SalesHiker CRM.
Follow few simple steps to add custom fields in selected module
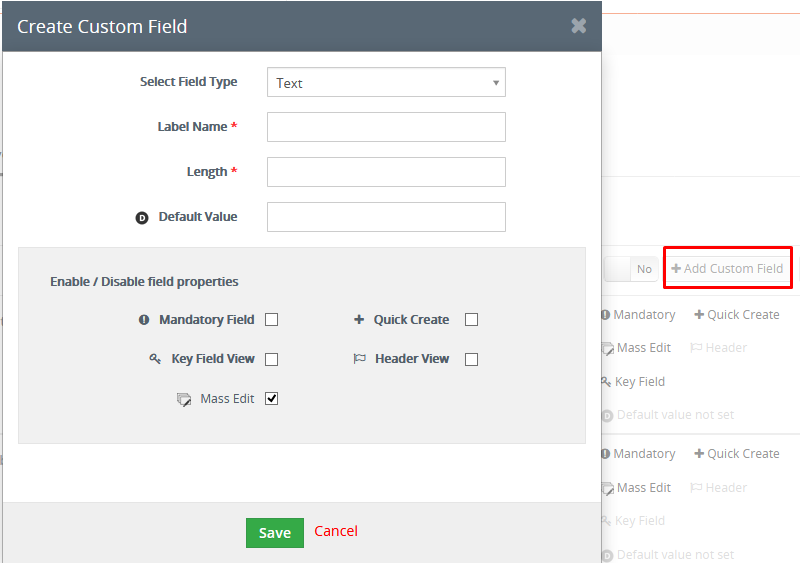
Click on Add Custom Field then open a popup for add field.
Select Field Type from the Field Types picklist by clicking on it and select add field type.

- Provide field name in Label Name field, and specify field length in Length field.
- Provide the default value for the custom field.
- Set the field properties to the custom field by enabling the specific checkbook.
Custom Fields Table
SalesHiker CRM offers a wide variety of choices in creating custom fields to accord your business requirements. The following table gives complete information of custom Fields that are supported in SalesHiker CRM.
Field Type Description Fields Information
Text To add text
- Label: Provide field name
- Length: Provide field size
- Maximum Characters: 255
Decimal To add decimals
- Label: Provide field name
- Length: Provide field size
- Decimal: Provide number of decimal places
- Maximum Characters: 59
Integer To add integers
- Label: Provide field name
- Length: Provide field size
- Maximum Characters: 255
Percent To add percentage
- Label: Provide field name
Currency To add currency values
- Label: Provide field name
- Length: Provide field size
- Maximum Characters: 255
Date To add Date
- Label: Provide field name
Email To add email address
- Label: Provide field name
Phone To add Phone number
- Label: Provide field name
Pick List To add drop-down fields
- Label: Provide field name
- Picklist values: Provide picklist values
URL To add website address
- Label: Provide field name
Check-Box Enable check-box for true. Disable for false
- Label: Provide field name
Textarea To add long text
- Label: Provide field name
Multi-Select Combo Box Add picklist field to select multiple values
- Label: Provide field name
- Picklist Values: Provide picklist values
Skype To add skype id
- Label: Provide field name
Time To add time
- Label: Provide field name
Creating Custom Block
This feature enables you to create new blocks in addition to default blocks offered by SalesHiker CRM.
Follow few simple steps to create a new custom block,
- Click Add Block
- It brings up a pop-up. Provide label in Block Name and select a block from Add After drop-down to place your next to selected block
- Click Save to update changes.

Rearranging Fields
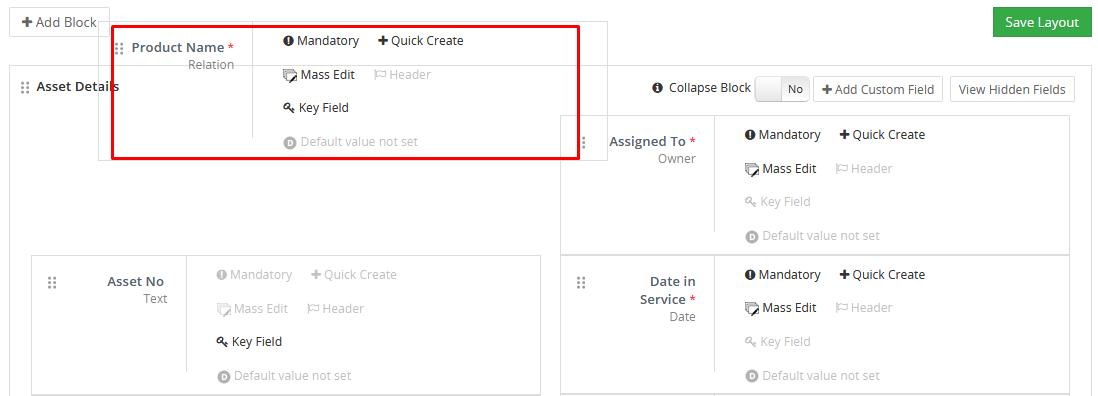
SalesHiker CRM gives you the flexibility to rearrange the arrangement of the fields according to your business requirements. Click on the desired field and drag it on to any selected location in and across blocks.
Follow few simple steps to reorganize fields
- In Module Layouts & Fields of selected module, click on desired field
- Drag the field to desired location.(You can move fields in all possible directions: left, right, up, and down)
- After rearranging fields, click Save Layouts button in the top-right

Editing Field Properties
This feature helps you to configure basic preferences of fields in SalesHiker CRM. You can also enable/disable fields across Modules, Quick Create, Summary View and Mass Edit.
Follow few simple steps to edit field properties
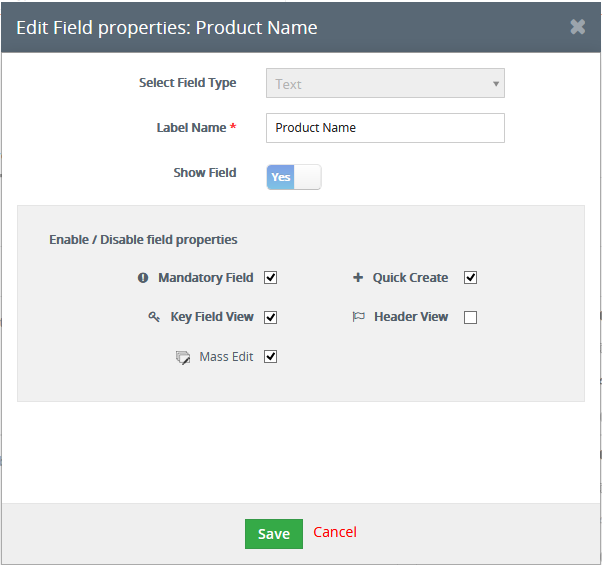
- Click pencil icon next to your desired field
- It brings up a pop-up that has set of options that can be configured on selected module

Field Property Functionality
- Mandatory field To make the field mandatory for the Users to fill in
- Show Field To enable or hide the field for all users
- Quick Create To make the field available in Quick Create popup
- Summary View To display the field in summary view of the record
- Mass Edit To make the field available during mass edit
After modifying field properties, click Save.


